I've always had a thing for pretty fabric.
Bold colors, sweet florals, checks, stripes.
You name it.
I just love the way the patterns bring a room to life.
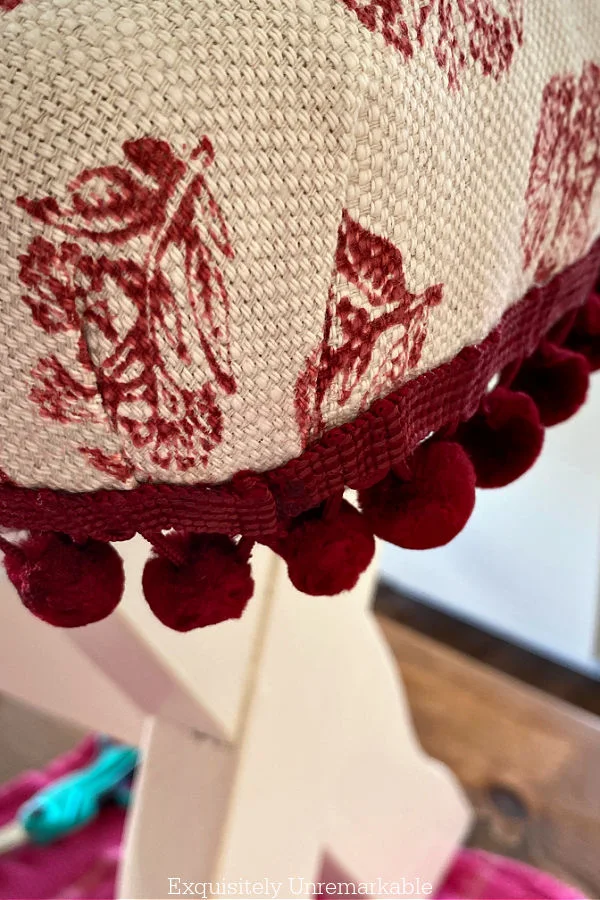
They add personality, charm and style...especially, when several of them are mixed together.
That's my all time favorite look. It's a hallmark of cottage style design.
Of course, there are no rules when combining patterns, but sometimes it takes a bit of time to find a grouping that's just right.
Enough differences to keep it interesting, but not too much so that it overwhelms the space. A little bit art, a little bit science.
And a whole lot of trial and error.
Like in my kitchen.
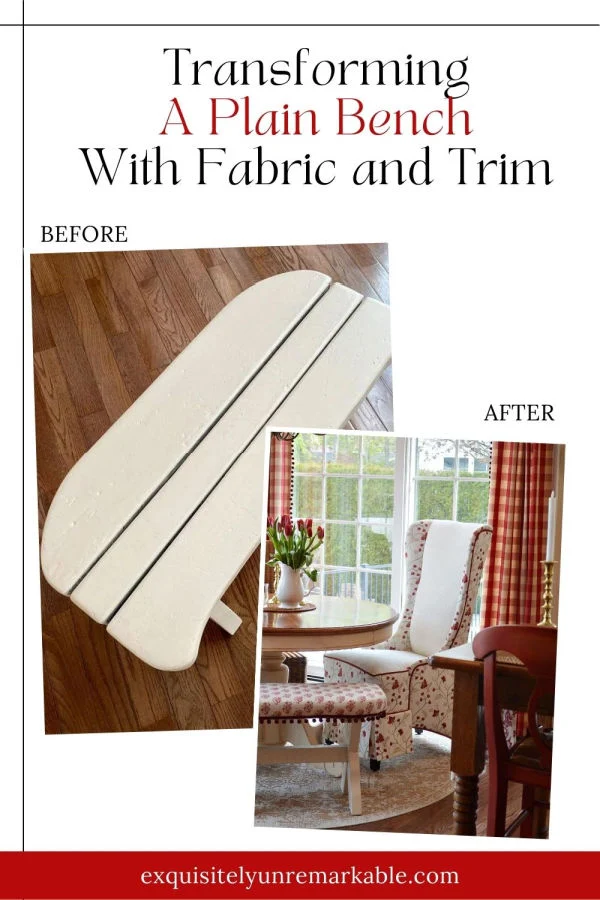
Remember this bench?
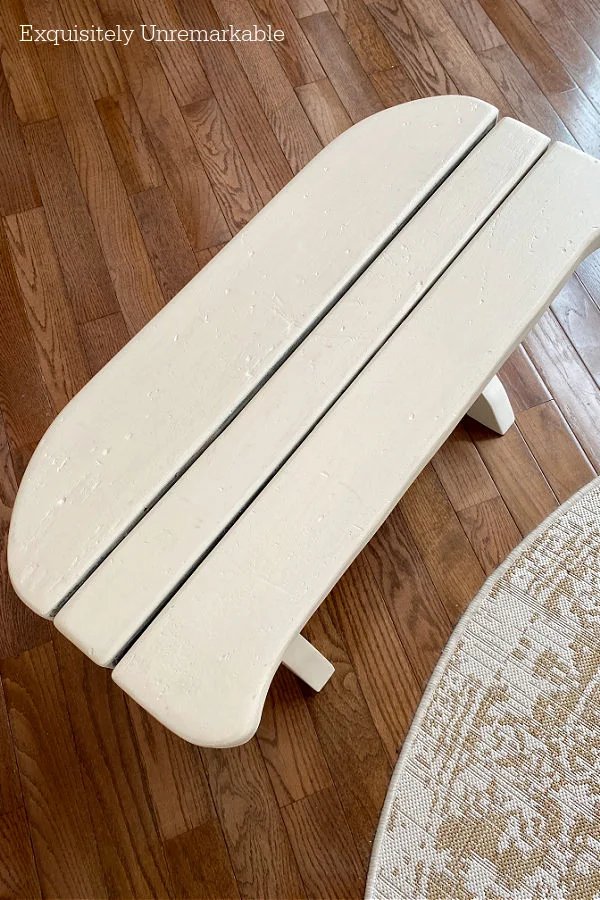
It's the curved dining bench my husband built for me out of two wooden picnic benches we found at the curb.
A few months ago,I decided to upholster it and cover the plain wood with that fun fabric.
I thought a cushion would look more at home nestled up to my red checked curtain panels and the wing chair I skirted years ago.
However, when I decided to have that chair reupholstered professionally, I wasn't sure the new bench fabric would coordinate with the new chair fabric. So I left that trim off to wait and see it with the chair in the room.
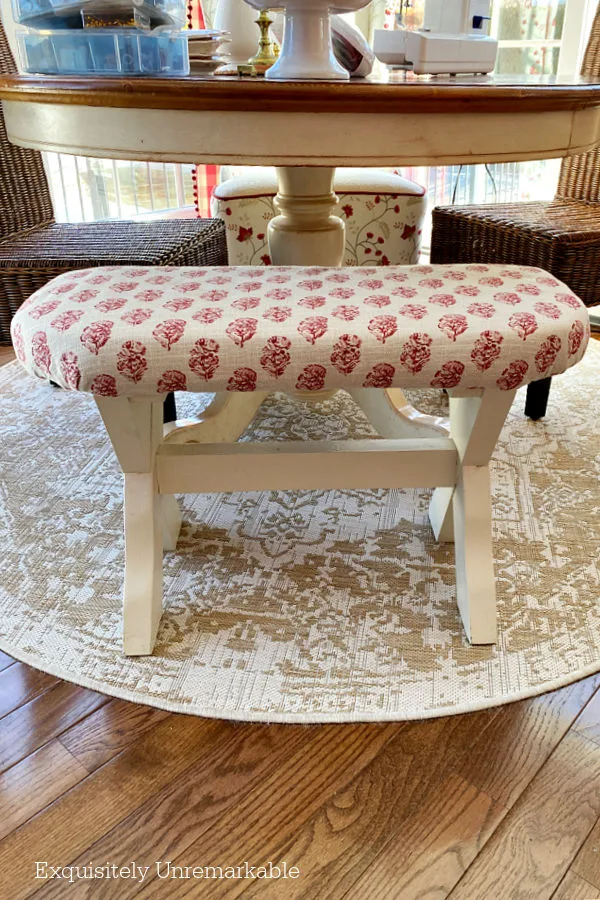
But the shop was backed up and the chair wasn't ready for months.
When it did arrive, I wasn't sure about how everything looked together. I needed time for it to settle, so to speak. I pinned on a ruffle and then took it off.
I pinned on white fabric, then took that off.
Finally, I pinned on the red pom pom trim and left it there...again, for months, while I made up my mind, with all those pins sticking anyone and everyone who dared to sit on it.
They all loved me for that one.
Well, this weekend, I got tired of doling out first aid, I committed to the red ball fringe trim and added it to my bench. Permanently.
How I Added Pom Pom Trim To An Upholstered Bench
After all that waiting, the actual DIY was a quick one. I highly recommend this technique if you want to give an old bench a little flair.
It'll work with any kind of trim, it doesn't have to be pom poms. Just find one that makes you smile.
Supplies I used:
- An iron - I need to get this one
- Fusible web - which is iron on tape
- Pins
- Parchment paper
- Red ball fringe - mine is actually a wine color, but it comes in tons of hues
My step by step process:
I started by placing the bench on my kitchen island, so I could work on it at eye level.Then I measured the circumference of the bench and cut a piece of trim to size.

Next up, I grabbed my fusible webbing, that's the fancy name for iron on tape.
It's what I used to attach the pom pom trim to the upholstery fabric on the bench seat.
I made sure to use a tape that was not wider than my trim base, otherwise the tape would melt and have nothing to adhere to and I'd just have a sticky mess on my hands.
And on my iron.

I began the process by tucking a bit of the pom pom trim under a fold of fabric on the corner of the bench. Then I pinned it in place.
I didn't anchor it with iron on tape yet. At this point, I was just setting the placement of the trim.
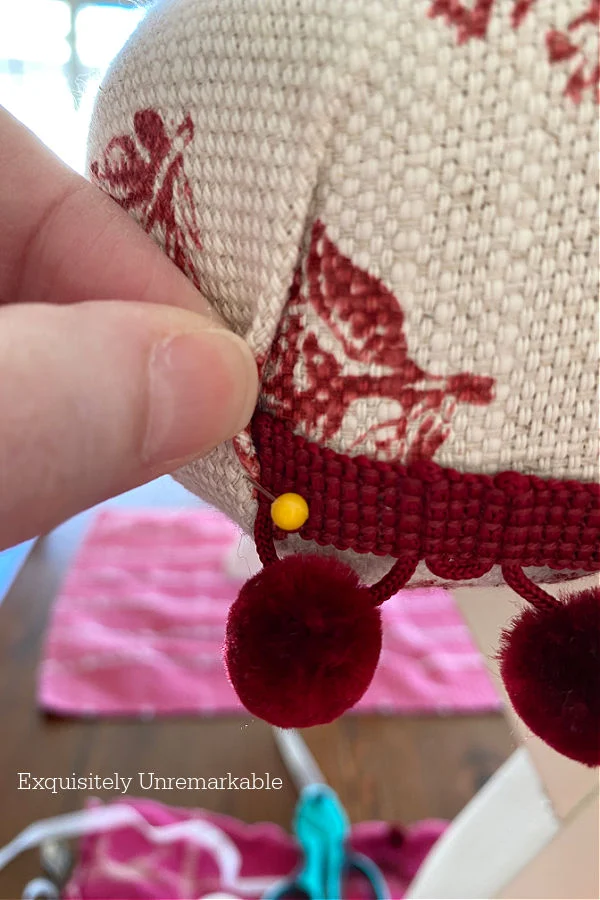
I ran the trim all the way around the perimeter of the bench, pinning it as I went along.
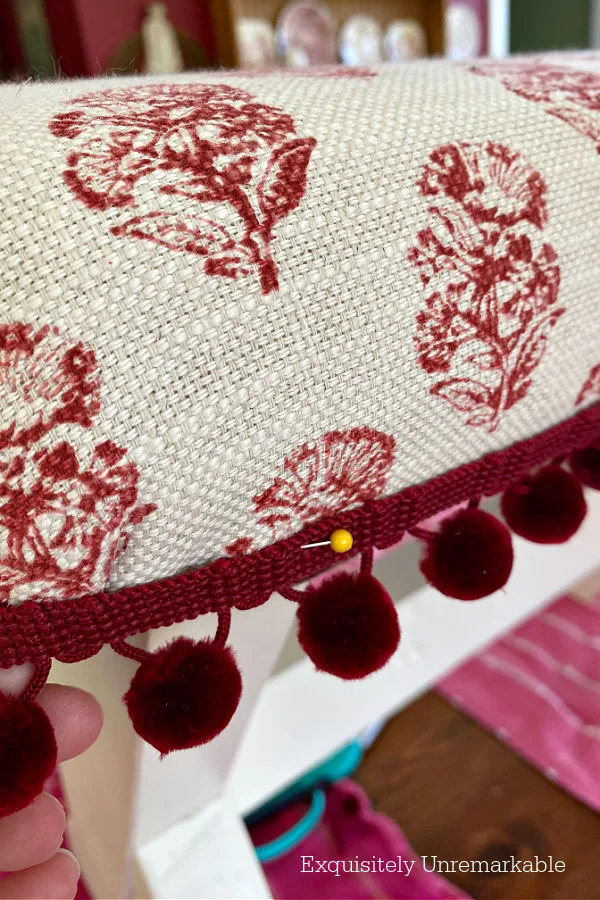
While I was planning, I had the iron plugged in and warming up, no steam.
By the time I was done pinning, the iron was hot and ready to go.
I left the first pin in place, removed only the second, to slip some of the iron on tape underneath it.
Then I placed the tip of the iron on the trim, moving it back and forth a little so I didn't burn it, until the tape had melted.
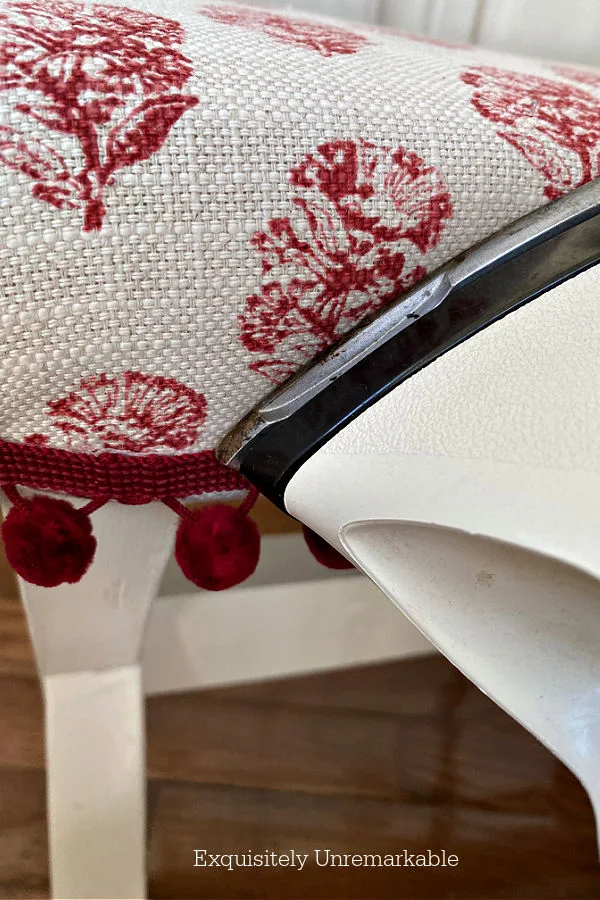
I continued this process all the way around the bench, until I was back at the starting corner again.
At this point, I removed that pin. I untucked the trim from the fold and glued it into place.
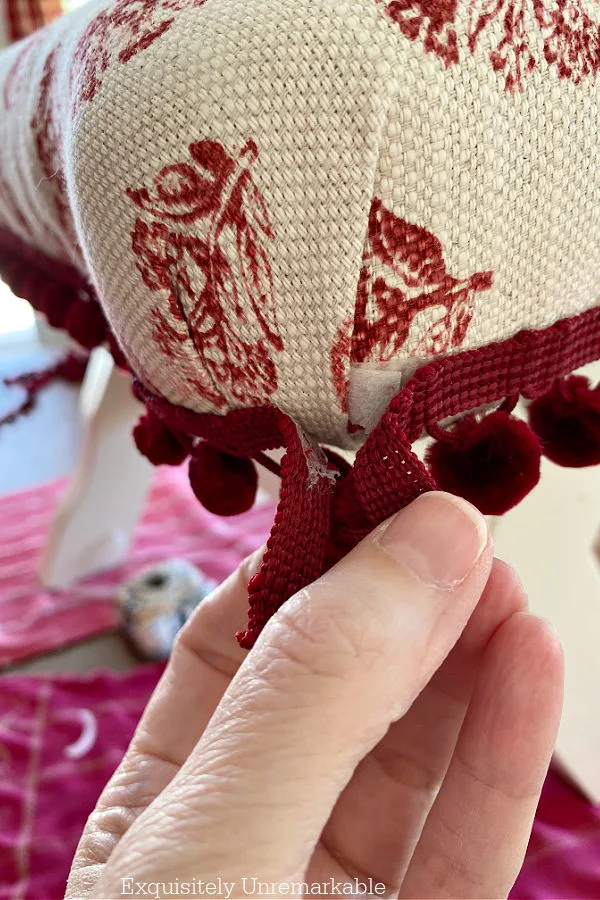
Then I snipped off any excess ball fringe on the other piece, being careful not to cut away a pom pom so there'd be a large gap. Of course, if there were an extra pom pom there, I would've snipped it away.
My goal was to have uniform pom pom spacing at the corner, to match the rest of the trim.

Then I folded the end of that last dangling piece of trim back, to create a finished edge, and ironed it into place.

For a last bit of sticky insurance, since this bench is used on a very regular basis, I gave it one last pass with my iron.
Just in case there was a spot I missed with my iron, the first time around, or a piece of tape that hadn't completely melted into glue.
Now, my iron is big. It was honestly too big for a project like this. I really need to get myself one of those neat little craft irons I included in the supply list.
However, since I didn't have one and I wanted to make sure that the iron touched the trim completely, without burning the fabric, I placed a piece of parchment paper in between and went around the entire piece.

When I was done, about 30 minutes later...well 6 months and 30 minutes later..., I had a lovely pom pom covered bench that complemented the chair and curtains perfectly.
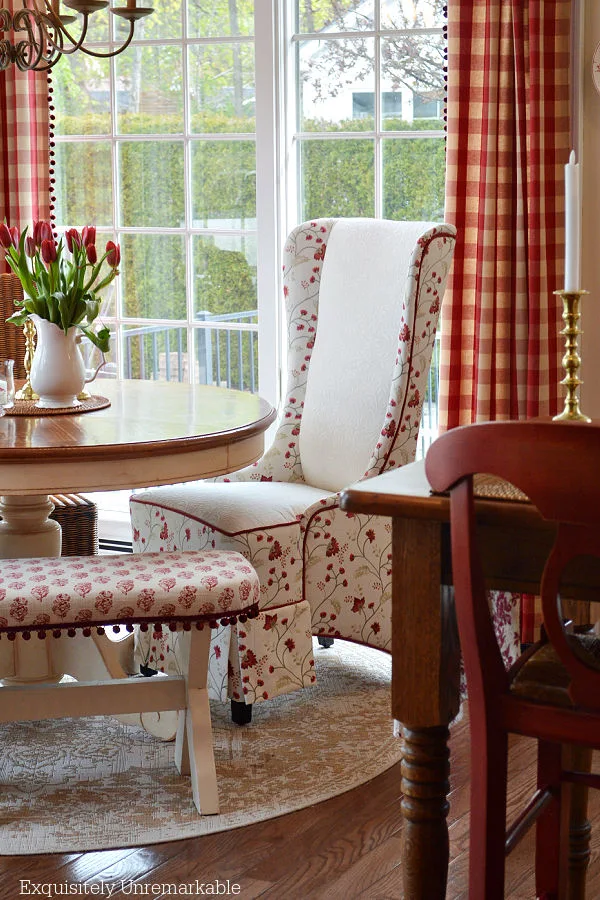
It was comfortable, stylish and even coordinated with my new kitchen sink skirt, the one I made to work with my existing cabinet doors.
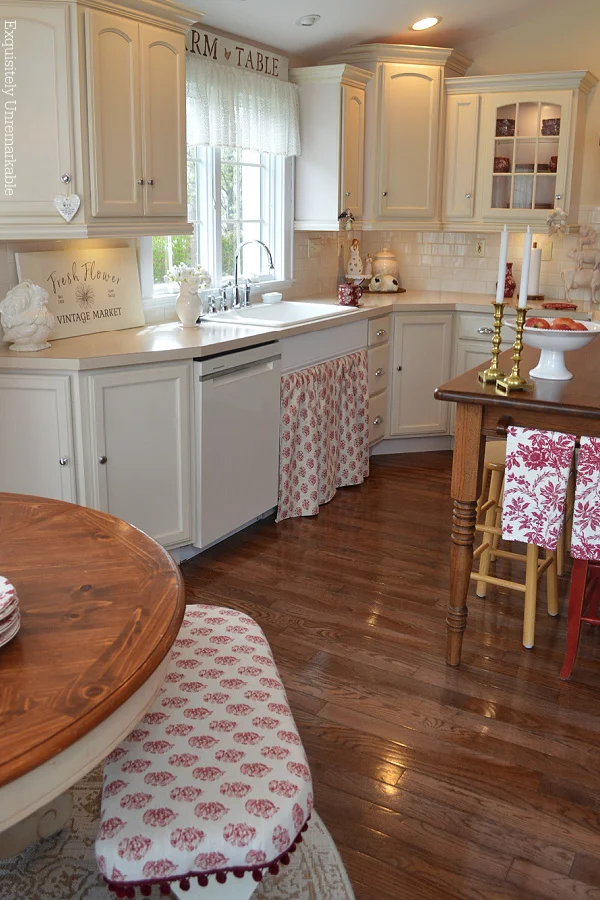
The bench is functional.
Safe to sit on, without fear of being pinched.
And best of all...it was done.
Which is my favorite kind of fabric DIY.
😉
How do you feel about fabric?
Psst- Pom pom trim is my weakness.
Here are a few more of my favorite ball fringe DIYs:
Happy Decorating, Folks!


I love it! It is added charm to your space.
ReplyDeleteThank you so much! I'm so glad decided to commit to the trim. I'm glad you like it, too!
DeleteHi Kim. I love that you use pretty patterns. Your kitchen is so pretty. Happy Saturday. Have a great weekend. Hugs. Kris
ReplyDeleteThanks Kris! I'm a color and pattern addict! 🤣
DeleteIt’s a lovely addition!
ReplyDeleteThank you so much...and thank you for taking the time to let me know! ☺️
DeleteGreat idea, Kim. The trim adds a sweet touch of whimsy I'm checking out the craft iron.
ReplyDeleteThanks Carol! I really need to get one of the irons myself.
DeleteHi Kim. Love it. That fabric is so cute and love the finish look with the pom poms. It makes that little corner just so pretty and cozy. You have the cottage feel done perfectly..xxoJudy
ReplyDeleteThanks so much, Judy!! I have to say, I just love the way the kitchen looks. The patterns are so good together, they just make me smile. Now if I could just get the family room patterns right, I;d be in business!! Haha!! xo
DeleteHi Kim, I love the new bench seat.. And I LOVE, LOVE, LOVE your chair. I meant to tell you last November when you first posted it. That is the prettiest chair I have ever seen. Your entire space, pulled together is lovely. Have a great weekend.
ReplyDeleteThank you so much!! You are just too sweet! I was a little nervous about having that chair done, it was very special to me and I'm kind of a DIY control freak. I wasn't sure that the upholsterer or the shop designer was going to get my vibe, but they listened to me and I'm totally thrilled, too. I appreciate the super kind words and the visit. Happy weekend!!
DeleteIt’s darling with the ball fringe but I can’t believe you left it pinned on and stuck your friends and family for that long! Made me laugh because it sounds like something I would do. Pamela
ReplyDeleteHaha!! Yes...that was certainly not my finest decorating or homemaking moment!! 🤣 I'm glad to hear that I'm not alone though! These decor decisions are hard!! Thanks so much for stopping by and taking the time to comment!!
DeleteHi Kim, Love the new bench cushion. But I LOVE, LOVE, LOVE, your upholstered chair. I meant to comment last November when you first posted. It is the prettiest chair I have ever seen. Your entire space as you have pulled it tiger is lovely. That a nice place to sit each morning. So one question.... What type of chair was the original one that has now been upholstered?? Is it just plain dining room upholstered one?? Thanks so much..
ReplyDeleteHi!! Thank you!! Yes, that was just a plain white, very cheap, dining wing chair I bought from eBay decades ago. When it tore, I made the skirt and seat cover for it. However, after a decade of everyday use, it was just too far gone for another DIY. It had to be rebuilt.
DeleteI have see similar chairs online on Amazon. Here's a link to one that is almost the same: https://www.amazon.com/Christopher-Knight-Home-299944-Callie/dp/B07D96D41P?crid=28HC63M3RY5XZ&dib=eyJ2IjoiMSJ9.JaUOmLgmzA_DPDqHKtoB_a8hVXbJMeyTtWzw3MwTL182hp6yPjNDNBcnEqGUolulgxG6L-uSMHsNBBY0dPUOvyuL7imhb9x71mbg6ehI63xhMzOWXAO4Lt4zthX-f3-kUr1ztGYURyG-SSIPWya2Fe3pT45RvBP2ca4vmKRlP5kAdIjCZ0llgK6rOu-efAiDgOo1jv6qn69NgYaBh9kdMh9sr82-DJu_6DVZfgYMj96SKCoGwvPi7o9UHqafBNNDFu8ETJTc2BRL_w2L85cUjUKYwBj8ghwCEXi8itTYr14.20ZGNosTt1A83YKAUYIQKeOTtc5E25jdVWJGLmuLK34&dib_tag=se&keywords=christopher%2Bknight%2Bdining%2Bchair&qid=1714248067&sprefix=christopher%2Bknight%2Bdining%2Bchair%2Caps%2C94&sr=8-37&th=1&linkCode=ll1&tag=exquisitunrem-20&linkId=9634c0c97a63b7c85801b161d402940c&language=en_US&ref_=as_li_ss_tl
Hope that helps and thanks again for the sweet messages!! ☺️
The bench looks so pretty! Everything looks great together in your kitchen. - Briana from Texas
ReplyDeleteThank you so much, Briana! I hope you're having a lovely Texas afternoon!!
DeleteBeautiful... beautiful... beautiful... another great tutorial.
ReplyDeleteCarla
Wow, three beautifuls!! I'm smiling over here. Thank you, thank you, thank you, my friend!!
Deleteoops never mind - my internet connection was acting up - great looking bench!
ReplyDeleteThanks so much, Linda! I'm not sure what was happening with my blog or the connection, but I'm glad it worked out and you took the time to leave a comment. I really appreciate it!
DeleteI love the pom pom finish. Such great idea for a wooden bench. Charming kitchen and red is a color besides purple that I love.
ReplyDeleteThanks Betsy!! I have to say that red has stolen my heart, but in our first house, everything, even the kitchen, had purple accents. Great minds!! Great colors!!
DeleteInstant charm and personality added. I do love your use of color Kim. SO fun reading how it came together.
ReplyDeleteThanks Maria! I know sometimes my stories are long...always long...but I like to share the process for others in a similar boat. ☺️
DeleteKim, you are so talented and the bench looks beautiful with the pom pom trim. You know how to add that extra touch to everything.
ReplyDeleteThanks Julie!! I love the way it looks…I just wish I hadn’t burned the carpet in the process!! Hahaha!!
DeleteKim,
ReplyDeleteI love how this came out and the fringe is the perfect touch to it!! Great transformation and it looks just perfect in your sweet Kitchen, my friend!! Thanks so much for stopping by!!
HUgs,
Deb
Debbie-Dabble Blog
Thanks so much, Debbie! It's so much easier to swap out now.
Delete