I found a ceramic candle shade and plate in the thrift store and gave them a makeover that turned them into an adorable lantern for battery operated votive candles.
And one that matched my decor.
Check out this simple craft and breathe new life into your old Yankee Candle shades.

A few weeks ago, I shared this adorable find from my January thrifting trip.
I don't know why it caught my eye.
It doesn't match anything in my predominantly red and green house.
Plus, I don't burn real candles, so I had absolutely no need for a Yankee Candle ceramic shade and plate.
However. Its tiny size and equally tiny price tag were too much for me to ignore, so the set came home with me.
Honestly, I had no idea how I was going to redecorate it to match my decor, but I knew I could figure out a way to use that shade and plate with my battery operated votives.
Exactly how was all sort of vague, until my friend Susan from Homeroad, gave me a bit of white mineral paint to makeover a table.
 |
| Fusion Mineral Paint In Casement |
It was lovely paint, and once I saw how well it worked on the table, I was sure it'd cover the shade and plate pattern completely.
From there, the ideas just came rolling in.
I sorted through my glass votive holders, found one, another thrift store find, to support the shade and house the candle and I headed off the races with one more decoupage DIY.

You may remember the sheep paper I used to transform an old tray at Christmas. Well, these two patterned papers were included in that shipment.
That makeover turned out beautifully, but I think this one gives it a run for its money.
I'll let you decide.
How To Repurpose A Candle Shade and Plate
I basically turned this candle shade and plate into a battery operated lantern and of course, now, I will be on the hunt for more of these sets whenever I'm in a second hand shop.Please keep in mind this DIY is only for use with a battery operated candle.
Also, if you happen to have the larger shades and plates, you could use a mason jar or small vase to support them and hold a larger faux candle.
With the right paper or napkins you could make a few for every season or holiday, too. Lots of possibilities!
Here are the steps to make the lantern:
I started by removing the price tag. Then I washed the plate and shade with soap and water. I wanted to remove all dust and soot from the surface so the paint would stick.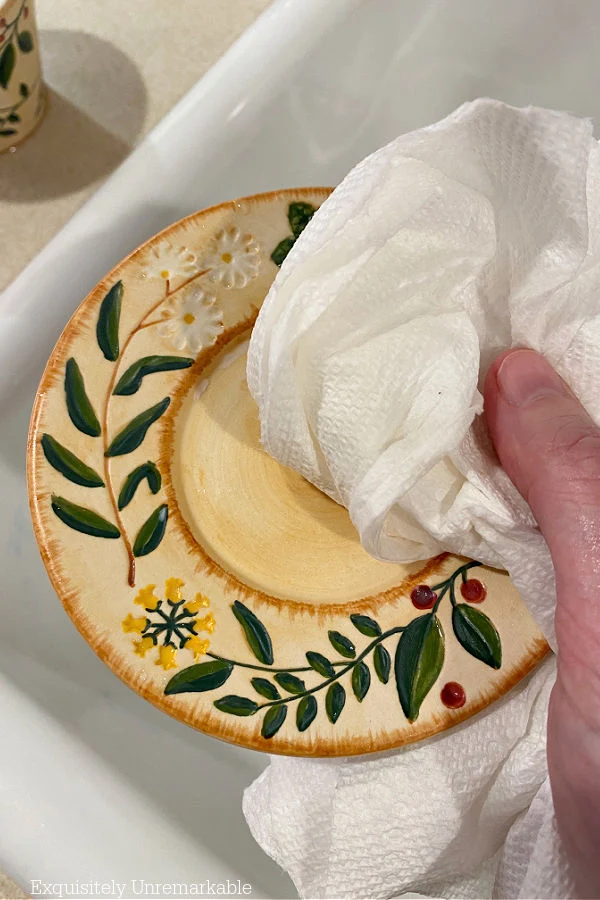
Then I dried the shade well so it would be ready for paint. I used a bristle brush and gave it one coat.

Next, I moved on and painted the plate.
Again, one coat did the trick and provided a neutral base for the decoupage paper. It was kind of a shame to cover the garden pattern, but like I said, it just didn't match my decor.

When the ceramic shade and plate were dry to the touch, I grabbed the decoupage paper.
I decided to use two different patterns for some interest.
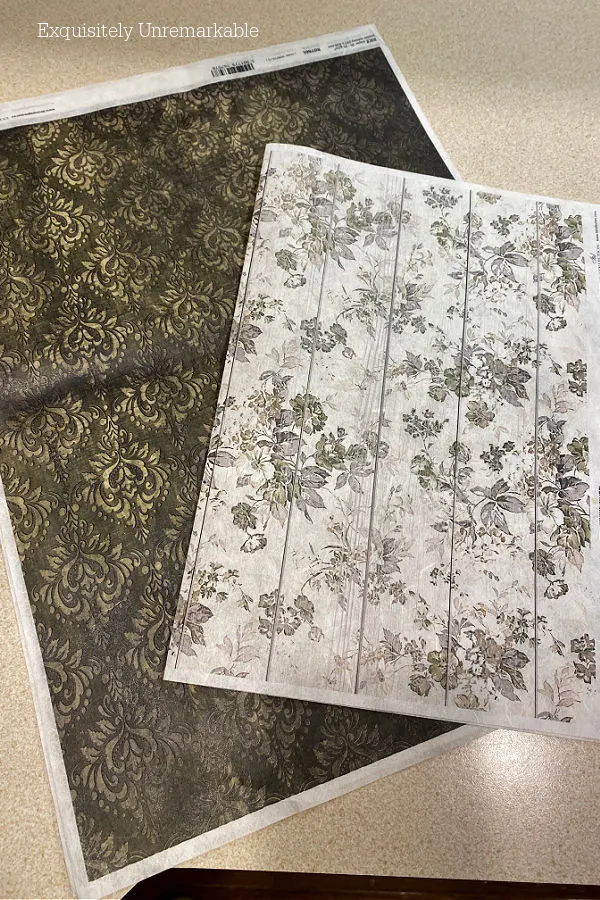 |
| See The Dark Green Paper here |
The plate was up first. I traced an oversized circle on the back of the darker green paper, to make sure I had enough to cover the entire surface and cut it out with very sharp scissors.

Then I opened up my satin sealer, which is my favorite decoupage medium, and brushed it onto the top side of the plate.
Mod Podge works well, too.

I gently laid the paper on top of it and used my fingers to smooth it down.
Just a tip - I never touch the paper with my bare hands anymore.
I find that they just get sticky and pull at the tacky paper or napkin. Instead, I slide my hand into a plastic baggie or use a vinyl glove. Then I can work out the bubbles with no tearing or damage.I'll also say that working with rice paper is so much more forgiving than decoupaging napkins. It's much sturdier.
Even so, this dish was a little tricky, since it had a deep notch in the center, where the candle usually sits. I had to be extra careful not to tear the paper while I was smoothing it down.
When I was happy with its placement, I gave it another coat of sealer to lock it in place.
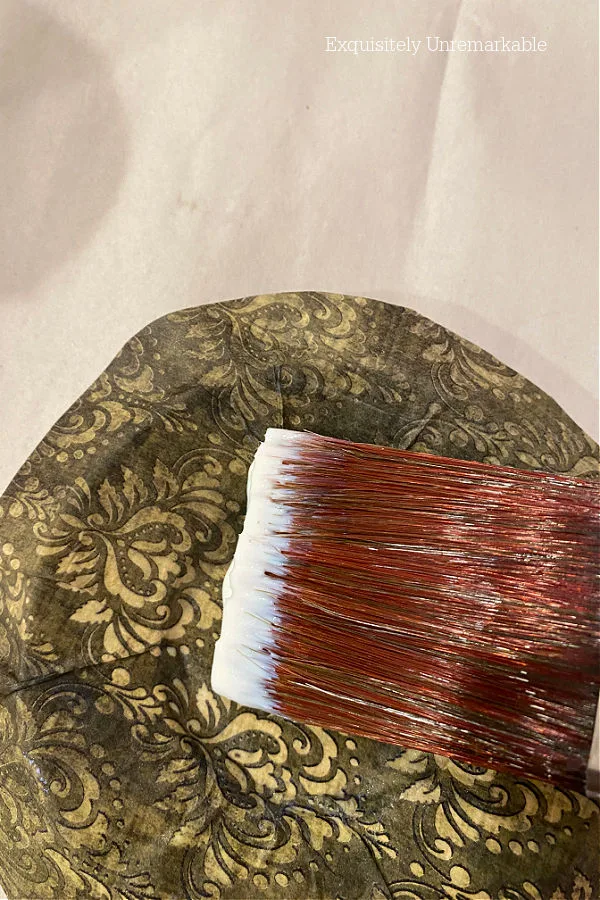
I will say that I much prefer using the iron on method for decoupage. It's a lot easier and a lot less messy, but neither the plate nor the shade were the proper shape for that technique.
So I muddled through, adding more sealer to the outside of the shade, wrapping the paper around it and repeating the process of smoothing and sealing like I did to the plate.
Since I will never be using the shade with a real candle, only battery operated ones, I did fold the paper into the top of the shade for a more finished look.
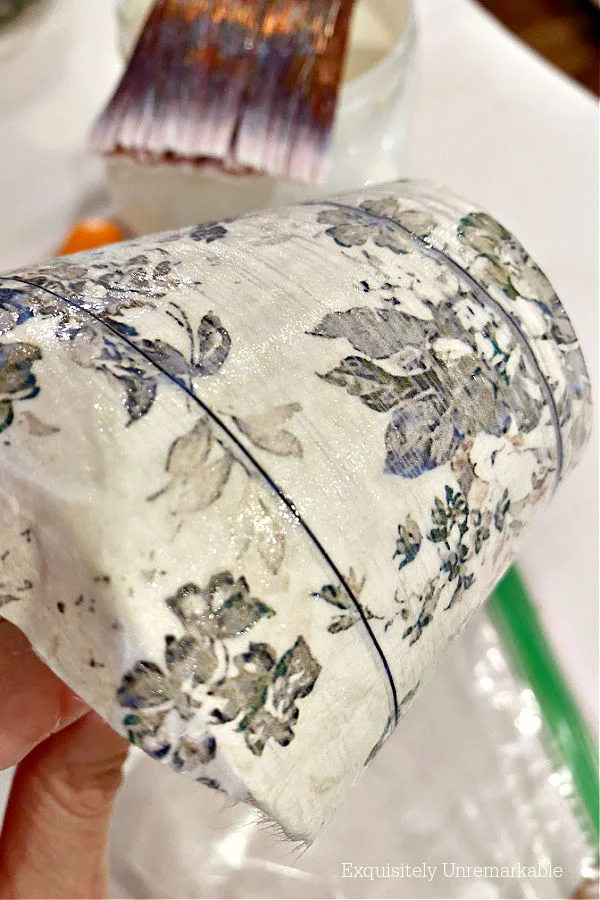
Finally, when both pieces were dry, I used a bit of sandpaper to wear away any of the paper that hung over the edges. With a few swipes, the excess paper just fell away.
And I was able to pop one of those battery operated votives into the white holder and place the ceramic shade on top. It fit perfectly and the shape made it look like a mini lamp.
Darling.
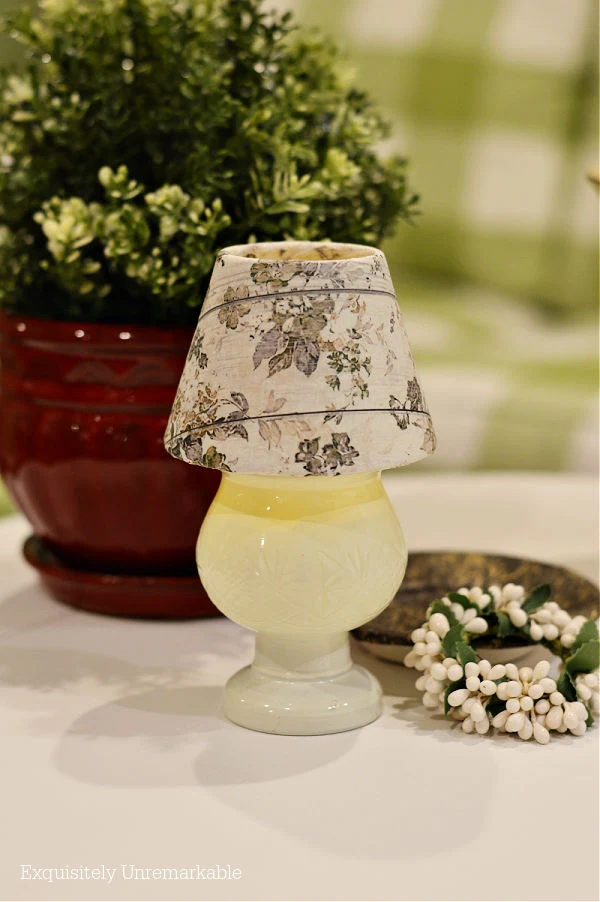
On its own or on top of the plate. I just can't get over how sweet this project turned out.
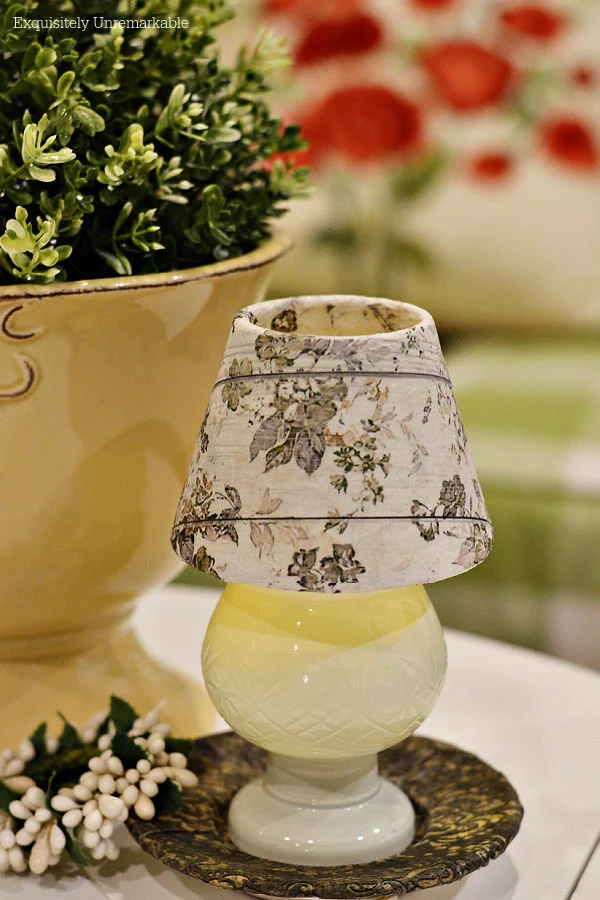
It matches my newly decorated family room. It also matches my bedroom decor. So I have lots of options with this little lantern DIY.
What makes me even happier is that I was able use two of my thrifted finds together to create one fabulous new decor accessory for my cottage style home.
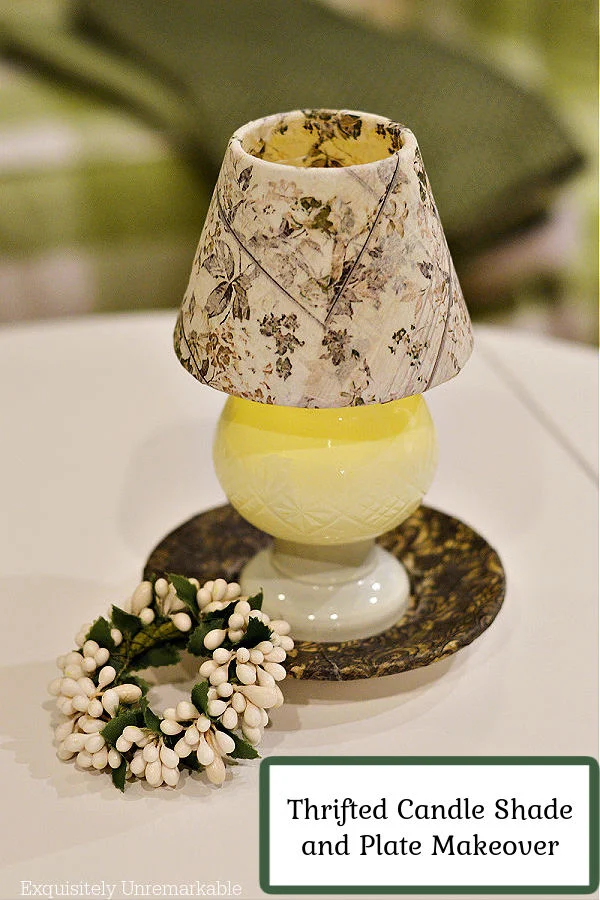
😉
And lucky me, it's just in time for our first Do It Over Designers hop of 2024!
We're kicking this new year off with a ton of great ideas, just click on the links below to see them all.
Don't forget to say hello and tell them I sent you over.

Happy Hopping Friends!!


So sweet! Don''t you love it when to different pieces look seamless together! I've been picking up so many good decoupage tips from you; I'll have to try my hand at this one day!
ReplyDeleteThanks Sara!! This was a fun project and I adore the results. You should definitely try it!
DeleteKim what wonderful little project, so beautiful! We are feeling the winter doldrums where I live...you inspired me to start to make plans with my girlfriends to go thrifting and find something inspiring. Beth
ReplyDeleteThanks Beth!! It's been dark and dreary here for weeks now, too. This little makeover process did brighten my day, and now, the finished makeover brightens my nights! Have fun thrifting!!
DeleteWell, that turned out pretty darned cute, Kim. It's sweet! Have a great weekend. xo xo xo
ReplyDeleteThanks Diana!! This one is my current favorite. The tiny ones always get me. 🤣
DeleteI had no idea where you were going with this project, but, wow, you nailed it! The glass votive holder is the perfect match. Fantastic project!
ReplyDeleteThanks Ann! I'm smitten with the combination of thrift finds and the new color palette. I think I'm going to be mass producing these!! Haha!!
DeleteThese 2 thrifted items go so well together - it was meant to be! It's amazing how different something can look with the magic of decoupage, this is fabulous.
ReplyDeleteThanks so much! I agree on both accounts and decoupage is the new paint for me...transforms everything in a jiffy.
Delete❤️❤️❤️ You’re giving me the courage to finally try decoupage.
ReplyDeleteWell that just made my day!! ❤️ It's the main reason I share, in the hopes that someone will be inspired to try something new and make some crafty magic! Thanks so much for letting me know!!
DeleteWhat a clever idea to update a ceramic piece - I don't have good luck decoupaging at all because i end up with too many wrinkles - yours came out great!
ReplyDeleteThanks Patti! Decoupage has become my newest crafty passion. I have to say with practice smoothing those wrinkles does get easier. I also find that rice paper is much more forgiving than napkins and an iron works the best. It's my preferred technique, but it really only works on flat surfaces.
DeleteOoooh! This turned out so very cute! I love the sheets you used for the decoupage. It's charming!
ReplyDeleteThanks Mari! It's so charming in person, too. The papers are great, I never realized how many choices are out there. Live and learn!
DeleteLove how pretty your candle shade and plate turned out, Kim! I love decoupaging, too, and I find each time can have a different result no matter how many times you do it! I do need to try that white paint you used. It seems to have the perfect coverage! Thanks for sharing!
ReplyDeleteThank you, Gail! I have to say, lately, I've become a huge decoupage fan. I keep finding new techniques, new items to transform and new patterns to use. I love your relief decoupage flowers, they add so much dimension to the project. I think I may need to try that next!!
DeleteThis really came out so cute. Love your crafty ideas and how you can look at something and imagine and re love it into something new and so so cute. Happy Weekend. Hugs. Kris
ReplyDeleteHi Kris! Happy weekend! I guess being a thrifting junkie worked out well for me this time. It’s the only reason I had the perfect votive holder to go in between the shade and the plate. If I had any self control at all, it wouldn’t have been half as cute! 🤣
DeleteThat's so cute and I never would have thought of such a unique makeover!
ReplyDeleteThanks Tania! It threw me for a bit, but once I found that paint, the wheels just started spinning.
DeleteI love how this turned out! Great transformation and awesome thrifting find!
ReplyDeleteThanks Rae!! I'm very happy with this one. Thanks so much for stopping by and sharing some kind words!
DeleteVery sweet makeover. So cute it blends in well with your home. You make it seem so easy. Happy weekend.
ReplyDeleteThank you, Linda! I had fun making this one, once I figured out which way to go. I hope you’re having a lovely weekend in your beautiful home. ☺️
DeleteKim, you did a great makeover with using the pretty patterned paper. I think the candle shade looks good without the plate too.
ReplyDeleteThank you so much, Julie! I really like it without the plate, too. It looks like a tiny lamp!!
DeleteKim, I can't even tell you how sweet this is. Great choice of colors and very good job which I can imagine wasn't as easy as you make it look..xxoJudy
ReplyDeleteThanks so much, Judy!! I have to say it really was not difficult. The hardest part with decoupage is taming sticky fingers. Honestly the most difficult part was waiting for the paint to dry. I’m not a patient crafter!! Happy Weekend!!
DeleteWhat a great makeover! Because we have 3 cats I never use real candles either, and this is such a great way to pretty up some battery operated votives. Super pretty!
ReplyDeleteLove those battery operated candles, Tuula! I have votives and tapers and pillars (oh my!) set to "burn", as soon as the sun goes down. The house looks warm and magical, but if they were real candles, with the amount I have going, all at once, they'd just be a giant fire hazard...And we don't even have cats!
DeleteThat is darling, Kim! I would never have seen the possibility in it or how to adapt it. Kim, we continue to love the battery votive candles you recommended! I have them all set for 3:30 on these still short days and they go off automatically 6 hours later when we go to bed. I have them all over the house. I ordered extra batteries too so I can use them daily. I think I will give them for Christmas gifts next year.
ReplyDeleteThanks so much, Dewena! I love this little lamp/ lantern. It's so sweet and now it matches my room perfectly. I'm so glad you love the votives. 😊 Aren't they the best? Mine go on at dusk too...although that's been getting later and later as we get closer to spring!! That makes me smile!!
DeleteI do love mod podge and I need to get me some battery votives and get to crafting!
ReplyDeleteDecoupage has become my favorite new craft...loving it, so many possibilities!!
DeleteSuch a sweet and darling little makeover. I see these shades all the time in thrift stores but never pick them up. Now I have a good idea on how to reuse them. Thanks for sharing.
ReplyDeleteThanks Donna!! I can't tell you how many times I've also passed these up...and actually donated a few back in the day. Oops!! You'd think that by now I'd know better than to toss anything!!
DeleteThis is such a beautiful re-do Kim! I would never have thought to decoupage the lantern and its base! I know I've probably got some of those old candle holders somewhere, lol! And like you, those battery operated lights make my life so special. I just love how they come on at the right time to brighten up the night! Beautiful repurpose, my friend!
ReplyDeleteThank you so much, Marilyn! I really enjoyed making this project and even better, I love the result. I'm so glad you found this one useful. It really does help to pretty up those battery operated candles...I know how handy the are, turning on and off on their own, and you never have to worry if littles or furry friends get near. Enjoy the week!!
DeleteThat turned out so well, it looks beautiful.
ReplyDeleteVery well done.
All the best Jan
https://thelowcarbdiabetic.blogspot.com/
Thanks so much, Jan! It light up the house nicely!!
DeleteI just love seeing your transformations in your projects, Kim, and this one turned out so beautifully! I like the papers that you chose and the tips that you shared. Great job!!
ReplyDeleteThank you, Kitty! What a kind comment. I have fun making these items over. It really is my zen. Happy February!!
DeleteWOW!!! This is great Kim, I really love the sweetness this little candle and shade. Well done, as always.
ReplyDeleteCarla
Thank you, Carla! Your capital letters just made my day!!
DeleteWhat a superb job! It is really remarkable what you did with that ceramic candle shade and plate, and all for less than $3
ReplyDeleteIt's the best feeling ever when random thrift store finds come together to make something so adorable. You'd never in a million years be able to guess how they all looked before you did your magic. The rice paper patterns are so cool too. I managed to find someone here in South Africa that prints any pattern or image on demand, so I may just steal your idea. Pinned for later
ReplyDeleteSteal away, Michelle!! That makes me smile. I'm excited to hear that you found some rice paper there. I'd love to find someone here to print on demand. Might have to look into that!
DeleteYour candle and plate makeover turned out great! I can picture it used in a guest bedroom or bathroom as a night light. Wonder how long those battery candles last?
ReplyDeleteThis turned out adorable Kim! I ventured over into rub on transfers, and was thinking decoupage paper may be next, but you sold me. I need to give it a try, you are right napkins are so fickle to work with. I haven't worked with them in a while because of it, but you can get so many different patterns when you use them... I guess I will just have to see what I can come up with as far as patterns go next.
ReplyDelete