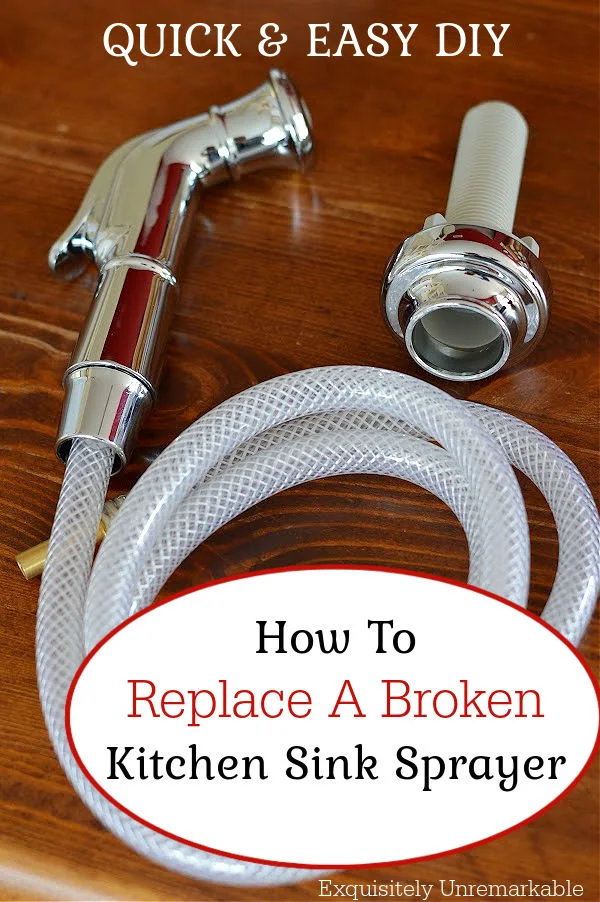
Do you have a broken or leaking kitchen sink sprayer? Not sure what to do?
Replacing it is actually an easy DIY fix. And you can usually get the parts for free.

When you buy one you expect it to last a good long time.
Well, at least I do.
However, after daily use in a busy household, sometimes, things break.
Instead of buying new, we usually try to fix or replace broken parts.
It's much more economical.
Plus, if you really like what you already have, a little DIY project allows you to keep it and get it in working order again.

So when our kitchen sink sprayer sprung a leak and starting dripping water, like the broken hose in our shower, we decided to replace that one part and keep our beloved farmhouse style faucet.
It was a quick and easy fix, but it definitely helped to have two people.
Speaking of my DIY partner in crime...he wanted to go to Home Depot to pick up a replacement sprayer hose kit, but I said hold on there mister.
Again, kitchen sink fixtures are a high end item and most, if not all, offer very good warranties. Ours is a Pfister faucet and it has a lifetime warranty.

So I just called them up, explained my situation and they sent me a free replacement part.
I did the same thing when we needed to replace the kitchen soap dispenser.
Like I said, busy household...things take a beating around here.
Once it arrived, it was literally a 10 minute swap.
How Do I Fix A Broken Kitchen Sink Sprayer
First things first, kitchen sprayer parts are not universal. What you need will depend upon the kind of setup you have. That's why I always recommend getting the parts from the manufacturer...especially if they're free.
If you can't do that, then you should look at your parts, take pictures or bring the hose with you to buy the replacement.
Step 1: Turn off the water
You don't want a flood. The valve under the sink that supplies the faucet needs to be turned off first and foremost.
Turn on faucet or squeeze sprayer handle to relieve any water pressure.
Step 2: Disconnect the hose
Then disconnect the sprayer hose connection from the faucet supply line underneath the sink.

We were able to do this by hand. Different brands may require tools.
It's helpful to have a towel and small bucket to capture any remaining water.
Step 3: Remove the sprayer head
Our sprayer head was attached to the hose.

It came out with it when we pulled it all the way up and out.
Step 4: Remove the mounting flange
This is where it was helpful to have an extra set of hands.

The mounting flange is anchored underneath the sink with a large nut.
I held the flange in place on top of the sink, while my husband unscrewed the nut from below. If I wasn't holding onto it, it would've spun around endlessly and he wouldn't have been able to loosen it.
Step 5: Remove the rubber gasket
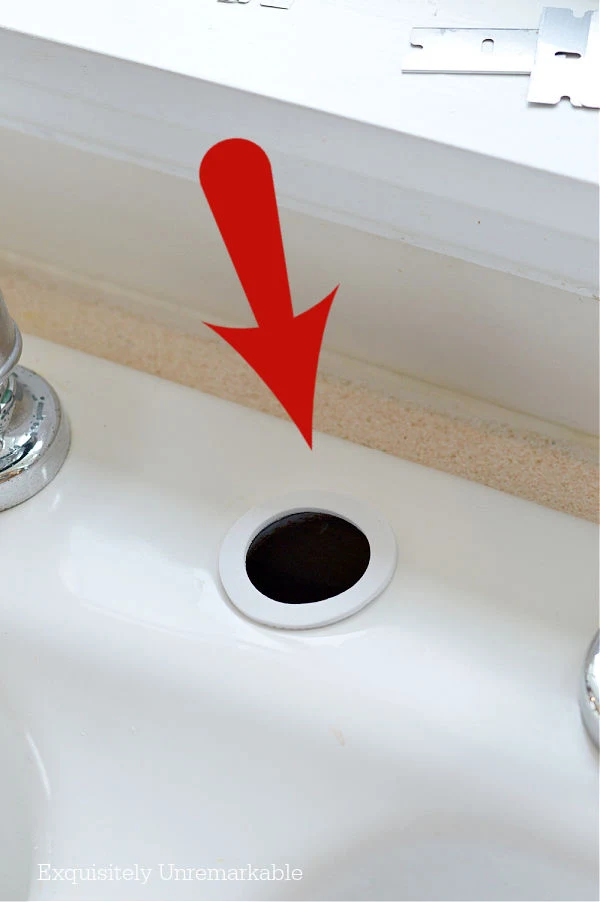
Underneath the mounting flange is a rubber gasket.
Ours was kind of icky after years of use. So once we peeled it up, I used my favorite product Cerama Bryte to clean away the ick on the sink and make the surface beautiful again.
And ready for the new gasket.
Step 6: Replace the gasket
Next, we just did all the steps in reverse.

We started by placing the new gasket around the opening for the sprayer head.
Step 7: Add the mounting flange
Then it was time to install the mounting flange, or hose guide. Different manufacturers or part websites refer to it differently.

We popped the mounting flange the into the hole on the top of the sink and secured it underneath the sink with the nut included in the hose replacement kit.
Step 8: Connect the hose to the water source
Then we fed the hose through the flange, from the top of the sink, and grabbed it underneath.
It was then connected to the diverter, exactly in the place where the old hose was removed.
Step 9: Turn the water on
Lastly, we turned the water back on and checked for any leaks.
Our connections were tight and dry, so we were good to go.
And voila.

We had a good as new kitchen sink sprayer for our old faucet.
Form and, more importantly when water is involved, function.
How fabulous.
Would you attempt a sprayer swap?
Happy DIYing, Friends!


You know this was a great post Kim. Most people would do what your husband wanted to do and go to the hardware store for a new replacement. You do not think about the long warranties on things and it just takes a little time to contact the manufacture and get the replacement parts for free. Glad it was a quick and easy fix. Have a great rest of the week. Hugs. Kris
ReplyDeleteThanks Kris! He's always looking to do things "NOW", so running out to buy the part gets the job done right away, so I get it. I'm glad we waited and got the proper part...for free! Of course, it'd be best if it didn't break...but that's life! Hope your week is fabulous!
DeleteI wouldn't have thought to call for replacement parts! My hubby always fixes these things, your step by step instructions are great and show me I could do it too!
ReplyDeleteSo funny, Mari, because I’ve also always relied on him to do this stuff (division of labor!), but after all these years, watching and helping, I know I could do it now, too. That’s why I share, because it really is hard and expensive to find help today. I figure if I can be a little encouraging or at least share the steps so people know what they’re up against when they do call a service pro, it’s worth a post. Have a great week!
DeleteHi, Kim! Long-time reader, first-time commenter. I love your blog. As we are currently replacing our kitchen sink and faucet, I’m curious what the accessory is on the right in your sink. I hope you don’t mind my curiosity. Kim
ReplyDeleteHello! Always lovely to "meet" readers!! I adore comments and I don't mind questions at all. So we have four holes on this sink, in the photo from right to left is the handle to turn the water on and off (I think that's the one you're referring to), then the water faucet itself, the sprayer and finally the soap pump. I know the newer faucets are all in ones, where the handle is mounted on the faucet and the sprayer pulls down. Those are lovely too, I just really like having the soap dispenser in the sink...a filtered water dispenser would be very nice, too, but we don't have that many spaces! I hope that helps! Good luck with your faucet purchase...so exciting...and I hope to see you in the comments again!! ❤️
DeleteHigh Fives on thinking to call the manufacture. You are right, we need to remember to do just that, may items are lifetime warranties and I think we forget that! Another great post. Thank you!
ReplyDeleteCarla
Would I attempt a sprayer swap? Probably not but I know my hubby would! Great post Kim!
ReplyDeleteAwesome tutorial Kim! We have definitely called the company directly for many things, and gotten replacements also. Our outside water faucet failed, and we called the company and they shipped the replacement parts free to us. So definitely a good thing to think about doing that before trying to replace with universal parts! Great post!
ReplyDeleteI wouldn't have thought to call the manufacturer either - smart move! Our sprayer only works once in awhile right now. It gets stuck in the on position and we can't turn it off. So we don't use it. Our whole kitchen needs a total rehaul anyway, so it'll all be replaced in the near future anyway.
ReplyDeleteKim,
ReplyDeleteI have "hard" water and it seems to take a toll on faucets and pipes... We had a great plumber but he has since retired....Anything having to do with pipes makes me nervous so we will have to find a new plumber...Kudos to you for doing this...
Hugs,
Deb