Cake plates or cake stands are plentiful at thrift stores and second hand shops. They make great decor and serving pieces.
With a little bit of decoupage you can give one a makeover and turn it into a treasure for any season or event.
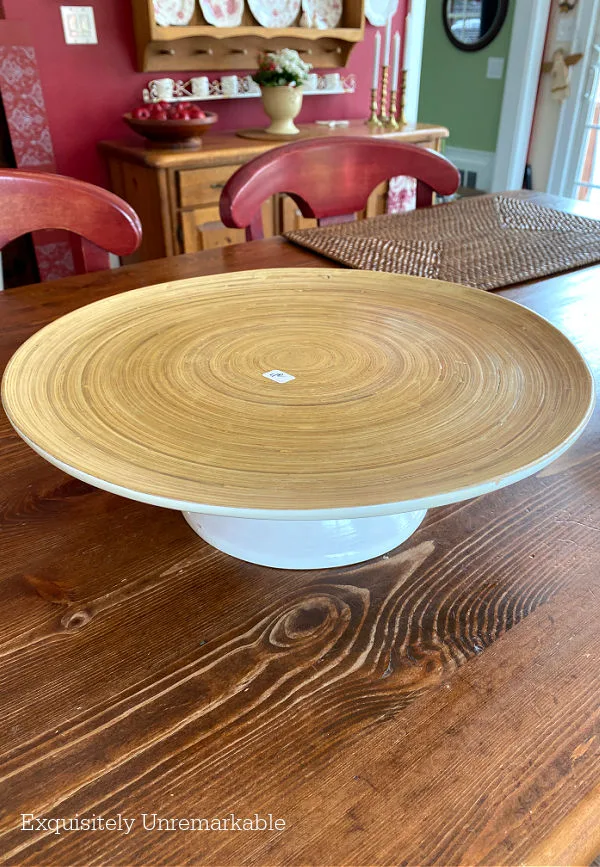
A few days ago, I shared several treasures I recently picked up at the thrift store.
Some of them were in perfect condition, ready for display.
However other's needed a little TLC to take them from second hand blah to beautiful, including this $4.00 cake stand.
I don't know why but I'm a sucker for any kind of cake stand.
I have too many to count and no right to own more than one, since I don't really bake.
I just like their shape and the way I can display seasonal items on them.
And occasionally something sweet.
I have wooden ones, milk glass ones, domed ones, tall ones, short ones, galvanized metal ones and a few made of glass. Ones that are big enough for a sheet cake and small enough for one cupcake.
I even have a DIY cake stand.
However today, I'm sharing this one, made of a wood like material and full of cracks. I honestly think I paid too much, but it was huge, with room for food and decor.
Did you know I started a Facebook Thrift Store Home Decor group? Come join and share your finds and DIYs with us!

And I had a vision, so I took it home, made it over and dressed it up for fall.
Just in time to share with The Thrifty Style Team! Don't you just love a party? Oh good, me too. Now before we get to the hopping, let me show you what I did to my overpriced thrifted plate.
How To Decoupage A Cake Plate
I started by removing the price tag, getting rid of the sticky goop and wiping it down with a damp paper towel.
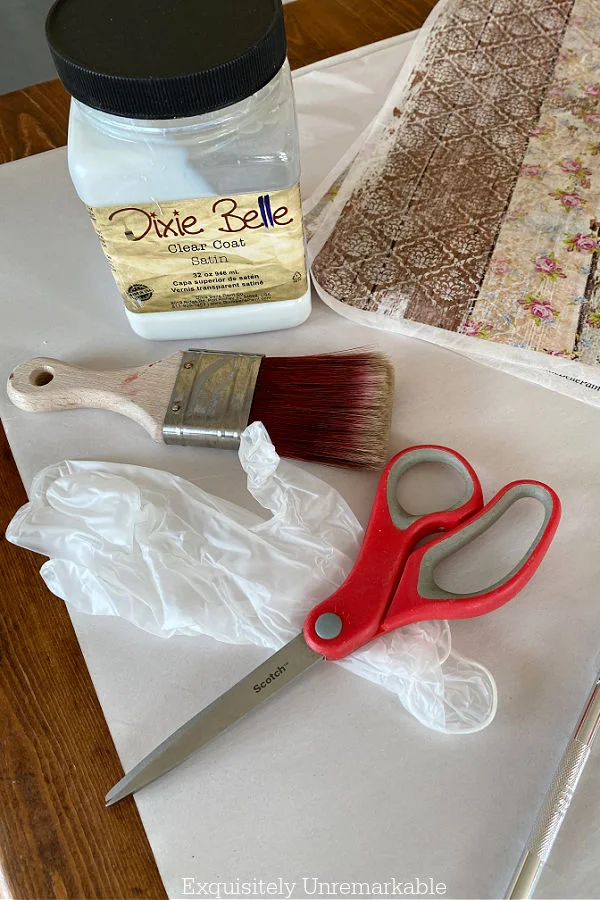
Then I collected all my supplies.
- Rice paper for decoupage
- Clear Satin Sealer or Mod Podge
- Scissors
- Pencil
- Gloves
- Paint Brush
The Steps
One rice paper sheet wasn't large enough to cover the cake plate on its own, so I had to cut the white edging off each sheet so I could fit them together seamlessly.

Next, I placed them together on the table, patterned side up so I could see where they'd be joined.
Then I put the cake plate, upside down, on top of the paper and traced all the way around it in pencil, like I did on my toile fabric sled.
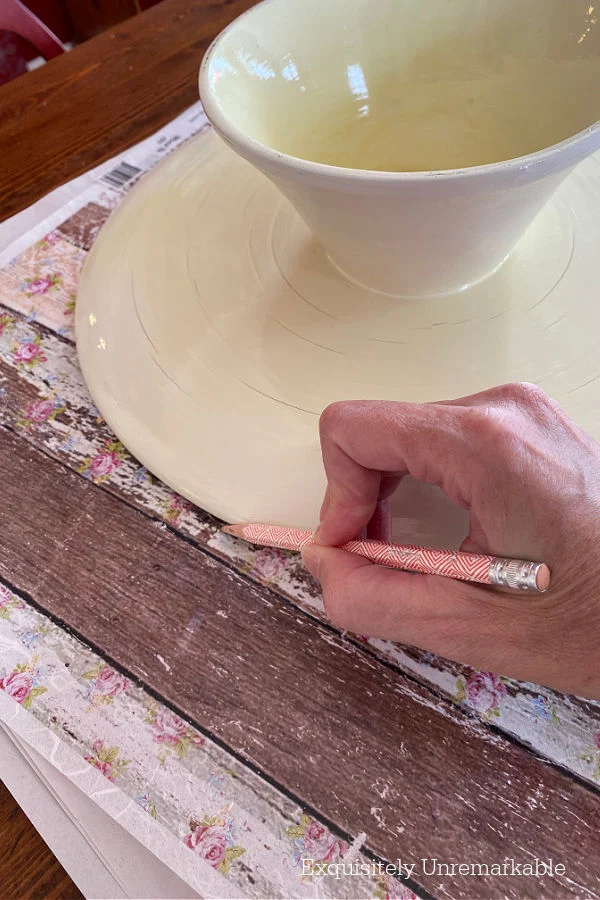
When I lifted it away, I was left with a circular pattern. I carefully cut on the pencil line with very sharp scissors.
Dull scissors could tear the paper.

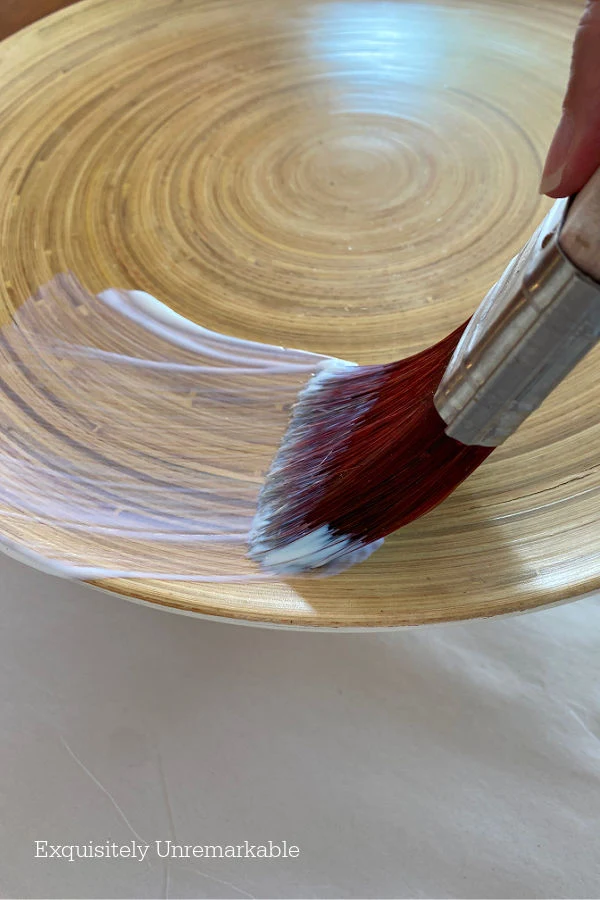
Once the paper was ready to go, I dipped my brush into the satin sealer (or Mod Podge) and added a generous amount to the top of the cake stand.
I was careful to go all the way around the edges of the plate, too.
Then I placed the rice paper on the stand, lining up the patterns so they wouldn't be noticeable.

I put on a glove, vinyl gloves from the drug store that I use for crafting, and smoothed out the rice paper. They look a little scary, but they work amazingly well.
I've mentioned before that I prefer decoupaging with rice paper, as opposed to using napkins. It's much sturdier and it doesn't tear when you smooth it out or need to move it a bit.

The last step in this process was to coat the top of the rice paper with more satin sealer. I prefer this to Mod Podge, it doesn't smell, it's not as sticky and it dries quickly.
It is much more expensive, but it lasts much longer and, honestly, the lack of a smell, is worth it to me.
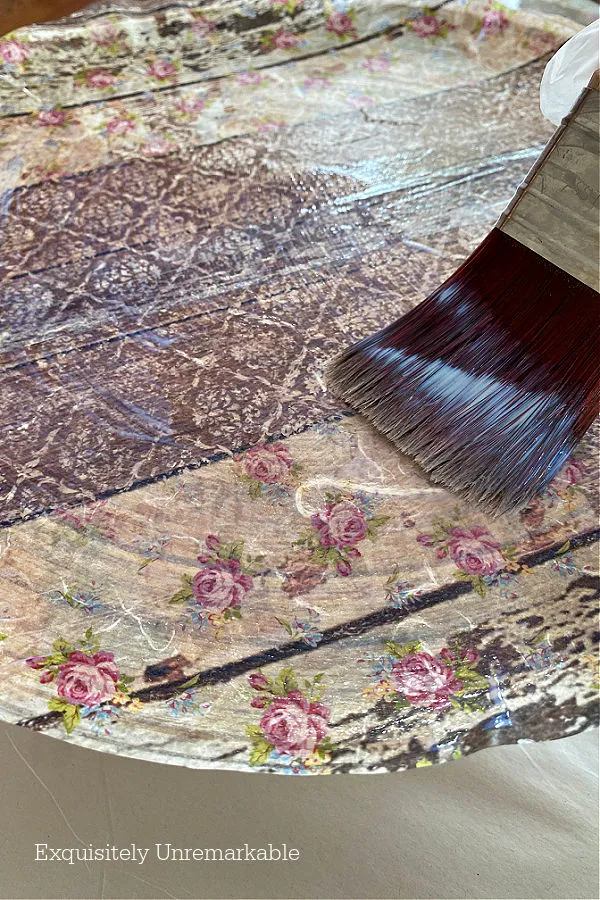


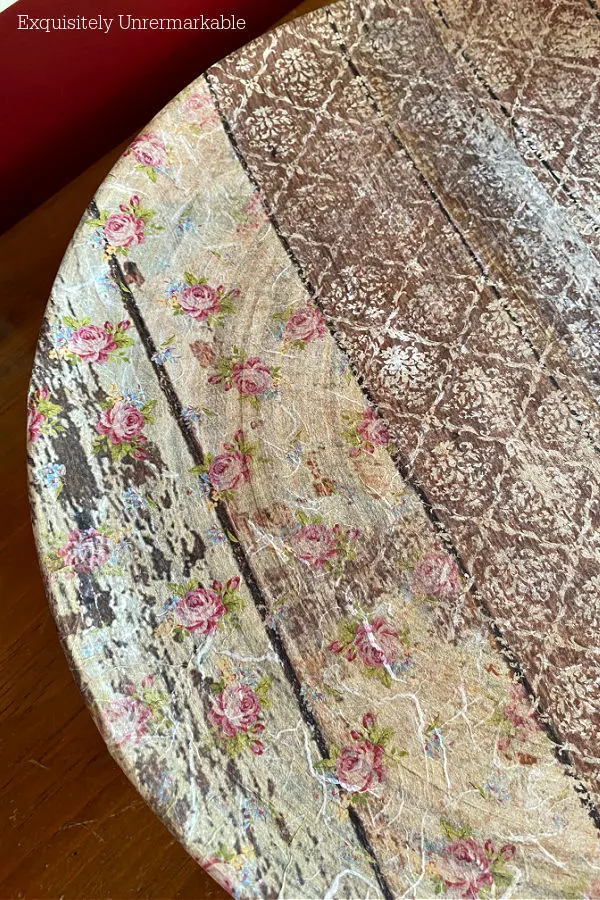
When it was dry you could still see that faux wood pattern through the paper, making it the perfect rustic accent for my cottage style kitchen.
Especially during fall.
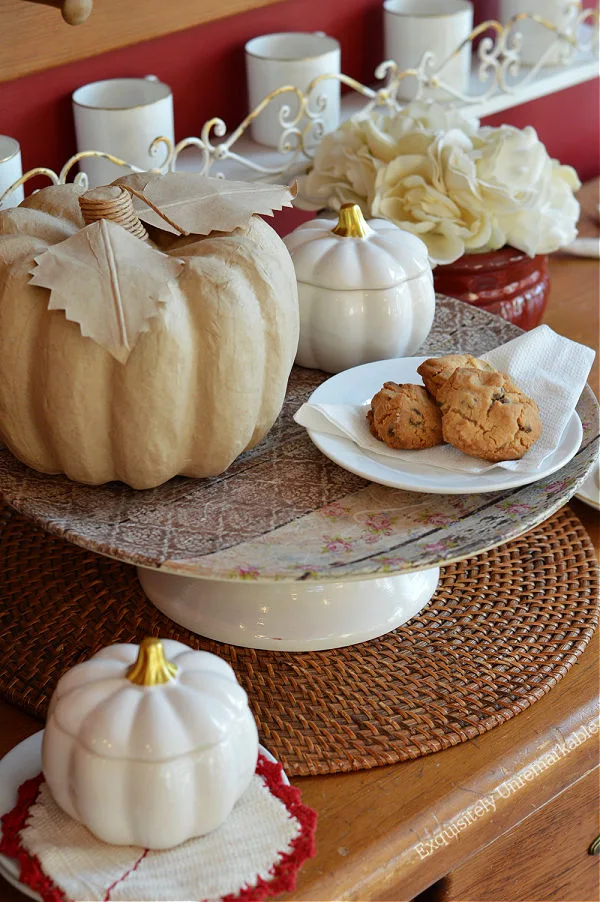
Not that I'm ready to let go of summer just yet.
But it's nice to prepare for the upcoming season.
And it's always fun to get crafty with a thrifty find.
😉
What do you think of my cake plate now?
A few things to keep in mind with decoupage crafts:
- Decoupage gels, including Mod Podge and the Dixie Belle sealer I used, are not food safe. That means if I were going to serve food on my cake plate I would need to place a barrier between the food and the decoupaged surface.
- This is a great project for any season, all you need to do is swap out the rice paper or napkin pattern and you can have a Christmas cake stand, baby shower, wedding or birthday cake plate. Endless options here, just use your imagination.
- If you have a glass cake stand, you can add the rice paper or napkins to the bottom of it. You'll see the pattern from above...and you'll still be able to place food directly on the glass. Just don't submerge it when washing. Even the dishwasher safe Mod Podge isn't quite that waterproof.
And now...drumroll please... it's time to hop!! I hope you'll stick around to visit my creative friends and check out all their thrifty fall home decor!!

It's a lovely party hosted by Julie from Redhead Can Decorate and Michelle from Our Crafty Mom. They're first on the list so hop on over and say hello!
Redhead Can Decorate - How to Make a Thrifty Dollar Store Fall Centerpiece For Your Coffee Table
Our Crafty Mom - Fall Coffee Table Decor
The How to Home - Dollar Store Feather and Wood Stem Placecards
DIY Beautify- 10 Fall Crafty DIYs To Make Now
Songbird - Lavender Wreath
Simple Nature Decor - Coastal Fall Decorating Ideas
Zucchini Sisters - How To Make An Acorn Garland With Dollar Tree Items
Exquisitely Unremarkable - That's me!
Happy Hopping, Friends!


What a cute idea. Perfect for fall. xo Laura
ReplyDeleteThanks so much, Laura!! I'm not ready for fall at all, but it's fun to craft for it now.
DeleteThe refurbished cake plate is very pretty. My choice would have been to leave it in the natural.
ReplyDeleteThank you! Yes, it was pretty in the natural, unfortunately, the cracks were splintering and it wasn't really safe to put anything on it. I figured the rice paper was like a bandaid of sorts and sealed those cracks up!
DeleteGreat makeover, Kim and I love that floral paper!
ReplyDeleteThanks Ann! I really like that rice paper, too.
DeleteI love your re loved cake plate. That decoupage is amazing. Happy Friday sweet friend. Have a good weekend. Hugs. Kris
ReplyDeleteHi Kris! Thanks so much. I love decoupage, it’s so easy, the process is pretty foolproof and the results make me smile!
DeleteWell done, you do such great work with decoupage.
ReplyDeleteHappy Weekend my friend.
Love, Carla
Happy Weekend, Carla!! I love decoupage, it's so easy and works on almost any surface.
DeleteGreat idea and like your choice of rice paper. Helps seal it and makes it a stronger piece.
ReplyDeleteHi Kim! I have used this same paper to decopauge many things. I love it! Thank you for sharing this today.
ReplyDeletewhat a great job you did on the cake stand. everything looks fall ready and stylish.Thanks for the rice paper tip. I love to decoupage and haven’t dried that.
ReplyDeleteVery nice, and the rice paper you chose for your project is so pretty!
ReplyDeleteWhat a beautiful transformation! Your cake plate looks lovely. I love doing things like that too! Have a wonderful weekend.
ReplyDeleteKim...you always do a wonderful job with your tutorials. I absolutely love the pattern you used, and I am a cake stand hoarder too. When we moved into the apartment I realized I had to give a couple to my daughter...now she likes them lol. So happy you joined in with us...Happy Fall!! ~ Julie from redheadcandecorate.com
ReplyDeleteWhat a wonderful tutorial and such a beautiful makeover!
ReplyDeleteKim, this turned out SO cute! I have a weakness for cake stands too, and have more than I need (still packed away). The rice paper pattern you used is really pretty! I'm going to have to check that out! Thanks for the inspiration!!
ReplyDeleteLovely project. I really like the combination of papers that you choose. I have never played with rice paper, only done the napkins decoupage, but now I have to go hunt for pretty rice papers.
ReplyDeleteKim, you did a great job with the thrifted cake stand. It looks beautiful and perfect for fall. I hope you enjoy the weekend.
ReplyDeleteKim,
ReplyDeleteWhat a great idea... Love it!! Looks really pretty in your Kitchen!!
Hugs,
Deb
Kim, I love the vintage look you've created on your cake plate. I've never used rice paper to decoupage, and napkins do tear easily. Thanks for the tip! Happy Fall :)
ReplyDeleteRebecca (Zucchini Sisters)
GORGEOUS makeover, Kim!!
ReplyDeleteI'd love for you to join us over at the Creative Crafts Linky Party every Wednesday through Sunday
https://creativelybeth.com/creative-crafts-linky-party/
Followed and Pinned!
Creatively, Beth