All you need is a large glass plate, a few napkins, some Mod Podge and a little imagination.
I pop in on my way to the grocery store.
Map out trips to shops far, far away.
Sometimes, I'll even yell, STOP, when my husband and I are out running errands.
After all, he has a pick up and you never know what you may find.
Of course, most of the time, my treasures don't require heavy lifting.
Like today's lucky winner in the what can I make with you game I play once I get everything home.
I found this very large glass plate for 50% at a shop over the winter. It was a whopping 13" in diameter.
I had no idea what I was going to do with it or where I was going to display it, but it was a unique piece for $3.50, so I grabbed it.

At first though, I was stumped.
Then the heat rolled in and I was all about Christmas in July crafts, and I thought, wait a minute, this would make a great serving platter for the holidays.
I'd made a little decoupaged glass plate for Christmas before and it was darling. So I figured a bigger glass platter would be even better.
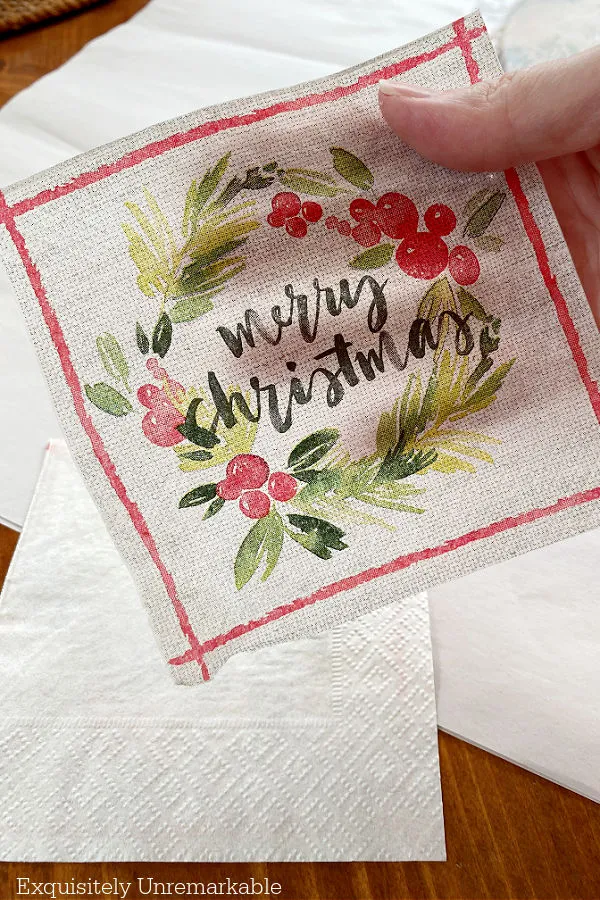
Plus, I had a few Merry Christmas napkins leftover from an old sled makeover on hand.
Coincidentally, I also was tasked with coming up with a glass upcycle for this month's Do It Over Designers Hop, hosted by my friend Ann from The Apple Street Cottage.
Participating in a fun DIY party with friends and a little Christmas in July crafting.
How perfect.
How To Make A Decorative Glass Christmas Platter
Keep in mind you can use this crafty technique for any holiday or occasion. Just swap out the Christmas napkins for ones that match your theme.
Ok, so I started by gathering my supplies:
- Glass Platter or Plate - Dollar Tree has glass dinner plates
- Christmas Napkins
- Rice Paper
- Mod Podge or Dixie Belle Satin Clear Coat - they do have Dishwasher Safe Mod Podge although I've never tried it. If you plan to really wash the plate with heavy soap and water if might be worth looking into.
- Paint Brush
- Scissors
- Razor Blade
Step 1. Prep The Platter
Starting with a clean surface is always the best way to go. So I grabbed a razor blade to thoroughly remove the sticky price tags.
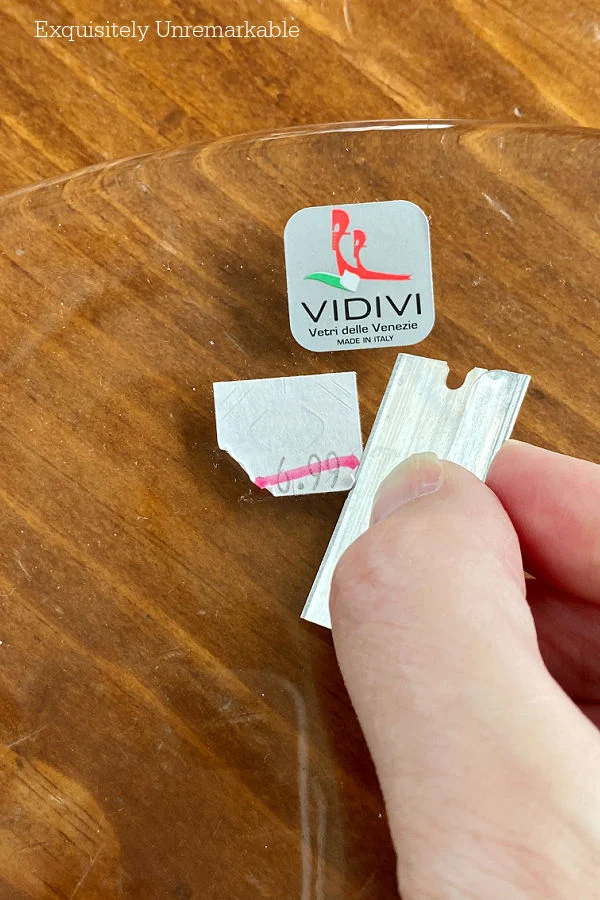
I paid special attention to the bottom of the plate since that's where I was applying the papers.

Step 2. Prep The Napkins
Napkins are a great way to add pattern to glass, however, they're not the easiest to work with...I've found that rice paper is amazing and favor it.
However, rice paper is much more expensive and doesn't always come in patterns I like or need. Napkins are available everywhere, in designs for every holiday and season and they're cheap.
Ding ding ding. We have a winner.
But again, they're a pain and I usually grumble my way through the process.

Then I had to seperate the three layers of paper so I was left with only the decorative top sheet.
Some napkins only have two layers, other look like they only have two layers and then when you apply the Mod Podge that sneaky third layer makes itself known as it bunches up and the slides right off your prepped surface.
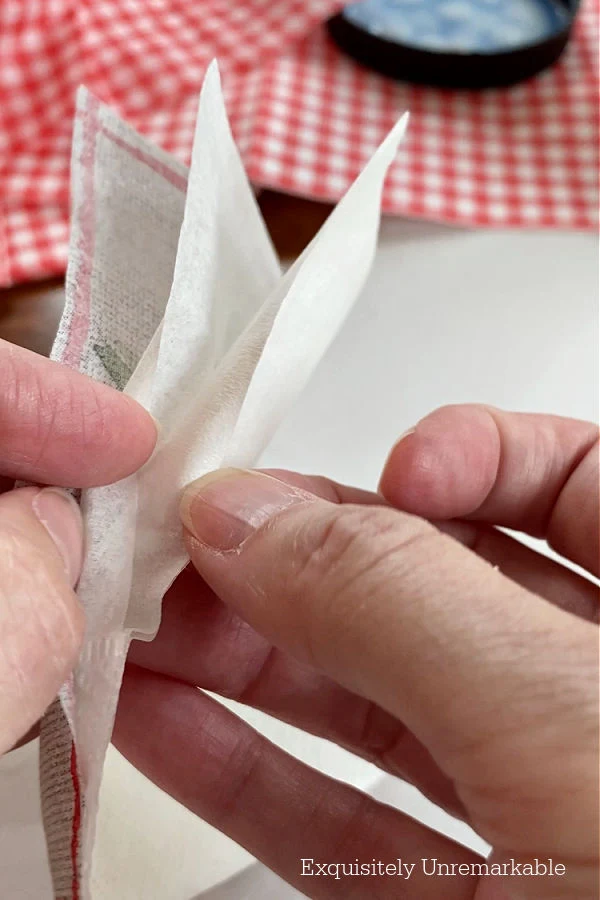
But armed with experience, I knew there were three layers and pulled them all apart.
Step 3. Prep Rice Paper
Oh yeah, there is none. 😉
Ok, well if you have a huge sheet of it and your project piece isn't that big, you can cut a smaller piece to fit.
I was using a scrap leftover from my cottage style wooden Christmas tree trio, so no cutting for me.
Looking for another no fuss, quick crafting trick? Peek at the Christmas sled I decoupaged with fabric. Super simple.
Step 4. Apply Decoupage
Once my napkin and paper were prepped, I loaded my brush with satin sealer and coated the entire back side of the platter with it.
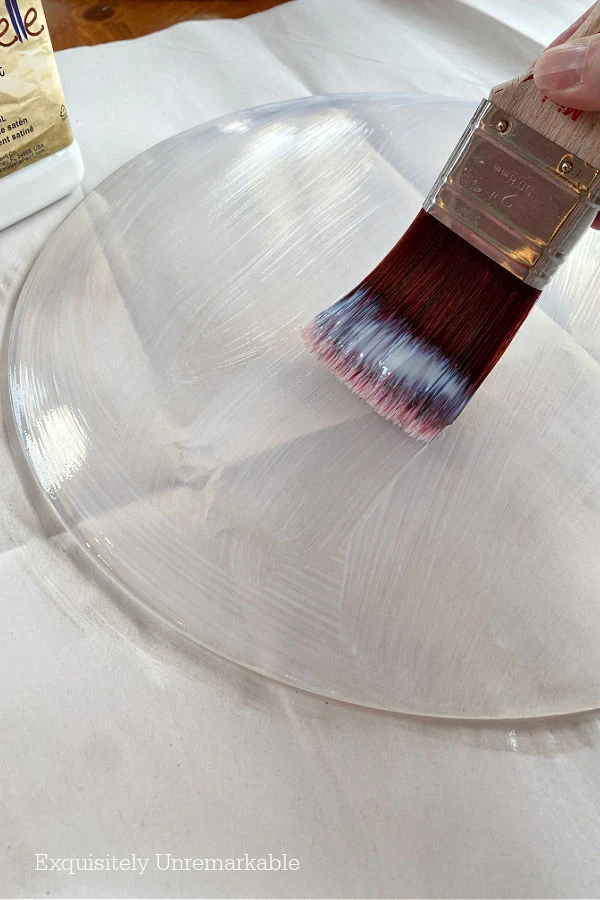
I used a bristle brush, but you can use a foam one if you prefer.
Now, people ask all the time, can you eat off a Mod Podge plate and the answer is no. It's not approved for food use. That's why I only put it on the back of the glass plate.
They also ask if the Mod Podge will stay on glass if washed. It will. You can't soak it and even the Dishwasher Safe Mod Podge is unreliable when in water for a long time.
But you can give it a quick wash especially if you're only really washing the top. That technique has worked well on the decoupage glass cutting board I made years ago.
Step 5. Add Napkin and Rice Paper
Next up, I carefully laid the small Christmas napkin, face down in the center of the glass.

Then I smoothed it out. A plastic zippy bag or latex/ rubber glove makes that job very easy.


Immediately following that, so the decoupage medium didn't have time to dry, I placed the rice paper on top.
And again, repeated the plastic baggie trick.

Then I brushed decoupage on the top of the rice paper.
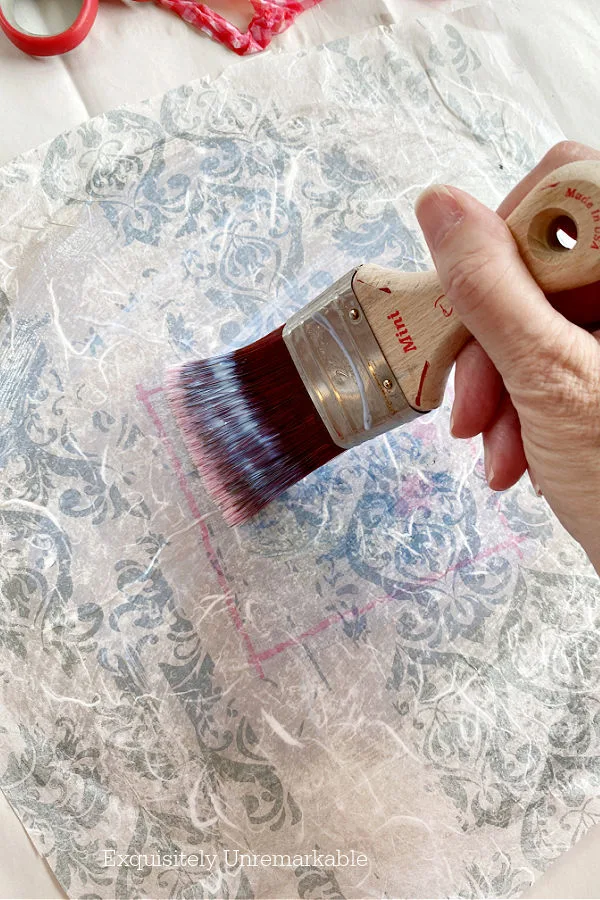
I made sure to get every bit of the glass plate, including the rounded edges, so the paper wouldn't peel away when it dried.
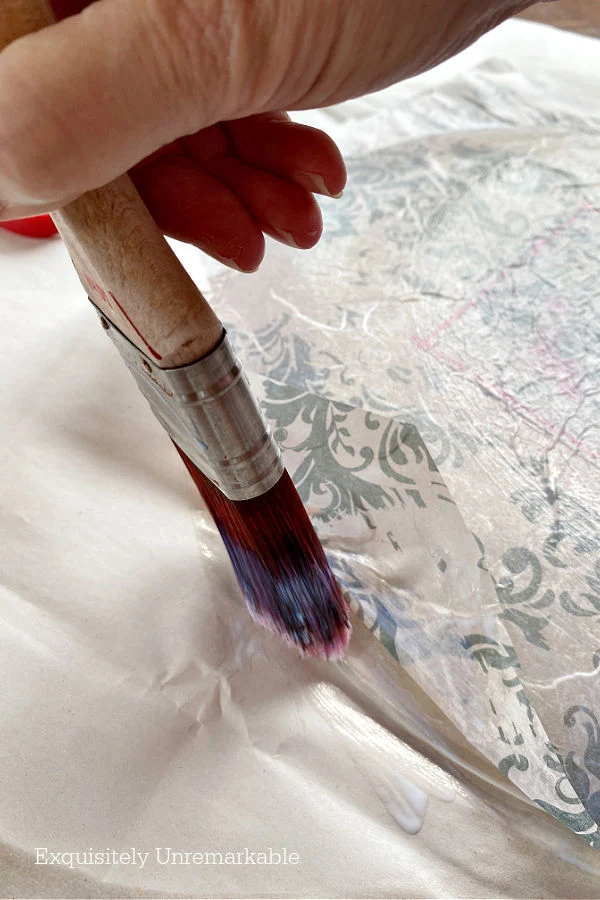
Step 5. Let It Dry
So this was probably the most important step, since there were 2 layers to this decoupaged glass platter.
I didn't want any part of it to be wet when I tried to trim the edges, so I left it alone for hours.
Step 5. Trim
Only then, did I use a super sharp razor blade and very carefully ran it along the edge of the platter to remove any jagged paper edges.
The rice paper cuts easily and cleanly. It doesn't bunch or snag, again, so forgiving to use.
When I was done, I had a showstopper of a glass Christmas serving platter.
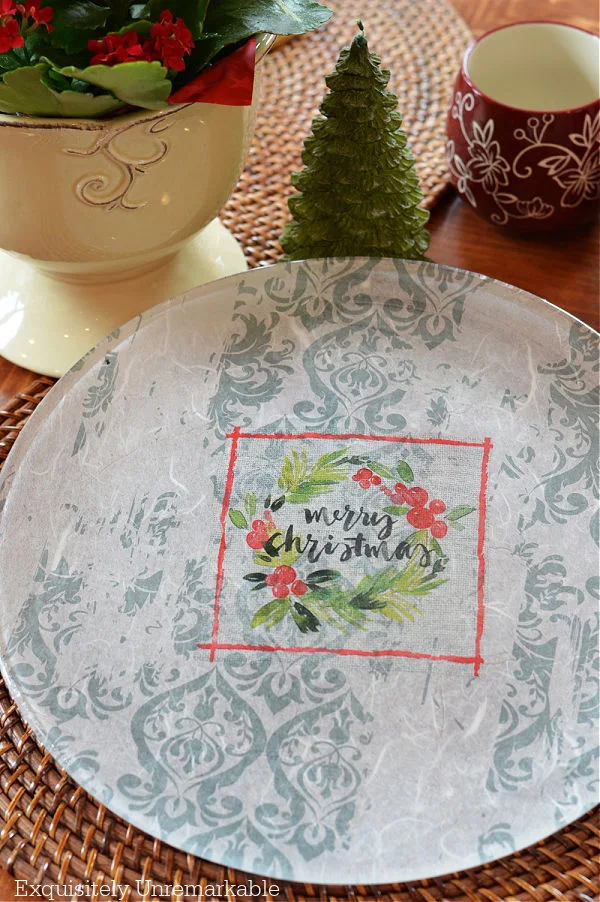
For $3.50.
Best of all, it's so festive on its own, I can display in between all the parties.
To decorate my Christmas home.
How fabulous.
🌲

Hey, before you go check out all the other creative glass projects from my friends.

Let's hop!
Little Vintage Cottage
Modern on Monticello
Pandora’s Box
Purple Hues & Me
Southern Sunflowers
Unique Creations by Anita
The Apple Street Cottage
Color Me Thrifty
Exquisitely Unremarkable - It's me!!
Happy Crafting, Friends!


Great idea! I usually struggle with decoupage, but you make it look so easy - well done!
ReplyDeleteThanks so much, Patti! It really is easy once you get the technique down.
DeleteSo pretty, Kim. I've never tried rice paper for decoupage, only napkins which can be tricky if you're not careful! Sooo, what will you be serving? Cookies? canapes? Either way, you're all set for holiday entertaining!
ReplyDeleteThanks Ann!! I say give the rice paper a chance. It's such a game changer!
DeleteHi. I am just starting crafting. I decoupaged some fall leaves and that's it! Just curious - for this project do you have to use rice paper? Truthfully, I don't even know what it is!!
DeleteDid the rice paper you used have a design to it because it looks that way to me
The plate is adorable...I hope my attempt comes out ok!
Hello!! I'm so happy you're giving crafting a try. It really is a lovely hobby. I think if you can decoupage leaves, you can decoupage anything! Leaves are tough to work with, they are so delicate. For this project, you can use anything you like, napkins, scrapbook paper, fabric or even leaves. Just have fun with it. Decoupage rice paper is just a bit sturdier than napkins. It does come in all sorts of patterns and styles. Etsy has a lot of choices. I actually just posted today about another rice paper decoupage craft if you want to check it out in another DIY.
DeleteThis is the link:https://www.exquisitelyunremarkable.com/2023/11/upcycled-cookie-sheet-christmas-sign.html
I hope you enjoy making your own platter and I hope you'll follow up and let us know how it goes!! 😊
Your platter turned out lovely, Kim! I'm sure you will enjoy using it during the holidays! I love decoupaging. It's amazing what you can do with it! I've used printed napkins in most of my projects but recently I started printing out personal photos and pictures on rice paper. and discovered I love decoupaging rice paper better than using napkins. The material is so much easier to decoupage.
ReplyDeleteI totally agree, Gail! Rice paper is a game changer...but tell me more about printing on it! That sounds very cool. I think I'd like to try it!!
DeleteWhat a great project!- Kim! Your plate is gorgeous. I love to decoupage with all kinds of paper and fabric, but I've never tried napkins or rice paper. I'll definitely have to give it a go.
ReplyDeleteThanks so much, Tuula! I just started using the rice paper and last Christmas I decoupaged with fabric on an old sled for the first time. I have to say, I loved that, too.
DeleteI love decoupage. The napkins designs are so pretty. This was a great idea. I have never tried rice paper. Hugs and Happy Weekend. Kris
ReplyDeleteIt really is a great way to totally change things up and turn them into something completely new and different..and rice paper is awesome!! Happy Summer and Merry Christmas!!
DeleteOooh, how pretty! I have not tried rice paper before, I'll have to keep my eye out for some.
ReplyDeleteThanks so much, Tania! I say try the rice paper…it’s a game changer!!
DeleteIt turned out great! I agree, you can display it and use it. And we all need large platters at Christmas!
ReplyDeleteIt was such a great find, I'm glad I grabbed it...and thanks!!
DeleteVery pretty result. I will be adding rice paper to my list of future projects.
ReplyDeleteThanks so much, Anita!! You are so very creative, I know you'd do something so cool with it.
DeleteDarling, and easy to do!
ReplyDeleteThanks Deanna!! It was so easy.
DeleteI love it and won't you be happy when Christmas roll around. xo Laura
ReplyDeleteThanks so much, Laura!! Merry Christmas!!
DeleteMerry Christmas... it is perfect. :-)
ReplyDeleteThanks Carla!! Merry Christmas!!
DeleteWhat a wonderful one-of-a-kind platter idea! That platter was a great price. I'm like a few others above not having used rice paper before. I saw some recently at JoAnn's, but I was on a scrapbook paper mission. Maybe one day....
ReplyDeleteThanks so much, Allyson! I love the rice paper. I say if you get the time and chance, try it!!
DeleteThis turned out really cute, I love to decoupage, it's like magic!
ReplyDeleteJenna
Thanks Jenna! I love decoupage, too. It’s such an easy way to totally transform something…like you said, it’s like magic!
DeleteKim, I love how you are redecorating you plates and cake stands for the holidays. This plate looks perfect and you did a great job. I wish I had room for these types of items in my house!
ReplyDeleteThanks Julie! I do love crafting, but I get it...this tiny cottage is overflowing with DIYs. I'm running out of room!!
Delete