Instead, I used fabric and wallpaper to turn my boring cabinet into a charming country cottage style piece in no time flat and for under $10.
Way back when, if anyone had told me that fabric would play a major part in my decorating, I would've laughed.
Paint and wallpaper, sure.
My mom was a huge fan of both. I grew up in a house plastered with paper, flowers and bold colors.
But fabric?
Eh.
Sure, there were heavy drapes and my mom had patterned couches - big surprise - but I was more enamored with the murals of ancient Rome on the wall, than the solid colored curtains.
Of course, now, everything's changed.
Fabric is my muse.
The patterns and colors define my rooms. They add softness and personality.

Plus, fabric has the power to transform hard edges in a flash.
Like in the bathroom.
Shower curtains, window treatments, shuttered doors and lamp shades warm up those cold, glass and tile filled spaces.
And you don't even need to know how to sew.
Last week, I gave my boring bathroom vanity a makeover that totally transformed the piece and in turn my entire room.
And it was an easy DIY that anyone can accomplish.
Update A Bathroom Vanity On A Budget (and no paint)
This is where I started.
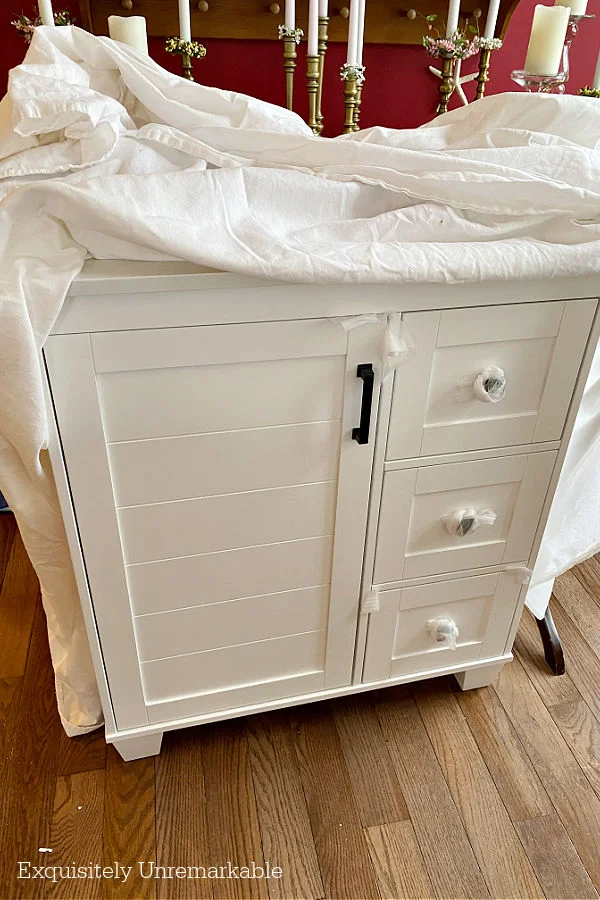
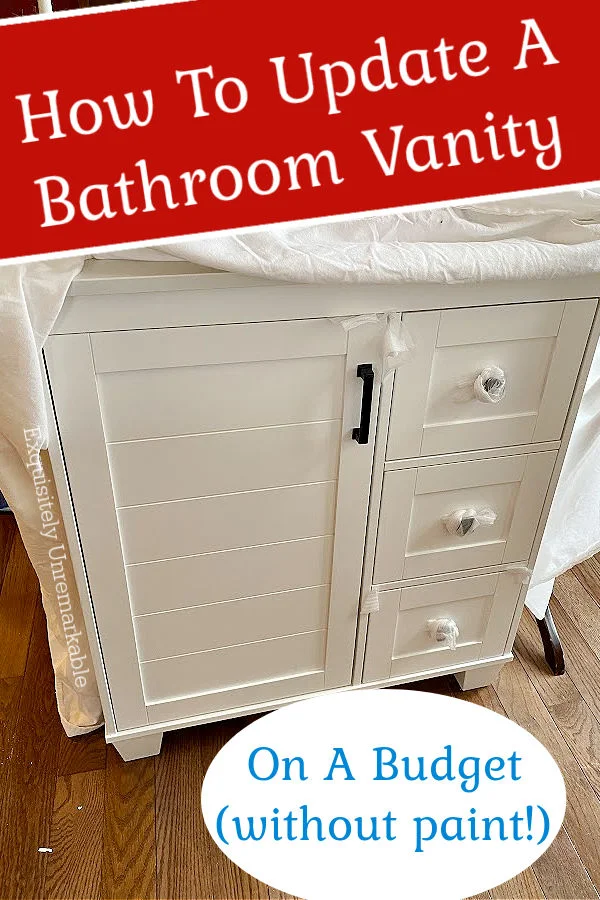
This plain white vanity, I grabbed off the shelf. Pretty, but basic.
The handles were too modern, and while I did like the paneled look, it was too plain for my color filled cottage. The handles were an easy swap. The rest of the vanity took some thought.
Especially since I didn't want to paint another bathroom vanity. The finish was new and in great shape. Nope, not an option.
Instead, I opted to add fabric. A $4.99 remnant and it changed everything.
Step 1. Remove The Center Panel From The Door
Luckily, the door had a removable center panel. All I had to do was unscrew the clips to set it free.
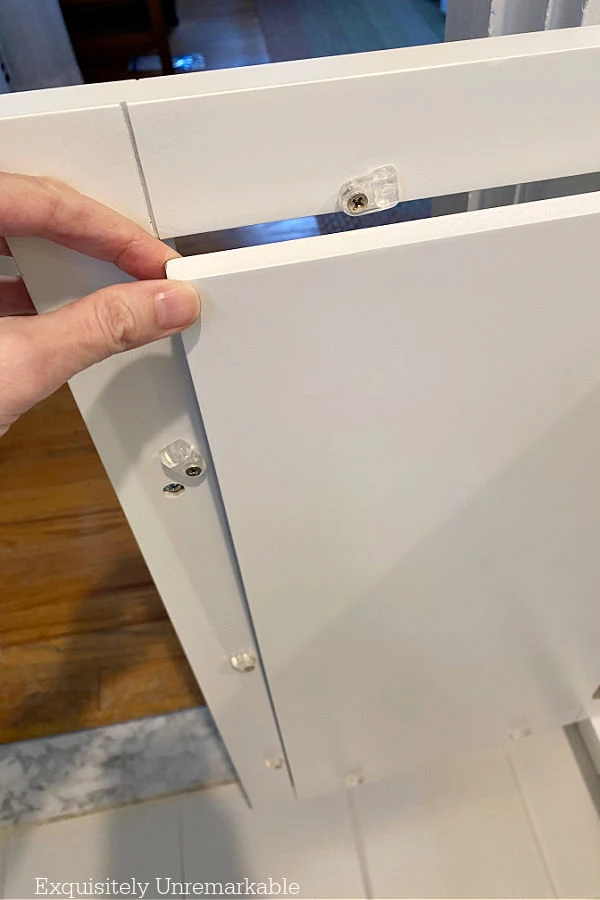
Then I just popped it out to reveal an open space to place my fabric.
Now, clearly, most vanities and/ or cabinets are not made like this.
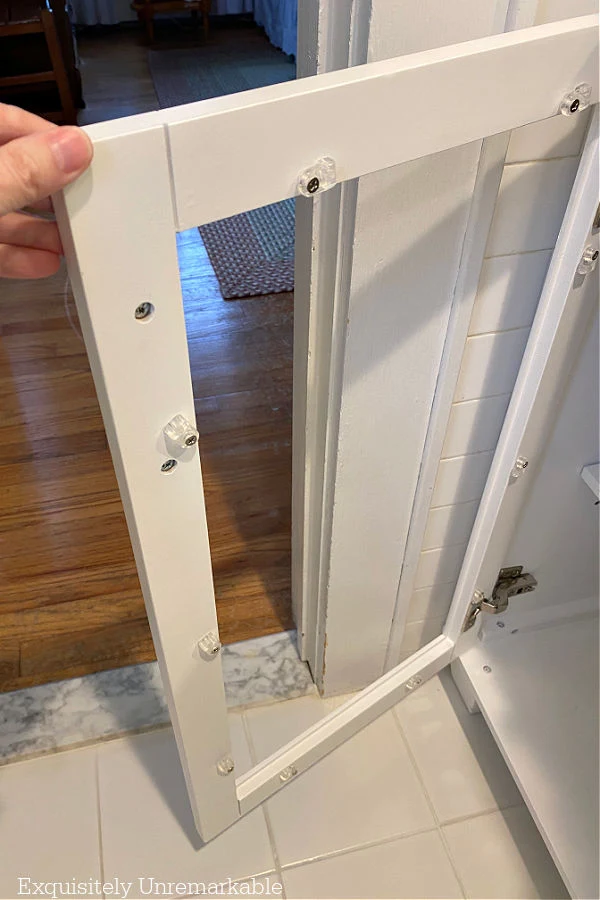
No worries.
There are lots of options to add fabric covered doors to your own vanity.
- You can cut the center panel out, like we did with our shutter doors, since most are just tucked inside a channel in the frame.
- You can make a simple door frame with wood strips. My door doesn't have mitred corners, so there's nothing fancy about the construction.
- You can actually even use the same technique we used to for our kitchen sink skirt. That left the cabinet doors intact.
It's a versatile DIY that won't damage your wood or require you to add a curtain rod to the inside of your door. Plus is fast and removable.
Step 2. Add Velcro
All I did was take some sticky velcro tape and add it to the top and bottom of the door frame.
I left both sides together, so one side of the tape was stuck to the door and the other side was exposed, to grab the fabric.

Step 3: Attach Fabric To Velcro
Next up, I cut my fabric into a rectangle that was about 1.5x the width of the door, to leave room for pleating.
And I stuck it to the velcro tape, starting at the top and gathered it as I moved across the door frame.
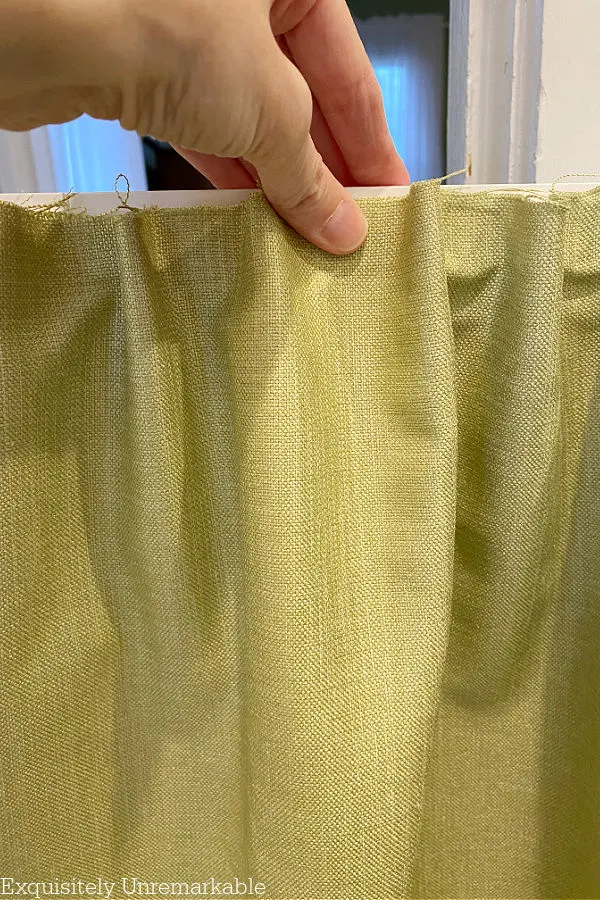
Then I moved onto the bottom, using the same motion and process as I used to attach the fabric to the top of the vanity door.

Occasionally, I'd shut the door to view it from the outside to make sure my pleats were straight and visually appealing.

Step 4: Trim Excess Fabric
When I was satisfied with the look, I grabbed my scissors to trim away any excess fabric.
I didn't need to hem any of the edges, but if you have a fabric that does tend to fray, you can always use an iron on tape to seal the sides up.

Adding Wallpaper To Line The Drawers
Of course, my love of wallpaper hasn't diminished, so I incorporated some of the excess from my family room renovation into the design of my unconventional bathroom vanity makeover.
In the past, I've used contact paper to line drawers. That was easy, peel, stick and go.
Using wallpaper to line drawers was a little different, since it wasn't the peel and stick kind like I used in my kitchen pantry.
There was no stick and I wasn't willing to paste it to the wood.

Instead, I bought a roll of double sided tape, cut the wallpaper to fit the drawer exactly and stuck it inside.
Flowers everywhere.
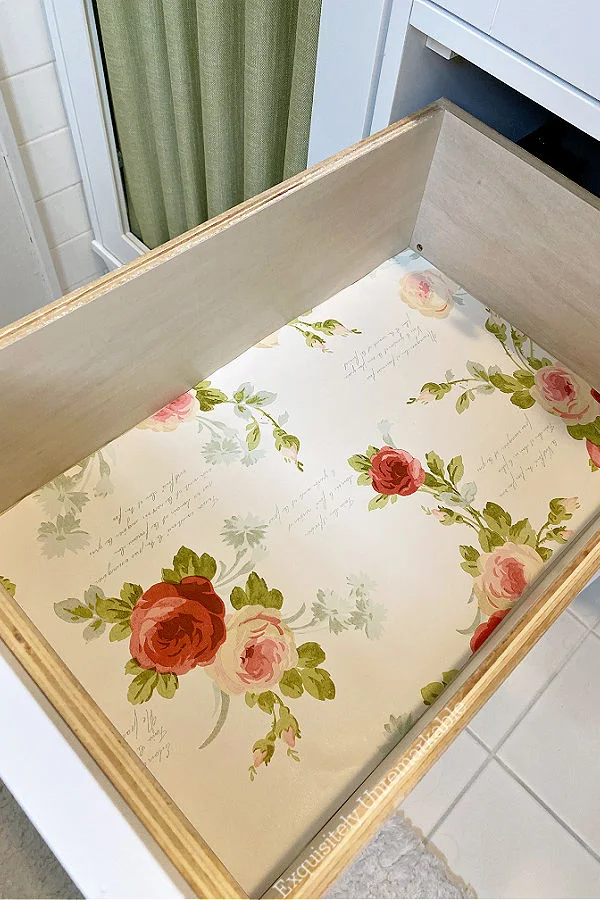
When I was done, I had a totally transformed cottage style bathroom vanity.
It cost me less than $10 in supplies and took me less than an hour to complete.
And I didn't even need to pick up a paint brush.
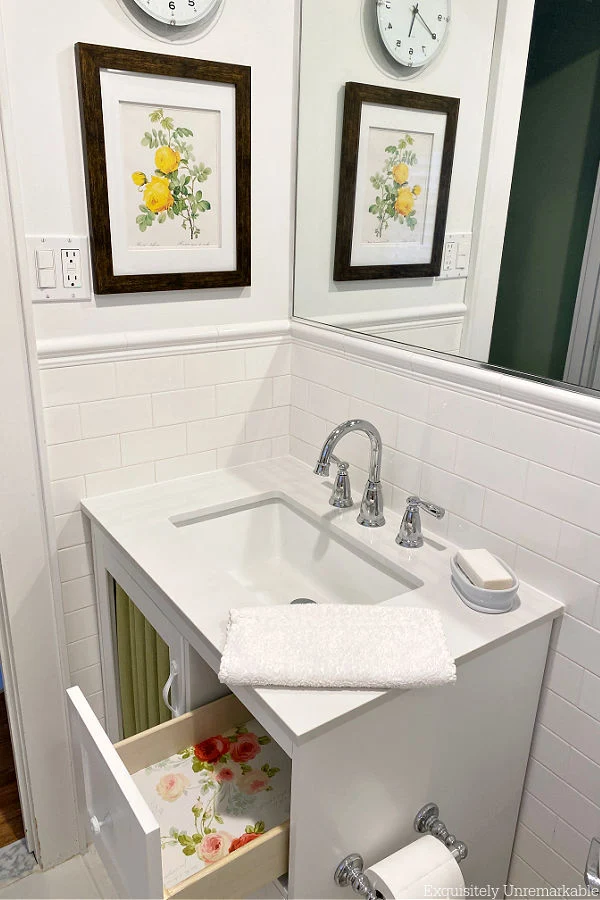
Thanks to my love of fabric.
Amazing.
Resources for this post:
How do you feel about fabric?

Happy Crafting!!


Good for you, you did GREAT!!!!!! And you already know that fabric is queen AND king in my house!!! Now, if my town just had a fabric store, things would be perfect in my world!!
ReplyDeleteBlessings,
J
Thanks J! I just ran into that lovely green fabric at the one and only shop that sells fabric off the roll in my area. Of course, that might not be a bad thing, since I think I'd be broke if there were more shops to take my money. I feel like you'd be in just as much trouble! Haha!! ☺️
DeleteI love the fabric idea and the velcro to make it easy to attach. Also the wallpaper for drawer liner is genius too. Love them both. Happy Friday. Have a great weekend. hugs. Kris
ReplyDeleteThanks Kris! I love the way it looks now…makes me smile every time I go in the room. Plus, no more bending down for me!! Yay! Happy Mother’s Day! xo
DeleteI love what you did Kim. Did I tell you we are updating our two bathrooms? We painted each one. We are stripping the original oak door and medicine cabinet to the original wood. A big job, but it is slowly coming along. We need to get it done by Wednesday... my uncle and aunt from Texas are coming for a visit and staying with us. ;-)
ReplyDeleteOh boy! That's quite a deadline to beat. I bet the original wood is gorgeous. I can't wait to see the makeover and good luck with your project and your deadline!!
DeleteWhat a beautiful makeover. Using that velcro is a pretty nifty trick. I've never seen it done that way before, but now I want to add fabric to every door in my house.
ReplyDeleteThanks so much! It's a dangerous habit for sure, but it really does add a ton of charm to a room. If you do try it, I hope you'll let me know!! Happy weekend!
DeleteThe bathroom cabinet look great! I love the colors you chose. Great project.
ReplyDeleteThank you so much! I'm so glad I was able to find a way to give it a little color without paint!
DeleteKim, you did a great job updating your vanity with fabric and lining the drawers with wallpaper. You always take everything to the next level and making it look unique and beautiful.
ReplyDeleteJulie, you just totally made my evening. Thank you for that super sweet comment. ❤️
DeleteI love the fabric insert, Kim! Great job on explaining the how-to. Plus, the drawers would make me so happy every time I opened them! They’re so pretty!!
ReplyDeleteThank you, Kitty! It was a fun way to give it a little colorful charm, without damaging the piece. I'm also obsessed with that wallpaper so it was fun to have another place to use it.
DeleteI would never have thought to replace the door with fabric, but it does look pretty! Isn't it something how a drawer liner can make you smile every time you open the drawer?
ReplyDeleteI guess you can tell I’m truly a fabric junkie when you find it in the bathroom!! Haha!! I hope you’re enjoying this long weekend, Amy. Thanks for the visit!
DeleteIt's pretty, but fabric in a bathroom seems unhygienic to me.
ReplyDeletePersonally, that doesn't bother me at all, since it's easy to launder if it does get messy, but there's really no reason to touch it, since the cabinet has a handle. Plus, most people already have shower curtains, window curtains, rugs and towels in a bathroom, so I don't think it's any different. However, I always encourage people to decorate with what they love and what works best in their own home. So I appreciate you sharing your thoughts, since it might resonate with someone else. 😊
DeleteI would have used the drawer liner on the inserts in the drawer front by removing the knobs and then adding the paper and replacing the knobs back. Otherwise great idea.
ReplyDeleteThanks! Great idea, I have extra wallpaper so I just may do that!!
Delete