Sometimes the ugliest thrift store finds can make the most beautiful DIYs.
My wooden candle holder makeover turned a burnt, waxy mess into a stunning piece of decor.

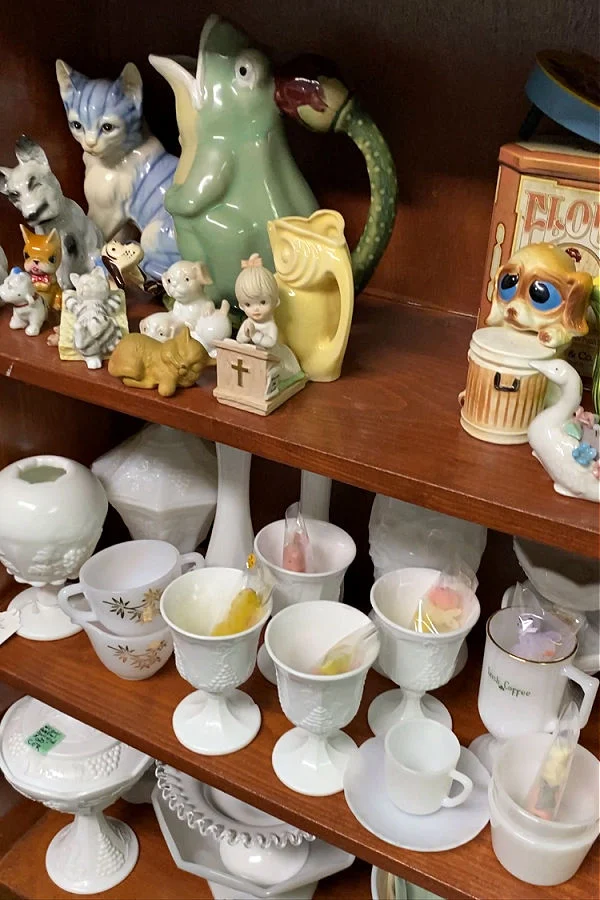
I used to enjoy popping into one occasionally. On my way to a Marshalls or HomeGoods.
However, over the past two years, I've completely abandoned the chain stores and find myself browsing the thrift aisles on a regular basis instead.
Why?
Well, for one thing they're all in different towns, so they all have very different types of merchandise.
They also get new items daily, so you never know what you're going to find and, best of all, since they're second hand shops, everything is cheap.
And let's face it, that's the best part.
You see, then I can shop to my heart's content and not spend more than a few bucks for a big thrill.
A new decor accessory.
Or a crafty DIY challenge.
My favorite.
Sometimes, the challenge seems so great, it's almost like I'm daring myself to see if I can make some true treasure out my...well, not trash...but...sometimes, yes. Trash.
That's exactly what happened when I found today's makeover.
Granted, it was in really, really bad shape. Truly terrible shape, but unique enough to pique my interest.
In perfect condition, they go for about $46.00. Mine was two bucks, which was still too much in my opinion. In fact, I walked by it several times.
But in the end, its siren song was too powerful to resist.

Charred. And they left a black, chalky dust on my hands every time I touched one.
Oh boy. I honestly wondered if I'd made a mistake, but I decided to give it the old Exquisitely Unremarkable try.
My Wooden Candle Holder Makeover
Now I know mine is very unique, but I hope you can use this idea if you find or have an old wooden candle holder that's in need of little love.Supplies:
- Spray Paint <--- I used this one
- Rub and Buff <---this color
- Antiquing Gel <---like this one
- Sanding Sponge <---these work well
- My Favorite Battery Candles <---And 50% off with coupon
- Floral Garland
- Vinegar
- Zippy Bags
- Paper Towels
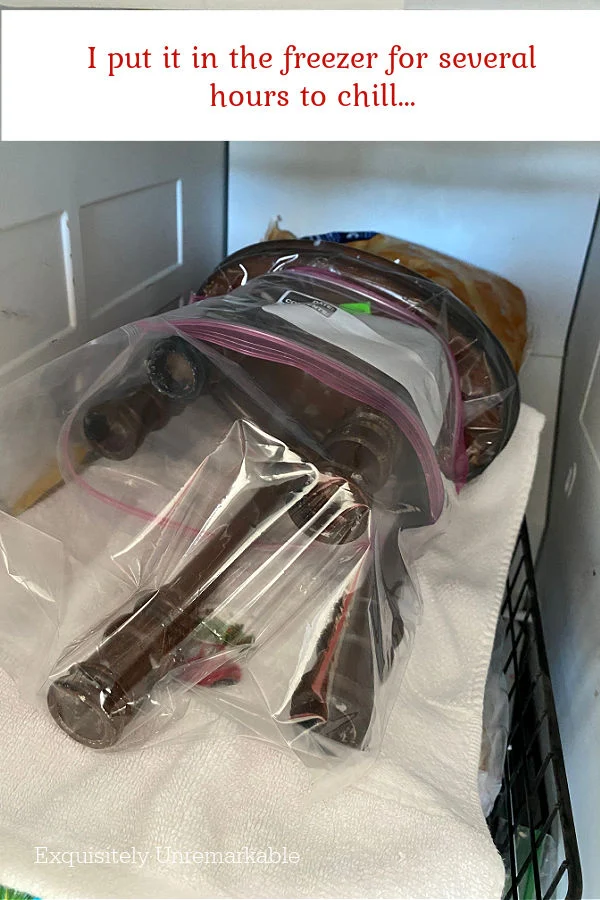
Step 1. Freeze It
I started by placing the entire icky holder in two ziploc bags and placed it on a towel in my freezer.

Step 2: Remove The Wax
Several hours later, when it was super cold, I took it out and used my nail to flake the frozen wax off.
It was a simple job and when I was done, I had enough wax to make my own candle.

I did have to use a screwdriver to pop the old wax out of the candle cups.
There was just too much of it for the nail trick.


Step 3: Clean It
Then I wiped the entire piece down with a little vinegar/water solution and a dry paper towel.
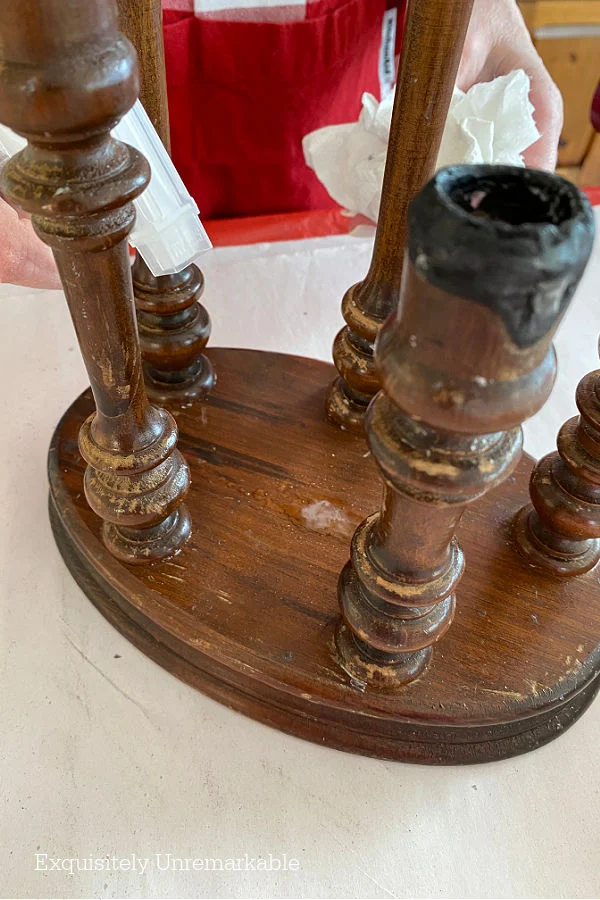 |
| Looking better already! Well, if you ignore the fire damage. 😉 |
Step 4: Paint It
Now originally, I had planned on using Rub N Buff to cover the wood. Clearly, it was in no shape to be refinished and I had no intention of rebuilding the charred cups with putty or wood filler.
That meant covering the wood with color was my next best option. But.
I'd never used Rub N Buff before and once I opened it and smelled it...nope. It was too stinky for my tricky lungs. It also looked like a lot of work to cover all those intricate spindle details.
Instead, I opted for spray paint. Tried and true.
(And my husband does the painting!)

I've become a real brass candlestick junkie lately, so my intention was to turn this wooden charmer into a show stopping centerpiece to match my collection.
The tone just wasn't warm enough to coordinate.
That's when I grabbed gloves, a mask and my coat, and sat outside and gave the base a quick coat of the Rub N Buff after all.
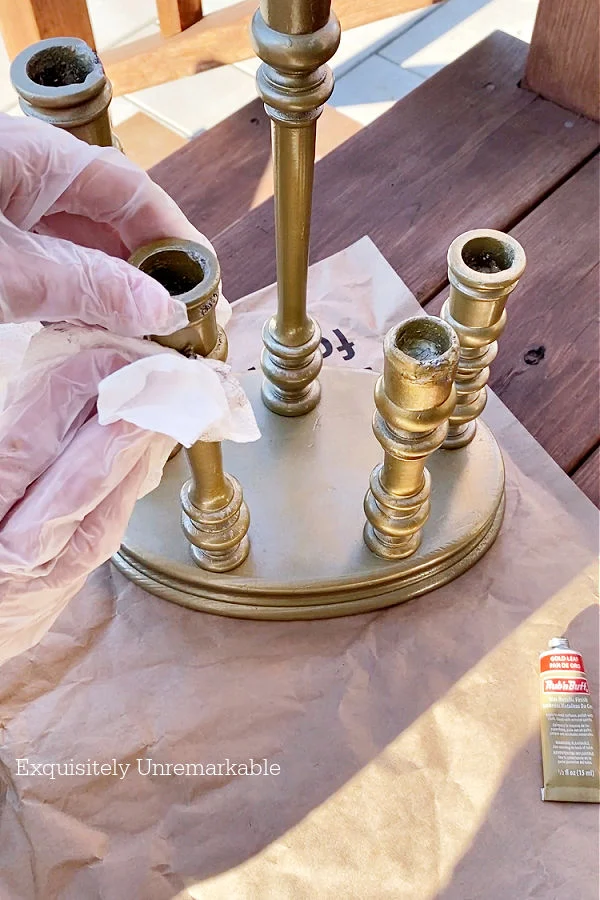
In a last ditch effort, I grabbed a jar of brown antiquing gel and coated the entire piece with it. That did the trick.

Step 5: Add Floral Rings
My last issue was those burned cups.
The charred areas were now gold, but the cups were still misshapen. They didn't look terrible, but they weren't really good looking either.
That's when I decided to make two quick floral beaded candle rings to cover them up. Plus they added a bit of interest.
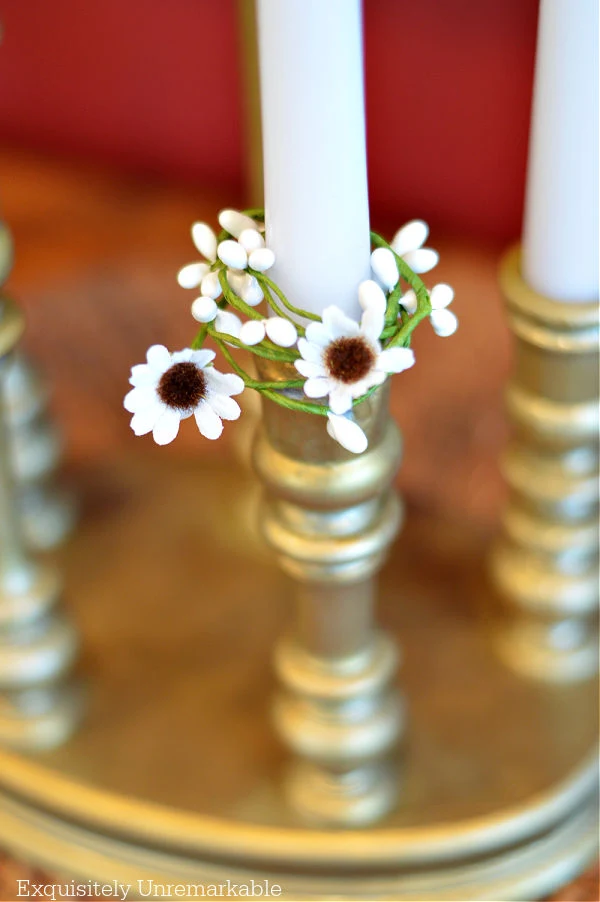
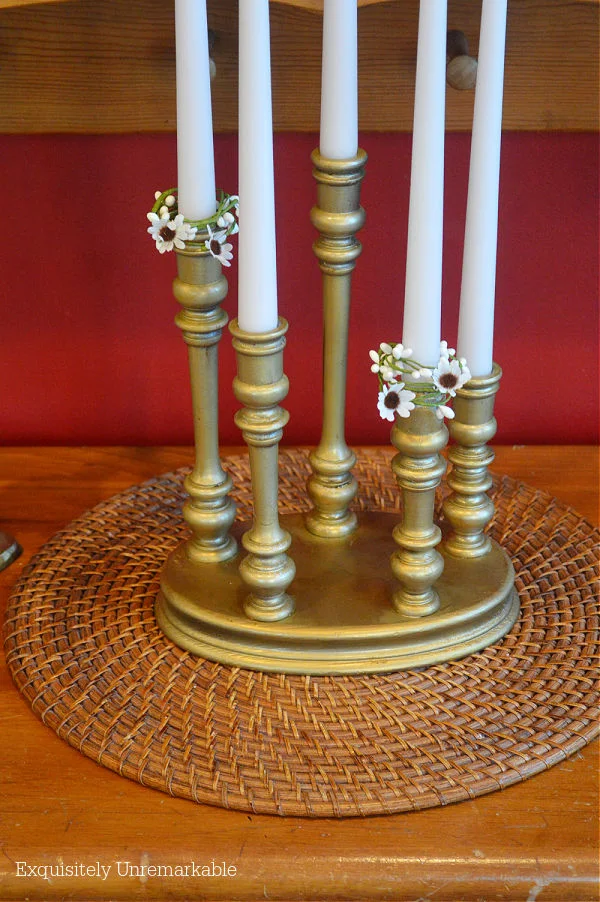
With real candles.
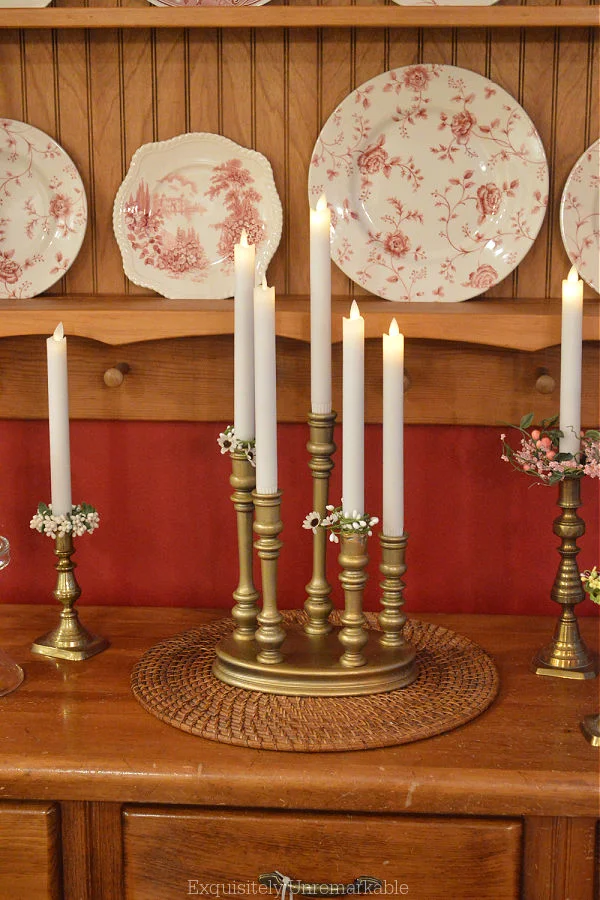
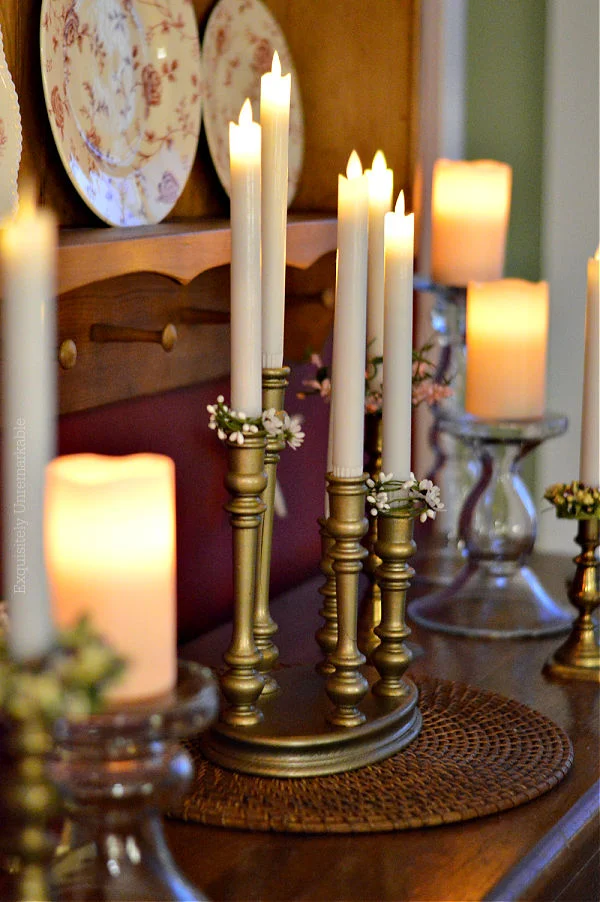
Or better yet, my favorite battery operated timer tapers, since I don't think this poor baby could endure another round of fire damage.
Either way, it looks outstanding.
Silly girl.
😉
I hope this inspires you to take think twice the next time something closer to trash than treasure catches your eye at a sale.
I also hope you'll stick around and check out all the links below for today's Thrifty Style Team hop hosted by Julie from Redhead Can Decorate.
Mine is not the only shocking transformation being shared today.
Look at all these befores...you know you want to see the afters!

Let the hopping begin!!
Redhead Can Decorate - How to Create a Thrift Store Basket Wall Corner
Our Crafty Mom - How to Make a Vintage Tea Cup Planter
I Should Be Mopping the Floor - Cheese Dome Turned Seasonal Cloche
The How to Home - 10 Ideas for Decorating with Thrift Store Antique Bakeware
DIY Beautify- Easy Flowers From Mason Jar Lids
Songbird - Thrift Store Bunnies Makeover
Simple Nature Decor - Beautiful Decoupage Wall Art
Zucchini Sisters - Thrift Store Ceramic Cherub Makeover
Exquisitely Unremarkable - That's me!
A Life Unfolding - Ten Thrifting Tips and Tricks
Happy Thrifting Friends!!


Wow, this looks fantastic! Send some goof thrifting our way.
ReplyDeleteThanks Cindy! I had a feeling this one had great potential…and for two bucks I was willing to take the risk!
DeleteHappy weekend!
love this ! turned out great and i agreee to skip the retailers and go thrifting
Deletelove this tutorial
DeleteNow that’s waxing poetic!
ReplyDeleteThought you might need an intervention till you said battery candles. Love the rings, too. Awesome vision!
Haha...yes, battery candles for sure. That poor little candle holder had literally been through the fire and once is enough for sure! And thanks so much, this was a fun one!
DeleteThat turned out great. I think that is a talent to be able to spot the potential in something most people would pass by. Love it and it's a beauty now. Well worth the effort.
ReplyDeleteOff on a trip with 3 of my girls and I am driving on snow covered roads--3 hours I think. UGH...It's still snowing and ugly. xo Diana
Thanks Diana! I'm not sure if it's a talent, but for me, at least, it's fun. I like the challenge and the process of dreaming about what it could be...I hope you have / had a safe trip. The weather has been wicked in your neck of the woods this winter. Maybe the later sunset will scare the snow away for good!! xo
DeleteYou did it again! It looks so good!
ReplyDeleteThanks Deanna!! I really do enjoy the process and the challenge.
DeleteWow! Kim, you did a great job with this makeover. I love how the candle holder looks spray painted gold with those pretty candles. Enjoy!
ReplyDeleteThanks Julie! Thank goodness for spray paint…and a husband who is willing to do it for me. Hahaha!!
DeleteWow, another great find and thank you for the tutorial. I was able to go thrifting with my sister when visiting her. I found several fun finds.
ReplyDeleteI agree, visiting thrift stores in different areas is fun too. Eagle River is a tourist town. The thrift shops are full of a lot of cabin stuff.
Carla
Thanks Carla, and thrifting with your sister sounds like fun, especially in another town. I love the local flair of shops like that and the rustic cabin stuff sounds cool. We don't have a lot of that here and I like it!!
DeleteLove the battery operated candles great idea. The gold looks so pretty. Great re love. Hugs. Kris
ReplyDeleteThanks Kris! It was in such bad shape I almost couldn't believe the thrift shop didn't throw it away...I guess that was my good fortune. Hugs to you and have a great week!
DeleteYou have a much better eye than me! I saw that and wondered what you could do to make it look better! And you did it! The little flower rings add so much to it as well. Nice job! And now I'm off to visit some of the others.
ReplyDeleteThanks Mari! Funny thing, I bought that little garland to make candle rings for spring on my other tapers, so I had it on hand. I guess it was meant to be!
DeleteWell that most definitely qualifies as a shockingly good makeover, Kim. 10/10. You'd never guess it was the same sad candle holder.
ReplyDeleteShockingly good....ooh...Michelle, what fun words! Thank you!!
DeleteThis looks soooo pretty! Wasn't sure you were going to pull it off for a second! :)
ReplyDeleteThank you!! Yes, you and me both..especially once I got it home and saw how badly the cups were damaged, but there's not a lot spray paint can't fix! Thankfully!
DeleteKim,
ReplyDeleteI love using that paint and have done so more times then i care to mention as I am a Gold lover..It looks fantastic!! and may I say that it is Exquisitely REMARKABLE!!! Thanks for sharing and thanks so much for stopping by and for your sweet words my friend!!!! Being up on a hill with 13 steps to walk up to get to our row of townhouses does have the advantage of beautiful views....From my bedroom windows, I can see clear across the valley over to the mountains on the other side of the Susquehanna River....I hope you have a great weekend!!
Hugs,
Deb
Thanks Deb! I do love paint, I think it really is the base of 99% of my makeovers. And you do live in a magical place. The views are truly outstanding, it's like a resort!!
DeleteWhat a great makeover! I am so glad that you didn't pass it up. It looks so beautiful now. xo
ReplyDeleteThanks so much, Mary Beth! I have to say the shape of this one was intriguing and it was worth a $2 risk...even if it was totally disgusting! 🤣
DeleteOh my goodness!!! Kim this is so beautiful!!! This would cost a fortune if it was real brass and you made it look legit real! Nice work!!! -Julie redheadcandecorate.com
ReplyDeleteThank you, Julie and thanks for hosting such a fun hop...I love thinking outside the box and your hop challenges me to do so!
DeleteWow what a beautiful transformation this candle holder got! You really did such a great job with this and are so inspiring!
ReplyDelete-Rachel
raeelizabethdesign.com
Rachel, you just made my day with your sweet comment. Thank you!
DeleteThis turned out so good Kim! I think layering paint and glazes always adds nice depth and your beauty looks like real brass!
ReplyDeleteI agree, Cindy. I'm not usually patient enough to layer, but it was so worth it. I may have to do it more often...and thanks!
DeleteHoly moly, what a makeover! For you to even see potential in that gross candle holder is amazing. And what fortitude you have, especially with the wax. I have no patience! Your end result is beautiful.
ReplyDeleteMelanie, it was gross. I didn’t even want to put it in the freezer, that’s why it was wrapped up like it was wearing a hazmat suit! 🤣Honestly, the wax removal took less than 5 minutes and it was kind of fun…the painting and buffing and gel coating was what got me, but in the end it was worth it. Thanks for stopping by!!
DeleteI am in love with this candle stick makeover and I love the process you did to take off the wax. Thanks so much for that tip.
ReplyDeleteMy pleasure! I'm always happy to share in the hopes it inspires others to give it a try. 😊
DeleteI am in love with the candleholder makeover. The process to take off the wax is a great tip.
ReplyDeleteThanks Maria! I've used the freezer method on small wax spills, but I wasn't sure if it was going to do the trick this time. Thankfully, it did!
DeleteHonestly, when I saw the first picture, I thought: "How in the world is she going to pull this off??" But you DID it! This candle holder turned out amazing! It IS show-stopping and elegant, and fits in perfectly with your metal candle holders. And adding the candle rings was genius: you hid those messed up cups in plain sight! Beautifully done!
ReplyDeleteThanks Kristine! I have to say I love the way it turned out, but when I left the shop I had no idea what I was going to do with it. Glad you like it!
DeleteWonderful project. You saw the potential and now it is lovely. The battery candles are awesome.
ReplyDeleteThanks Linda! I really do enjoy a challenge. I like to learn new skills, too and give my brain a stretch. I hope you have a lovely week!
DeleteKim-- wow! What a makeover. You did wonders for this candle holder for sure. Love that you spotted this gem and had an inkling of its potential! xoxo, kristi
ReplyDeleteThanks Kristi! I think that's what I love most about thrifting...you never know what you're going to find! xoxo
DeleteVery nice, and I like the floral rings for spring!
ReplyDeleteThank Ricki Jill! I had fun with this one...and yes, those floral rings are my desperate attempt to lure spring. Unfortunately, it's not working, we're expecting snow tomorrow. Boo! Hope you have sunshine!
DeleteThat is quite a transformation, Kim. It's always amazing what a little elbow grease and some paint can do. Great makeover!
ReplyDeleteThanks Ann! Yes, paint to the rescue. Again!! Also, honestly, once it came out of the freezer , the wax just popped right off. I love that.
DeleteWow! Great transformation! And it only cost $2!
ReplyDeleteThanks so much...and yup, it was definitely a bargain!
DeleteImgc this diy is a-mazing. I love everything you did, you truly took an ugly Duckling and turned it into a beautiful swan 🦢. I love the idea of using batteries operated batteries. I was wondering how to avoid the same thing happening to your fabulous creation, then you show us. Thank you so much
ReplyDeleteThanks so much, Ivory! I agree, those candles are my favorites. I haven't lit a match around here in years. I think that candle holder is breathing a quiet sigh of relief!! Hahaha! I really appreciate the comment and hope you'll pop in again soon!
DeleteHow did I not know about the freezer trick. I can't believe how beautiful it is now. Once again you worked your magic. xo Laura
ReplyDeleteMy mom taught me about the freezer trick when I was a little girl. It’s come in quite handy over the years…but never more than now!
DeleteThat freezer trick is the best. We have so many wax encrusted things that need a good clean, but the thought of breaking my nails always puts me off, so we just ignore them and add fresh wax :D Love how you made a plan to hide the chip, too plus the paint job changes the look completely. They're so classy and elegant now.
ReplyDeleteThis one needed a lot of help for sure, but that freezer did all the heavy lifting. No broken nails!! After that, it was a simple process that I hope will give others the confidence to try.
DeleteKim, you really worked your magic this time -it's beautiful!
ReplyDeleteThanks so much! I second guessed myself once I got it home, but after I pulled it out of the freezer it was smooth sailing! Of course, then I needed to clean my freezer!! Ha!!
Delete