Yup, that's all it takes.

Happy Friday friends!
I'm so excited you're here with me today, because I have something super special in store.
The lovely Julie from Redhead Can Decorate has asked me to join her Thrifty Style Team and I am thrilled.

Each month this group shares budget friendly crafts, decor and DIYs and you know that's right up my alley.
Making over thrift store, yard sale and dollar store items and upcycling curbside treasures is my specialty. Of course, there are a lot of specialists on this team, so be sure to stick around to peek at the Early Spring Home Decor shared below.
As for me, today I'm tackling an old red glass vase.
You know the ones...they usually come from the florist.
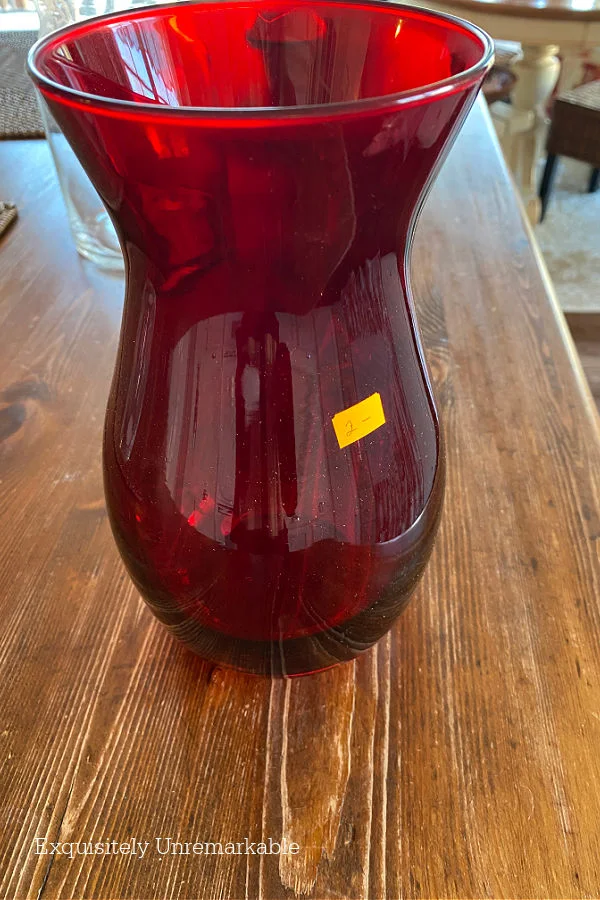
Boring enough for this crimson loving girl to donate hers once the roses wilted.
And then.
And then I saw one at the thrift store. Who knows, it could've been one of mine. Wouldn't be the first time I spotted some of my own stuff.
Anyway, for some reason, when I spotted this one, inspiration struck. I saw possibility, especially since it was $2 and 50% off.
I'm a sucker for a sale.
My idea was to doll it up with some of my leftover vinyl furniture transfers.
I had quite a few of them in my craft closet and I had a feeling they'd be just right.
Here are some other ways I've used furniture transfers:
And, after all, I'd used them on vases before.
I wasn't wrong.
Here's what I did.
How To Update A Boring Glass Vase With Vinyl Transfers

These are the supplies I used:
- A colored glass vase
- Vinyl transfers
- A rubbing transfer tool
- Scissors
Step 1:
I removed the price tag and washed my vase. It was pretty icky.
I just soaped it up good with dishwashing liquid and dried it thoroughly. There wasn't any sticker residue left on it, but if there had been I would've used my little trick to get rid of it.
The glass needs to be very clean for the transfers to adhere well.
Step 2:
I chose a transfer from the sheet and cut it out.

I made sure to leave enough space around the edges so I could rub the transfer without ruining the pattern.
Step 3:
Next up, I peeled the backing sheet away from the transfer itself.
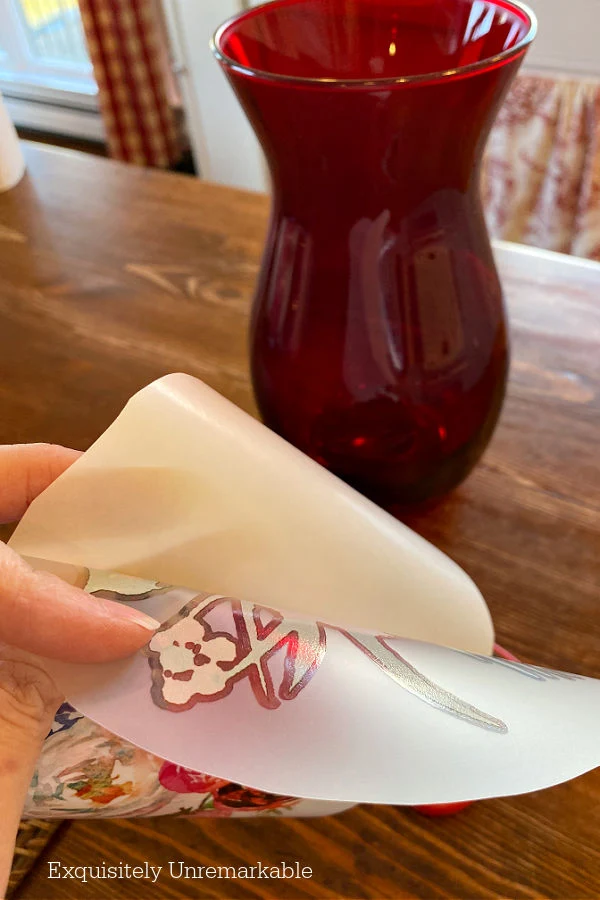
It's an easy job, just be careful not to touch the sticky part of the transfer or it could come off on your hands.
Step 4:
I placed the transfer, sticky side down, on the vase and pressed.

I made sure to apply even pressure with my fingers, over the entire surface, so the transfer would cling to the curves.
Step 5:
Most transfers come with a rubbing tool. I used the one enclosed to put pressure on the front of the transfer in a rubbing motion.
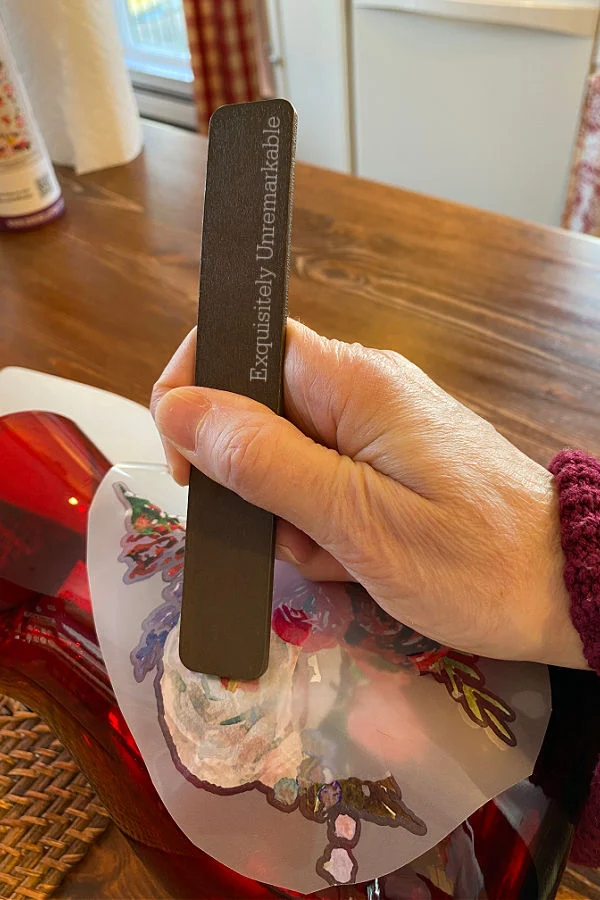
Then I removed the top paper. If any part of the transfer was still clinging to the paper, I simply put it back and rubbed a little more.
When I was done I had a lovely new showpiece. A vase that was covered with flowers.
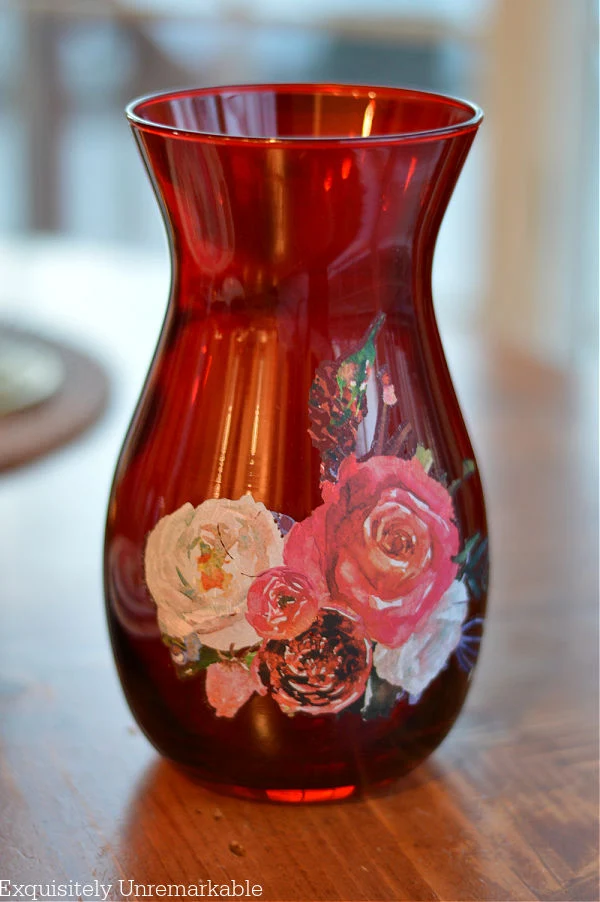
And one that didn't need to be filled with them to look great on a shelf or table.
Of course, when it was filled with flowers, it was even more outstanding.
That plain little thrift store find was now a vintage looking vase that was right at home in my 1920's beach cottage.

And all for a buck.
Who knew?
Guess you know who won't be donating anymore old vases.
😉
Are you ready to meet the rest of the team? I hope you stop by and say hello to each and every one of them. I just know you'll be inspired!
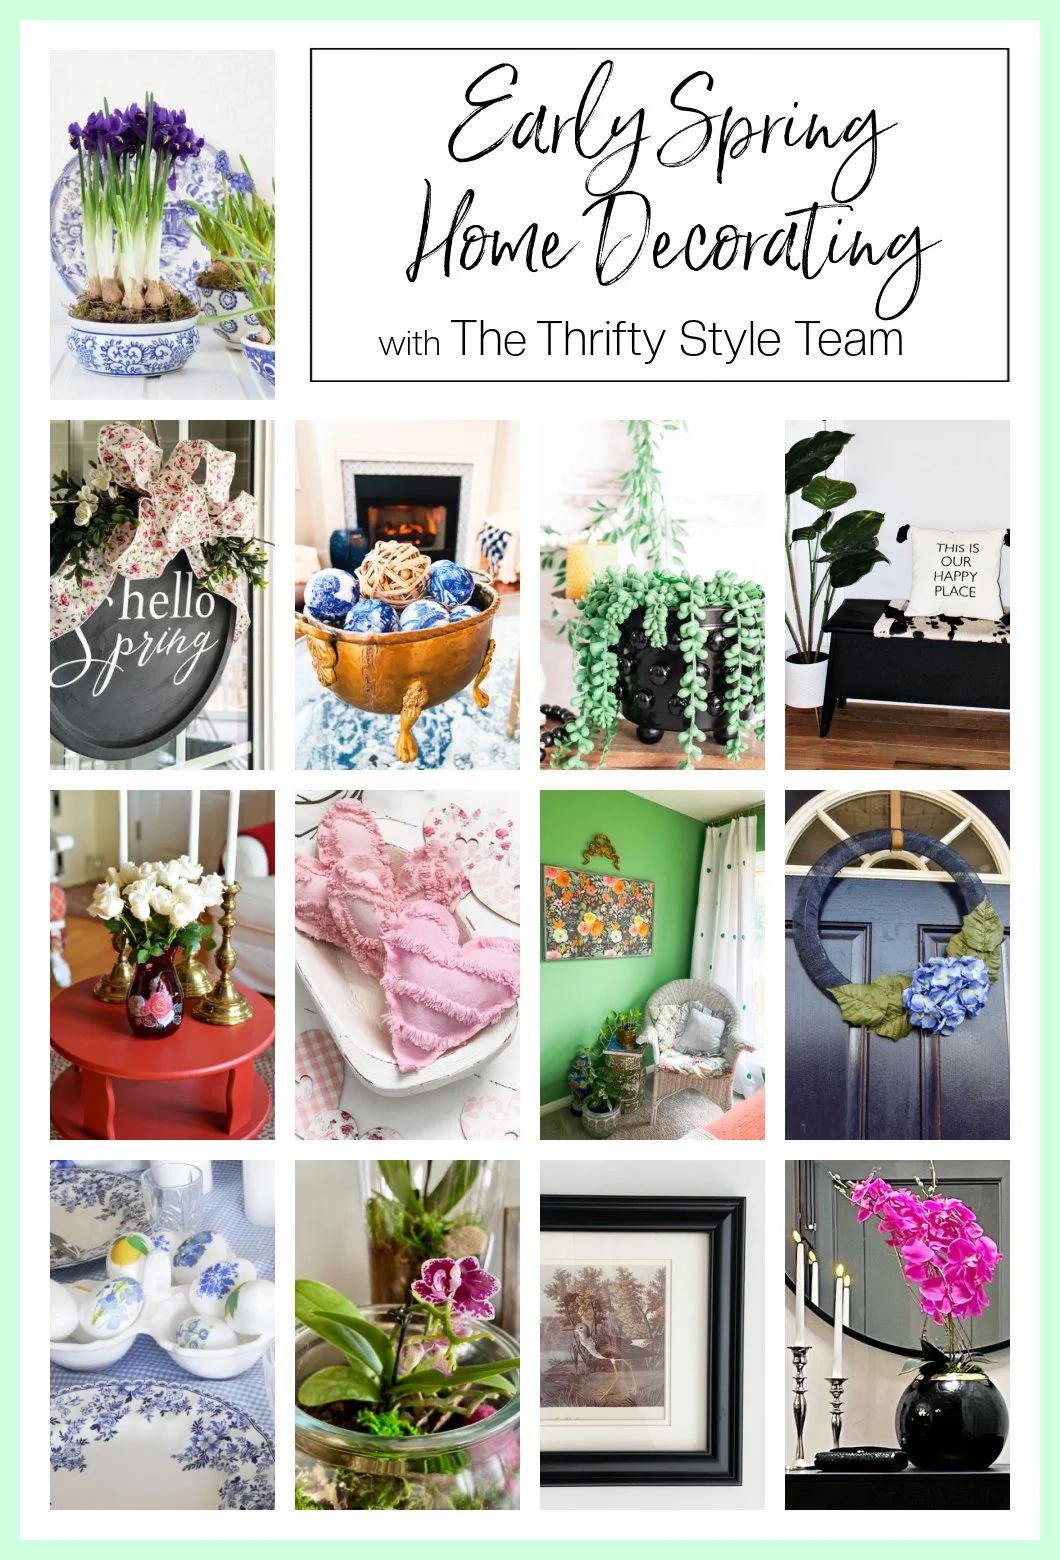
Redhead Can Decorate -
How to Make a Fake Orchid Look Real
Our Crafty Mom - Simple Wood Bench with Boho Vibe
I Should Be Mopping the Floor - Using Wallpaper as Artwork
The How to Home - Turn a Plastic Container Into a Cute Planter Pot
DIY Beautify- How To Make A Chenille Hearts Bowl Filler
2 Bees in a Pod - DIY Chinoiserie Balls
Songbird - Best Flowers for Home Decor
My Family Thyme - Easy Spring Pizza Pan Wreath
Simple Nature Decor - How to Decoupage Easter Eggs
Zucchini Sisters - Dollar Tree Spring Wreath
Sonya Burgess - Creating Budget Friendly Art
Exquisitely Unremarkable - Thrift Store Vase Makeover
A Life Unfolding - Turning a Jar Into a DIY Terrarium
Happy Crafting Friends!


Good Morning sweet friend. This is an amazing transformation for a buck! Very pretty. Have a wonderful weekend. xoxo Kris
ReplyDeleteThanks Kris! It was so easy. I love these transfers. They make everything look brand new. Maybe I should put one on my neck! Haha!! 😉
DeleteIt turned out great! And that red vase! Love it!
ReplyDeleteThanks Deanna! I know you could whip a gorgeous arrangement to put inside.
DeleteThat turned out cute, Kim. I hand painted flowers on a big vase years ago but left it with the house when we sold (for my daughter-in-law). It really does dress things up a bit to have a vase that is also decorative. Have a wonderful weekend- xo Diana
ReplyDeleteThat sounds lovely, Diana! You’re so talented and what a sweet treasure for your daughter in law. Enjoy the weekend, my friend!
DeleteI have a red vase! :-) You have got me thinking about another gift idea.
ReplyDeleteWith my flower business people like to drop off vases at the Flower Shack for me to use. I have a collection. :-) Last September someone gave me 5 red vases. I did give one away to my aunt with a Christmas bouquet that I created using supermarket flowers.
Happy Valentine's Day,
Carla
Five red vases? You lucky girl! I foresee many lovely bouquets in your Flower Shack this summer!! Happy Valentine's Day!
DeleteI love this! It reminds me of John Derien's decoupage plates and other things.
ReplyDeleteWell, that’s quite a compliment, Ricki!! I just looked him up and I love his work. The Rose Tuberose wallpaper is outstanding. Hmmm…she says trying figure out where that could go!! Haha!!
DeleteYou could also do that with those green flower vases.
ReplyDeleteYes!! I'm going to be on the lookout for a green one now. How pretty for Christmas...or super fresh looking in spring! Thanks for the suggestion!
DeleteVery pretty! Be on the lookout for true Ruby Red vases too! They are made of true red glass not just painted on red, which will scratch off most noticeably on the bottom. Most times one can find them for a few bucks!
ReplyDeleteThey are beautiful! I actually have one that my mom gave to my grandmother for her birthday back in 1941, when my mom was ten. She bought it for a dime. You're right they're gorgeous. The one I put the transfers on is painted and as you said, it does scratch off...and that's not great! I'll be on the lookout for more ruby reds. Thanks for the suggestion!
DeleteWelcome to the TST Kim! This is such a great thrifty project, I love transfers and these floral ones are so pretty!
ReplyDeleteThanks so much, Cindy! I feel honored to be in such good company!
DeleteKim - welcome to the TST team! Your vase upgrade is just lovely. The floral transfer is beautiful and the perfect compliment to the vase,
ReplyDeleteThanks so much! I'm excited to be on the team!!
DeleteNow that is a great makeover!
ReplyDeleteAnd LOL on buying your own stuff back at the thrift store. I would never do that, of course not :-)(ducking now).
Haha! Marianne, I'm glad to know I'm not alone...and thanks!!
DeleteIt does look like a vintage vase now. Very pretty with the white roses. Hugs.
ReplyDeleteThanks Nancy! It really does, even in person, it has that aged look. ❤️
DeleteKim, what a wonderful idea. It really dresses up the vase.
ReplyDeleteThanks so much! It really turned this bargain vase into a showstopper.
DeleteWhat an amazing transformation! I love a good thrift find and upcycle project. Your vase looks amazing.
ReplyDeleteThanks Tammy! Your comment makes me smile!! SO glad you like this one.
DeleteYou made such a pretty vase Kim. I love the floral transfer project and the vase will look great with flowers!
ReplyDeleteThanks Julie! This one makes me smile...and just in time for Valentine's Day!!
DeleteAnother really cool idea, Kim. I need to keep an eye out for unusual transfers. Our craft shops have just started stocking them.
ReplyDeleteOh...yay!! I know you've been waiting for them. You're going to love them.
DeleteThis is such a darling way to dress up a vase, I love it! I too have a collection of vases through the years. Those transfers are just beautiful! Happy Valentine's Day!
ReplyDeleteHappy Valentine’s Day, Marilyn and thank you! I just knew this vase could be so much more. Thanks for the visit!
DeleteWhat a lovely way to paint the vase. I never used transfers, need to try it.
ReplyDeleteMaria, I think you'd love them. So easy to use...and thanks!!
DeleteWhat a beautiful project, Kim! The colors in the paper match the vase perfectly. I have so many extra vases...this would be the perfect way to do them up. So happy to party with you every month. xoxo, kristi
ReplyDeleteThanks so much, Kristi! I love an interesting vase and these decals are so easy to work with. Looking forward to more parties! xo
DeleteKim...I'm so happy you joined our TST!! I am literally addicted to crimson right now ♥️ . I have it all over our apartment since Christmas because I can't get enough! The vase my hubby gave me roses in yesterday is crimson. Yeay! Your vase turned out like a beautiful art piece! You did a beautiful job!! ~ Julie
ReplyDeleteThanks so much, Julie! Crimson is my favorite color to use in decor. Just a little bit packs quite a punch. I'm so excited to be a part of TST, thanks so much for asking!
DeleteOh, Kim! This turned out beautifully. I have older nut grinders that have transfers on them and this reminds me of those. Perfectly vintage. So happy to be part of the TST with you. xo, mb
ReplyDeleteThanks so much, Mary Beth! I bet your grinders are beautiful. I just love anything with that vintage feel…and I’m so excited to be a part of TST! xo
DeleteWhat a neat way to change up a plain glass vase. It turned out so pretty.
ReplyDeleteThanks so much!! I'm definitely going to try this one again!
DeleteWhat a great idea, Kim! I love the pretty transfer you chose. I am so happy to be part of TST with you! Pinned!
ReplyDeleteThanks so much, Lynne and thanks for the warm welcome. I'm already looking forward to the next hop!
DeleteLovely, Kim! You are a natural choice for the Thrifty Style Team! I'm going to check out some of the other posts.
ReplyDeleteThanks Amy! I think I've found my people! Haha!!
DeleteKim,
ReplyDeleteLove this! But you know me and red!!
Hugs,
Deb
Yes, I do, Deb! Birds of a feather...
DeleteKim, what a great idea! I have so many vases like yours that have gone to Goodwill. I would've never thought to put a transfer on one. It looks so lovely! It would make a perfect gift, too. Thanks for sharing! Pinned :)
ReplyDeleteRebecca (Zucchini Sisters)
Thanks so much, Rebecca! I have to say now I'm going to be a glass vase junkie. I already hear the call! Haha!
Delete