They make great wooden signs and with this crafty hack, using vinyl transfers, you can turn your thrift store find into a beautiful and unique piece of wall decor in minutes.
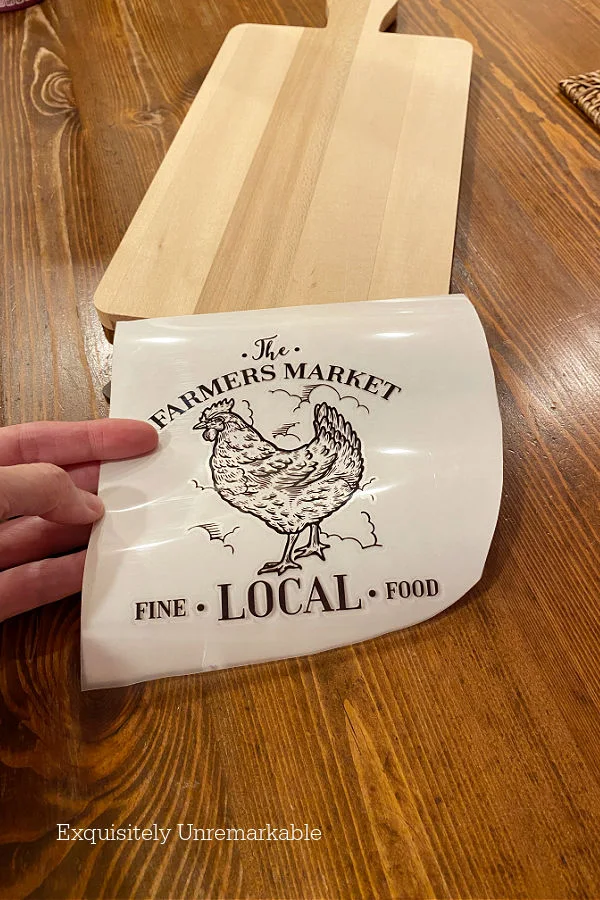
I'm so glad you're joining me today, because I have a super doable upcycle that I can't wait to share.
If you've followed me for any length of time, you know that turning inexpensive thrift store finds into home decor accents is one of all time favorite activities.
It's my meditation, my creative outlet and a way for me to get some really beautiful {if I do say so myself} custom decor pieces without breaking the bank.
Some of my projects maybe a little more involved than others.
Anything that involves sewing immediately comes to mind.
However, when I stand back and look at any one of my sink skirts or my ruffled chair makeover or curtains I know the time I spent fighting with my sewing machine was well worth it.
But.
I also have many more upcycled crafts that are done so quickly, that it takes me longer to write about them, than it did for me to complete the makeover.
Today, I'm sharing one of those.
And just in time for another Do It Over Designer's Hop. So don't run away after you leave a comment. Make sure you check out all the other fun DIYs.
Ok, so what is this quick and easy craft I've been building up?
And how quickly did I create it?
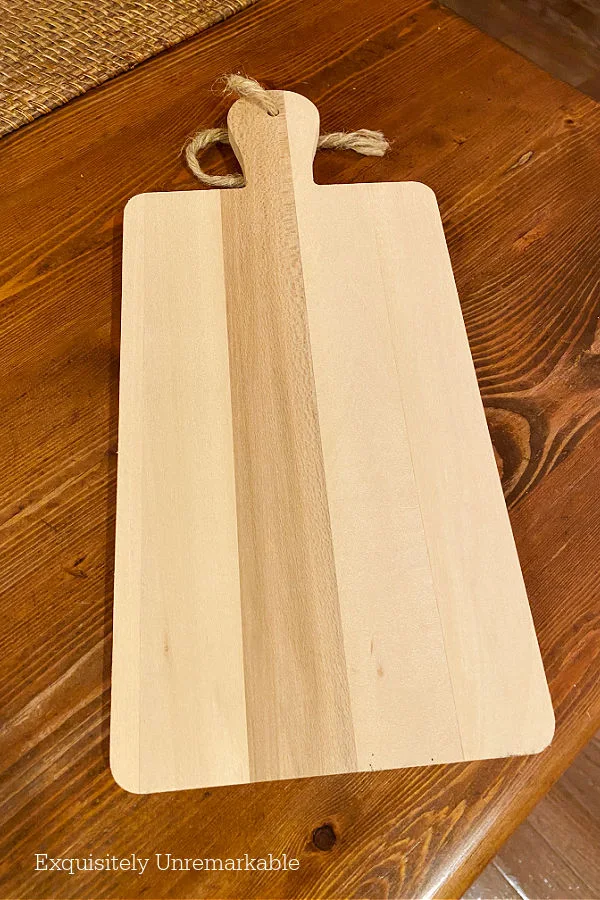
It's one of the easiest ways I know of to make a wooden sign and as I told my good friend Ann, the creative hostess of today's hop, I did during a commercial break.
Ok, technically it wasn't a commercial, it was during the introduction to a film on TCM, starring Marilyn Monroe. One I'd never seen before, and frankly, I think it's her best. It's called Don't Bother To Knock and it's chilling.
Sometimes inspiration strikes at the oddest times.
Anyway, sitting on the couch I was thinking about that cutting board, with plans to paint the whole thing and embellish it in a colorful way when the lightbulb went on.
It was such a pristine piece of wood. Why would I paint it. I didn't need to cover up or hide anything. And I already had several painted cutting boards.
More Wooden Cutting Board ProjectsNo this should be simple.
That's when I opened the cabinet, grabbed my farmhouse furniture transfers. <---these are the exact ones I used.
More Wooden Furniture Transfer Ideas
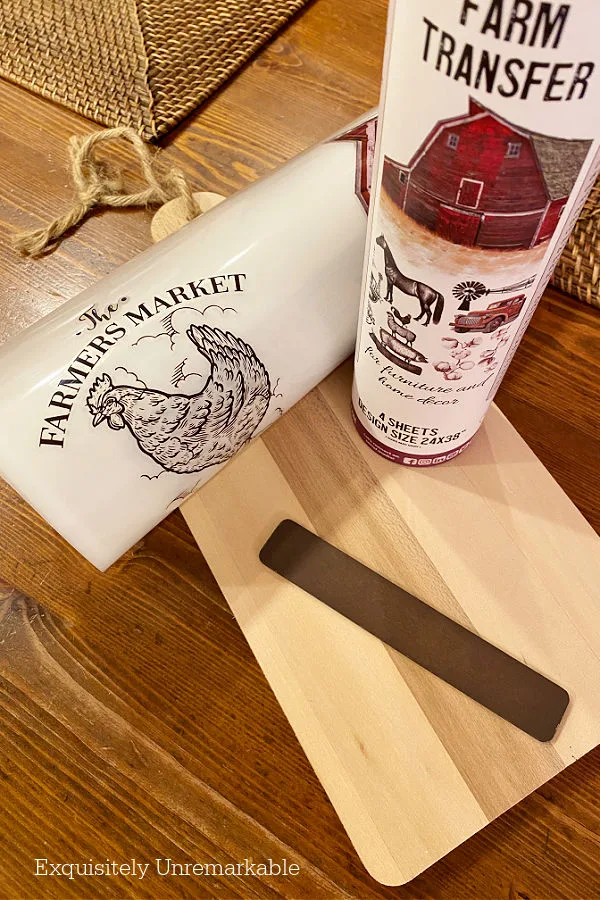
I picked a black chicken design. I thought that once it was on the wood, it would look like it was burned or branded.
The process took mere minutes.
Upcycling A Wooden Cutting Board With Transfers
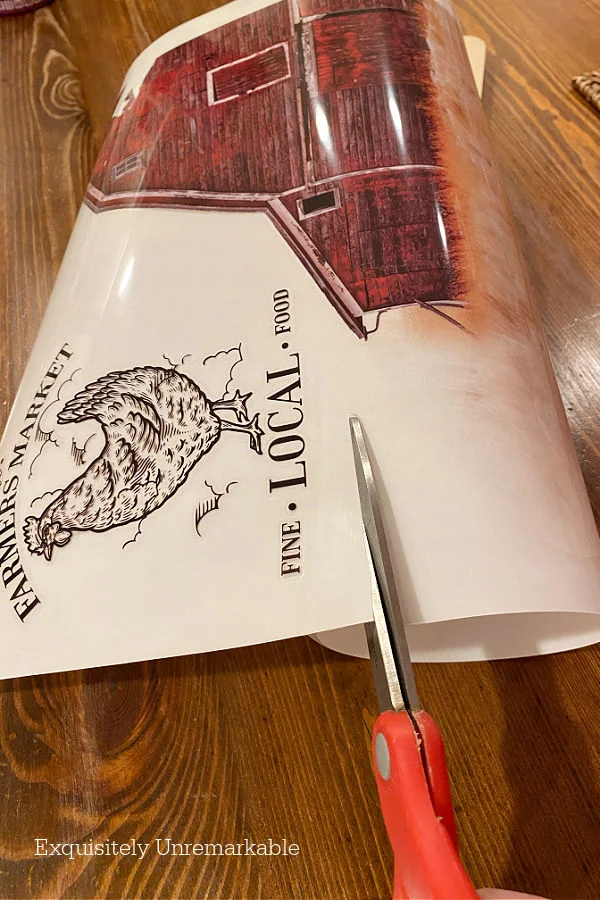
Step 1. I cut out the chicken, leaving enough vinyl around the edges so I could rub it on without damaging the actual design.
Step 2. Then I centered it on the cutting board.
I started doing it by eye and then confirmed my placement with a ruler.

Step 3. I used the rubbing tool for the actual transferring, making sure to apply enough pressure for the letters and picture to fully release.
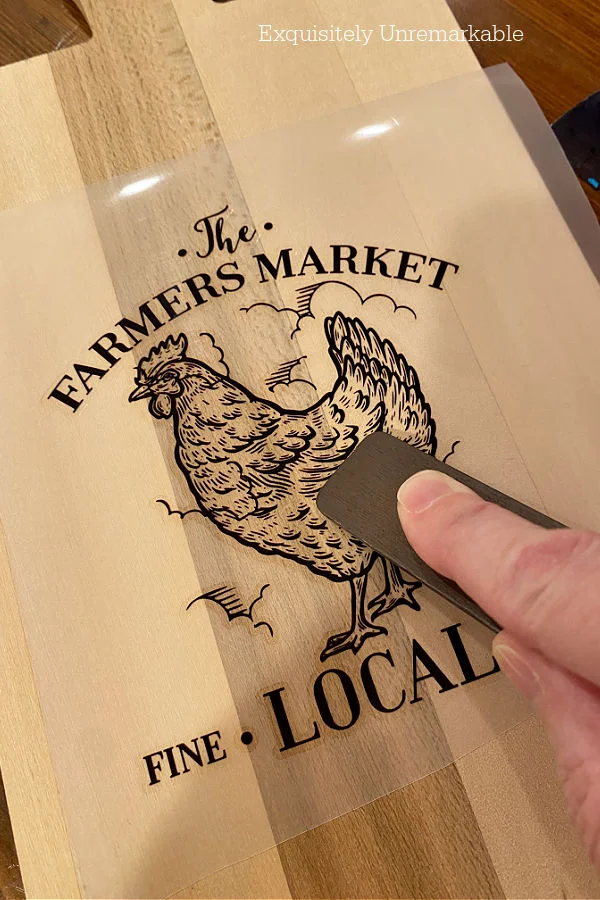

Step 4. Once the transfer was settled on the board, I took my finger and pressed down on all the edges to make sure they were secure.
I didn't need to, but you can also use a tiny bit of sandpaper on the edges to make them blend into the wood even more.
Step 5. To make sure that chicken didn't run away, or fade or peel, I decided to give the entire cutting board a quick coat of satin sealer.

A super easy accent for my kitchen that looks like I bought it in a high end shop.
All while Eddie Muller quickly described Marilyn's meteoric rise to fame.

I kid you not.
Now that's my kind of crafting.
😉
How about you? Are you a quick crafter or do you prefer longer projects? Let me know in the comments!
Now don't run away. There are some really creative DIYs that you won't want to miss below.
Just click on the links to see all the pretty projects and tell them I said hello.

The Apple Street Cottage
Birdz Of A Feather
Exquisitely Unremarkable - you are here!
Little Vintage Cottage
Purple Hues & Me
Southern Sunflowers
Sum Of Their Stories
Tea And Forget Me Nots
Unique Creations By Anita
Birdz Of A Feather
Exquisitely Unremarkable - you are here!
Little Vintage Cottage
Purple Hues & Me
Southern Sunflowers
Sum Of Their Stories
Tea And Forget Me Nots
Unique Creations By Anita
Happy Upcycling!!


Love the makeover! I've been having problems with transfers lately; not sure why. That Marilyn movie is one I haven't seen; I need to find a simple project and watch it too :)
ReplyDeleteThanks Sara! SO simple. Sorry you've been having trouble with transfers. Can I help? And yes, I highly recommend the movie. It was good!!
DeleteFantastic! I have a cutting board waiting for a makeover - except someone cut the handle so it's uneven...you'd think I did it! HaHa!! Thanks for the inspiration, Kim.
ReplyDeleteThanks Ann! I think your cutting board sounds charming. I love a little character in my upcycles.
DeleteYes, Kim! Your newly transformed cutting board does look like it's from a high-end store! Great job! I need to look into doing some transfers!
ReplyDeleteThanks so much, Gail! I highly recommend the transfers. They are so easy to use and come in tons of patterns and colors. Lots of purples!! 😉
DeleteWhat an adorable idea to put this on a cutting board! I may have to copy you and do something similar because this is so cute!
ReplyDeleteThanks! This one was easy, especially since I had the transfers on hand.
DeleteThis turned out so cute! I've been having visions of some cutting board upcycles lately, this is great inspiration!
ReplyDeleteThanks Tania! Updating old cutting boards is one of my favorite DIYs, too. I’m actually heading out today in search of a few more.
DeleteCute project, Kim. Those old cutting boards make great 'finished' boards to work on-and I love this one!
ReplyDeleteDiana, you are so right. I love that there's little to no prep involved! Thanks for the sweet comment, my friend!
DeleteOh I have not heard of that movie I will check it out. This project came out so cute. Love easy peasy and cute. Happy Weekend. Kris
ReplyDeleteHi Kris! I’d never seen that movie before either, it was a good one. Classic film noir. I hope your weekend is going well and it’s full of sun!! xxoo
DeleteI love this upcycled cutting board Kim. These boards would make great gifts for the holidays! Thanks for this easy DIY project idea.
ReplyDeleteGreat idea, Julie!! Thanks so much. Enjoy the weekend!
DeleteThis is my kind of crafting, I love quick and easy. It really did turn out great! And I agree, it looks high end.
ReplyDeleteThanks Mari! It was so easy to do and quick. Super quick!!
DeleteWell - I learned something new from you ! I did not know you could buy transfers on (what looks like) a large sheet. I actually do not know anything at all about transfers, and subsequently have never considered a project involving transfers. Thank you for opening my eyes to what looks like a lot of creative fun!! I'm with you on the sewing; it's MY zen, and keeps me happy, calm and focused. I have a roll of fabric on the dining table patiently waiting for me to make a couple more pillows out of!! Gotta go!!!!
ReplyDeleteI'm pretty new to transfer, too, Kristine. I just started using them last year, but they've become my new favorite crafting medium. They're quick and easy to use and with the sheets you get a lot for your money. Enjoy your sewing!!
DeleteFarmhouse chic. Love this, Kim! Nice thrift store score, too. I prefer quick thrift flips, so smalls are always fun to do. However, if I find a remarkable deal on furniture, I'll put in the extra effort to make it over. Have a great week! Hugs.
ReplyDeleteThanks Nancy!! I prefer small flips, too, quick and easy is my speciality. Hugs!!
DeleteYes, it looks like you could find it in a home boutique store, for sure. It looks wonderful! I like that barn transfer you still have left to use.
ReplyDeleteThanks Allyson! I love that barn transfer, too. Haven't quite figured out what I'm going to do with that one. Stay tuned!
DeleteReally love the end result. Can you use it as a cutting board or is it decorative only now? - Rachel - Tea and Forget-me-nots
ReplyDeleteThanks Rachel! It's just decorative now, since it's not food safe.
DeleteYou've always got something cute going on here, Kim!
ReplyDeleteThanks Deanna! It’s my creative zen. ☺️
DeleteAnother great idea. :-)
ReplyDeleteYou know how I love chickens.
xx oo
Carla
I do know!! And thank you my friend. xo
DeleteSuch a super cute project and it looks so easy. xo Laura
ReplyDeleteThanks Laura, this one was a quick and easy makeover.
DeletePretty amazing, Kim! 👌
ReplyDeleteWhy thank you so much!!
DeleteThis craft is so cute, Kim!
ReplyDeleteThanks RIcki! That chicken makes me smile.
DeleteThat’s a perfect kind of easy peasy crafting Kitchen decor project, Kim! ❤️
ReplyDeleteThank you, Kitty! Those are my favorite kind!
DeleteI love everything about this, especially how quick and easy it was! I have a few cutting boards on display in my kitchen and now, thanks to you, I see they definitely need a cute graphic!
ReplyDeleteHello Marie! SO nice to see you in the comments! This one was so easy, I think you could do it in a flash!
DeleteI'm all for instant gratification, so quick and easy is definitely my style. Five minutes is pretty impressive, and it looks fabulous. If I saw that cutting bard in a store, I'd buy it in a heartbeat!
ReplyDeleteThanks Amy! That's the highest compliment!
DeleteI know I've said it before, but you have such an amazing way with words. It felt like I was right there for 5 minutes and a few seconds transforming that cute breadboard. Love how it turned out
ReplyDeleteMichelle, you just totally made my day!!
DeleteKim,
ReplyDeleteNow you know I would just adore this as I am a huge fan of Hens and Roos!! So sweet!!
Hugs,
Deb
Thanks Deb! I really like this combo.
DeleteThis blog post is great and informative! The upcycling project of turning a cutting board into a wooden sign is a brilliant idea, and using vinyl transfers makes it quick and easy. The finished product looks like a high-end store purchase. I love how you share your passion for upcycling and DIY projects. My question is, where do you find inspiration for your upcycling projects?
ReplyDeleteThank you! I really like creating. Sometimes the ideas just pop into my head, other times the supplies I have on hand spark the ideas and of course, being involved with so many creative people online is always feeding my ideas!
DeleteI just love all your projects and the way you give the instructions is pretty easy to follow. I also love your website and look forward to your email postings very much. You are like a breath of fresh air!! You invite us into your lovely home like we are your neighbor or friends. Always down to earth and to the point. I have signed up to many different sites, but yours, by far, is the very best!! Thank you so much!! Til next time…..Have a great day. Your Spring is right around the corner!
ReplyDeleteSheri, I'm actually blushing over here and smiling from ear to ear with my bright red cheeks. ☺️ Thank you so much. You have no idea what your words mean. I really do try to give clear steps in my DIYs - I guess that's the kindergarten teacher in me - and I'm glad my words feel warm and welcoming, because that is the spirit in which they are shared. Thanks taking the time to let me know that you enjoy your visits...as I said, your words have genuinely touched me. ❤️
Delete