Hanging wallpaper doesn't have to be a daunting job.
With the right tools and a little bit of planning you can transform your room in no time to get professional results.
And the flower filled cottage of your dreams.

Last spring, after months of searching for a floral couch, I threw my hands up, ordered a checked one and decided to go with floral wallpaper instead.
Perhaps you remember my design plan and the beautiful rolls of paper I was gifted from Calico Corners.
Well, since then, I've been working on outdoor renovations, enjoying summer weather and waiting on my custom couch.
However now that there's a slight chill in the air, and my designer let me know that my sofa is nearing completion, my husband and I decided to hang up that gorgeous wallpaper.
Now, I know we do a lot of DIYs around here, but other than a nursery border and a corner hutch makeover, we'd never worked with wallpaper before.
We had used a peel and stick paper to update our kitchen pantry, but glue was a different story.
And we were a bit intimidated.
Turns out, once we sat down, planned it out and gathered our tools, the job took us no time at all to complete.
Done in a Saturday morning, before the kids were even awake.
And it looks fabulous.
Want to try it yourself? Stick to these quick and easy tips. And yes, I said stick. 😉
Hanging Floral or Patterned Wallpaper
To start we headed to the paint store for our supplies. Believe it or not Home Depot did not have a wallpaper section.
I was shocked, but that's ok, the paint pros at our local shop were amazing and set us up right.
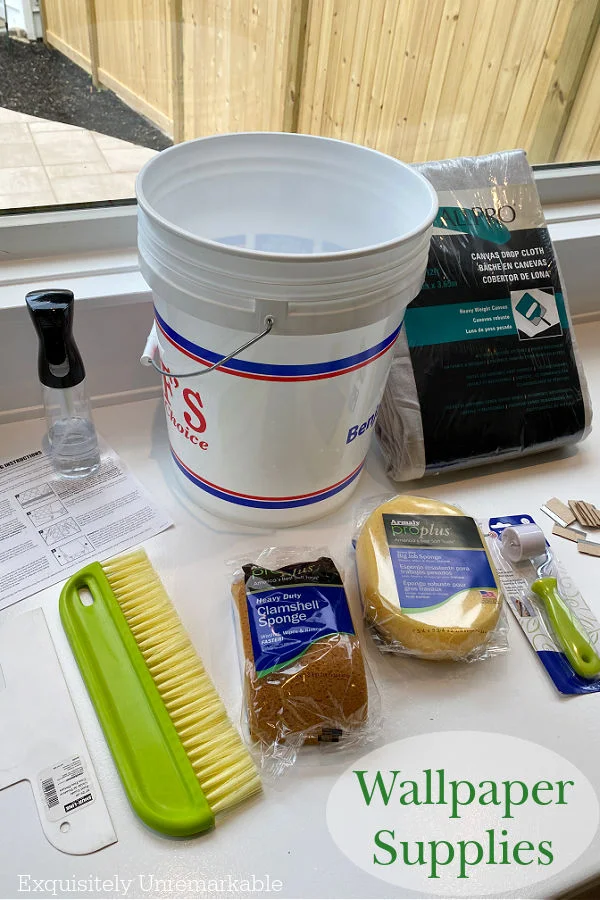
Here are the wallpaper supplies we used:
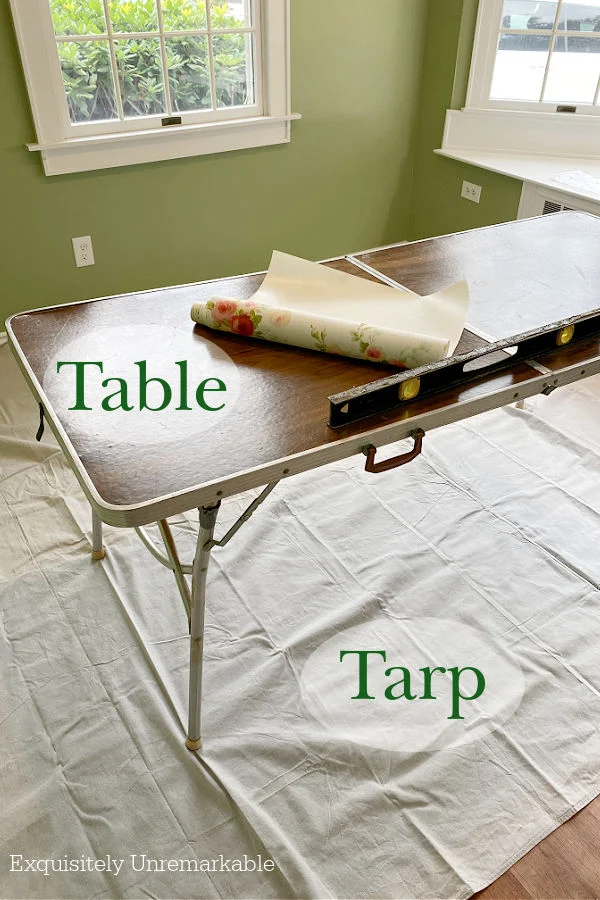
A long table and a canvas tarp went into the room first. The table was clean and dry and able to withstand a lot of water.The tarp was canvas, rather than plastic, to protect our new vinyl floor. It was a little more expensive, but totally worth the investment.
It was heavy and stayed put, we didn't slip or slide walking on it and it absorbed all the overspray.
On plastic, it would've puddled up, made a mess and caused a tripping hazard.
A large bucket for water
A spray/ misting bottle - This one is great
Wallpaper sponge
Wallpaper smoothing brush
Wallpaper seam roller
Razor blades- lots of them
Plastic or metal straightedge
Canvas tarp - Way better than plastic
Scissors
Pencils
Long level
Card table
Ladder
Measuring tape
Wallpaper - Mine is Magnolia Home Heirloom Rose
Of course it goes without saying that you'll have the wallpaper on hand and you'll have enough of it to take into account all the pattern matching that's necessary.
And the waste that goes along with it.
The hanging process:
We started with clean, dry, painted walls.We painted the room in the spring, so they were fully cured. If you're working with freshly painted walls, you should wait several weeks before applying the paper.

1. Measure your paper and mark your wall
Take the time to plan. It was crucial.
Keep in mind that you should always start in a corner and you'll want a few inches to wrap around the corner on that first piece.
This way you can cut in the corner perfectly. Houses aren't always straight and if you use the corner of the room as a straightedge and it's not square, the rest of your paper hanging will be a mess.
And your flowers will be crooked. Not good.
First, we measured the width of the paper.
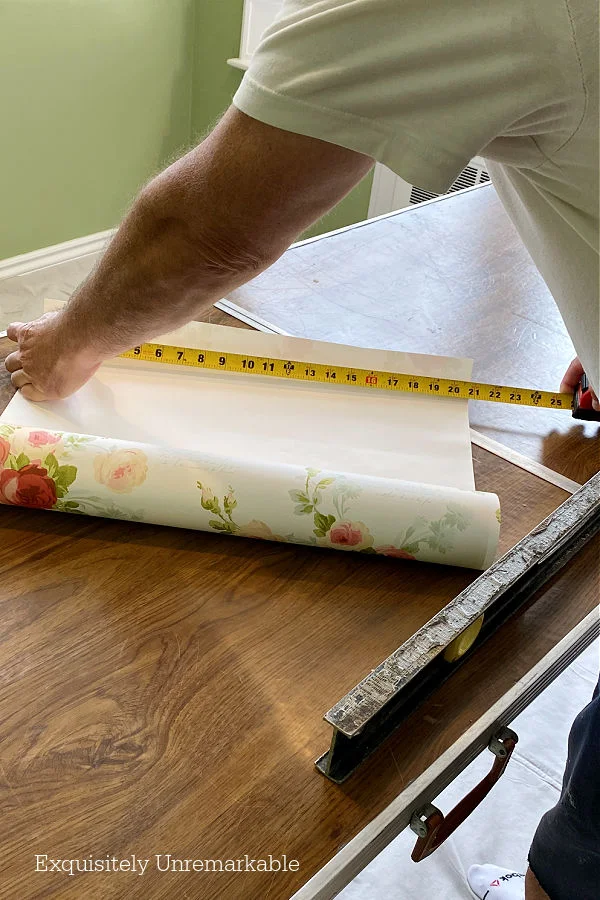
Then, using a level, we measured the wall, from the corner we were going to start in, and drew a pencil line, a few inches shorter than the width of the paper.
That's the line we used to set the first sheet.

I know...math. Not the most creative part of the project, but if you do it right, the rest of the DIY is a breeze.
2. Cut the wallpaper
Once we had our straight line set, it was time to cut that first piece of paper with scissors.
We cut it so that it was several inches longer than the height of our wall. That left us excess so we could trim it perfectly along the floor and ceiling mouldings.

Since, just like those corners, floors and ceilings aren't always straight. Especially in older houses.
3. Use a spray bottle
This trick was amazing. It was recommended on the instruction sheet and it worked amazingly well.
Dealing with the glue was the scary part, but the spray made easy work of the process.
I used a bottle from Dixie Belle, it's a mister, made for chalk painting. It didn't spray, it spread an even layer of water with each long pump.
It was perfect for the job.

We just laid the paper on the table, pattern side down, and sprayed the entire surface with water. We made sure to get every last bit of paper very wet.
Most importantly, the edges and corners.
Then we folded the paper onto itself for about 2-3 minutes, for the glue to activate.

4. Use a wallpaper brush
At this point, it was time to get that paper on the wall. We grabbed the ladder and unfolded the paper.
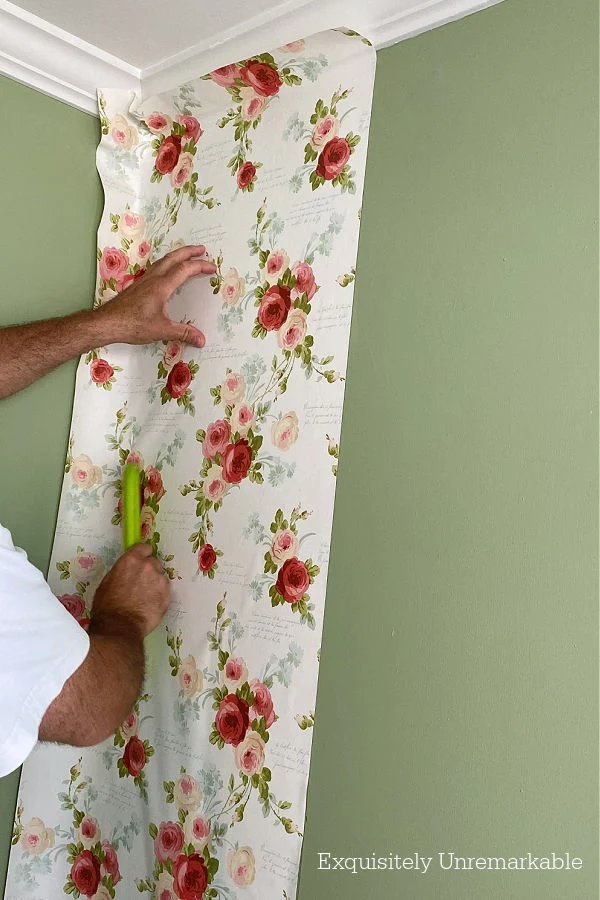
We lined it up with our pencil mark and pressed it onto the wall.
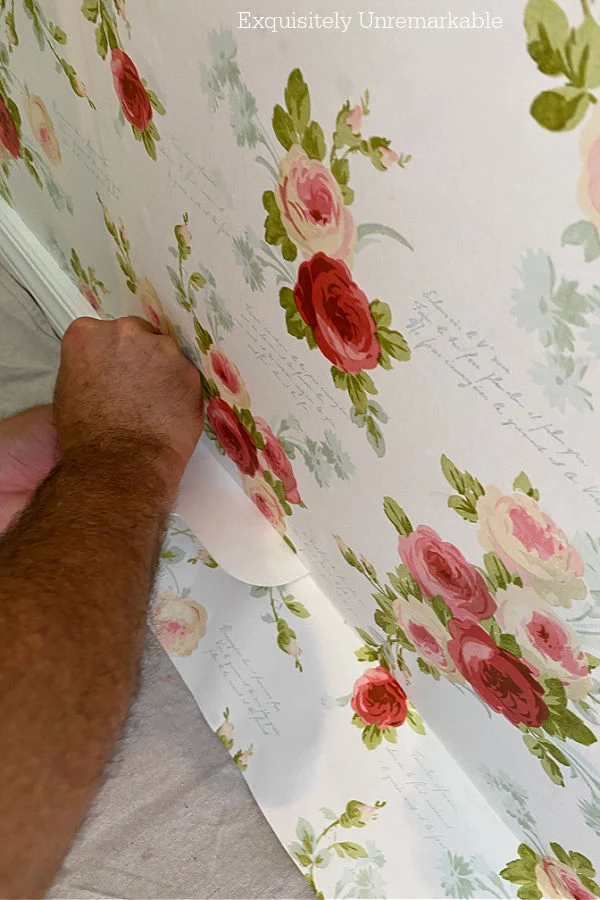
Again, we set it a few inches above the wood trim and some of it wrapped around the corner. To keep in place, we used a sweeping motion with a wallpaper brush.
It worked the bubbles out from behind the paper and smoothed over any wrinkles.
5. Use a seam roller
Once we were sure the paper was on the wall well, and we were satisfied with the way it looked. No bubbles or wrinkles, we ran the seam roller along the edge of the wallpaper.

We rolled it along the seam from top to bottom to lock that edge in place.
6. Trim the excess paper
This is where all those super sharp razor blades come into play. And trust me, we used a lot of them.
A really, really sharp edge is the key to a neat cut. If your blade is even the tiniest bit dull or tacky from the glue, the paper will rip.
And that is no good.
We pushed that straight edge right up against the moulding and ran the blade along it. We worked in small sections, trimming away the excess paper along the floor and ceiling.
And along that first corner.
7. Wipe away the glue
The last step in this process was to remove any excess glue. We did that by dipping one of the sponges into a bucket of clean water, wringing it out well and then running it over the top of the wallpaper.

This also gave us one last chance to make sure the edges were secure and the paper was sticking to the wall without any noticeable lumps or bumps.
Just make sure your sponge isn't too wet. That could damage the paper or cause it to tear.
8. Matching flowers or patterns with the next sheet
With the first sheet up, it was time for another. We were pretty confident about our paperhanging skills at this point.
Our biggest challenge moving forward was going to be matching the intricate florals and words, making sure everything lined up.

To do that, we had to unroll the paper enough to locate the part of the pattern that was already on the wall.
We then cut the paper, leaving about 3" above that spot and 3" below and repeated the entire process, from the spraying to the sponging.
The only difference was that this time, rather than dealing with a corner, we pushed the paper right up against the seam of that first sheet.
No overlap, just as close as we could get it.
And then we smoothed them out with that handy little roller.

9. Wallpapering around windows
We cut the paper around the electrical outlet and used our straightedge and razors to cut in the window trim.
We did try a smaller craft knife at one point, thinking it would be better for detail work. It worked well on peel and stick wallpaper and contact paper installation.
But this paper was wet, not a thick vinyl like the others. The razor blades worked best.

The only tricky part was working above the window.
Since there was only a small strip there, we didn't have enough repeat to line up several parts of the pattern to be confident that we were still straight.
And the ceiling was not a reliable guide.
So to be sure, we ran our level along the top of the tiny print on the next sheet. The level doesn't lie.
With the window behind us, we continued along the rest of the wall, until we reached the corner. Since we were only doing the one wall, we trimmed it there and we were done.

That green wall had been transformed into a giant bouquet of red and pink roses.
A cottage style garden room in making.
Exactly how I had envisioned it.
And all before breakfast.
Gotta love that.

Of course, the new sofa won't be delivered for a month...maybe two.
In the meantime, however, I did get my window seat cushion back and it is fantastic.
Here's a sneak peek.
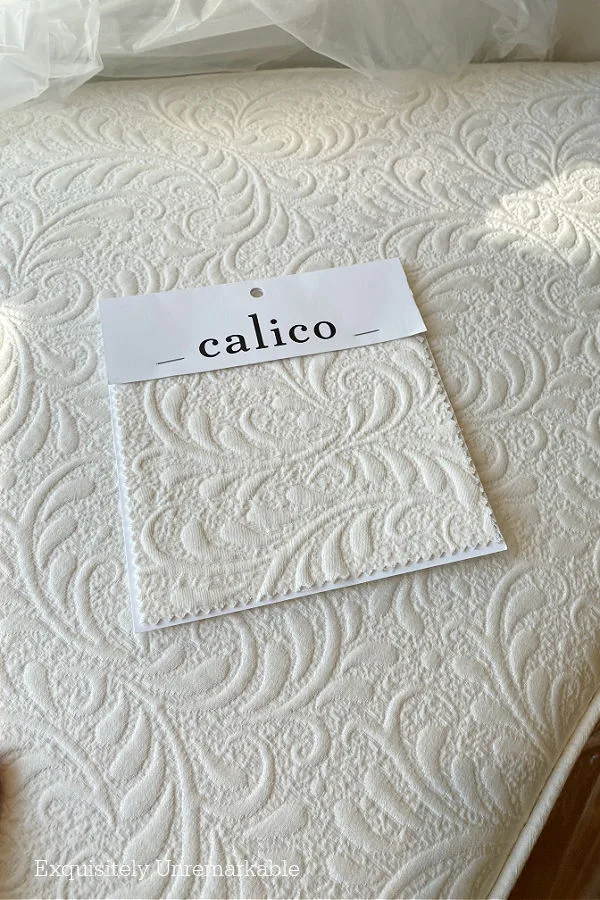
Oh boy...
Have you ever wallpapered?
Disclosure: this post was sponsored by Calico Corners. All opinions are my own. Please see my disclosure page for more information.



Hey Kim, you and your husband did a great job with putting up the wallpaper on the one accent wall. It will look beautiful with your new couch. You must be so excited and happy that everything is coming together inside and outside your home. Yes, my mother and I put wall paper in her kitchen many many years ago.
ReplyDeleteThanks Julie!! It feels like the finish line is getting closer now and that is exciting!!
DeleteIt looks fabulous and your tutorial is great! I have wallpapered many, many times but that was a long time ago! ~Jane Windham
ReplyDeleteThanks Jane and I'm glad to hear that my tutorial is on target...especially coming from an experienced wallpaper hanger!!
DeleteI love it and it is so pretty. You all did a great job.
ReplyDeleteThank you, Betty! We really love those flowers.
DeleteKim, your accent wall looks fabulous. Great tutorial by the way. I had wallpaper years ago. Styles come and go. Enjoy your new look.
ReplyDeleteThanks Linda...and they definitely do. Growing up our house was covered in wallpaper. Then it suddenly became passe toward the end of the 90s. I'm so glad it's back, I love the look!!
DeleteIt,s absolutely amazingly beautiful, I used to do all my own decorating when I was younger, and loved every minute of it, but now sadly the ailments of age has taken over,,
ReplyDeleteI hear you! The last time we wallpapered a room was over 20 years ago and it was a tiny ceiling border. We were a bit sore this time around!!
DeleteHi, Kim, I have been trying and trying to comment so don't know if this is ever going through! Blogger won't even let me reply to comments on my own blog for some crazy reason!!! I wanted to thank you for your comment on my blog...after soooo many months of me being gone! And yes, my husband I did wallpaper....one and only one time!!!! We said we'd never do it again:) And taking down wallpaper is way worse than putting it up! You and your hubby are so very talented and seemingly can do anything and everything! Come live next door to me and I will keep you busy, busy, busy. I want to change some things but just no ideas. We did just finish painting the outside and some rooms inside...so I'm happy with that. Just tired of the old decor! Maybe I'll figure it out someday. Hope you see this comment!!!
ReplyDeleteIt was so good to hear from you, Cheri! I agree, wallpapering is not for the faint of heart. We've taken wallpaper down, too, and I agree, it was terrible. These papers are supposedly much easier to remove...although it's so pretty I don't see that happening anytime soon. It was easy to put up as well, just spray and go. I loved that!!
DeleteIt is very pretty wall[aper! I put wallpaper in my bedroom in the spring. It’s still not finished.Long story but I’m getting there..lol. My hubby would never go for that in the living room that’s for sure! He doesn’t mind that in the bedrooms or bathrooms but not the living or dining area. I’m not even sure I could handle that but it sure looks pretty on your wall. Funny thing is, I’m always looking at a lot of things with floral prints but never seem to buy them. I really don’t know why? Well at least I can see it in other peoples homes.🙃
ReplyDeleteI totally get it, 100%...it's taken me years to get my husband to consider wallpaper at all. He remembers all the times we've had to steam it off of old walls...or paint over it. He wanted nothing to do with it. I eased him into it with a brick pattern, peel and stick version, in the pantry. Then I hit him with the real deal and flowers in the family room. I'm surprised how much he likes it. Then again, his back will be to it while he's watching tv! Haha!! I hope your papering is getting finished...I bet it's lovely!!
DeleteKim I love love love the paper and I cannot wait to see this whole room come together. The seat cushion looks great and I know it will compliment the room. Keeping hope you get the couch soon and you can pull this whole room together. I am excited to see the end results. Happy Sunday. xoxo Kris
ReplyDeleteThanks Kris!! It's all slowly coming along, but I'm so happy with the way it's shaping up. I can't wait for the sofa! xo
DeleteIt will feel like spring in this room every day!!
ReplyDeleteThanks Mary!! My husband calls the garden room now.
DeleteLovely as usual Kim!!!!!! You all did a great job, and that seat cushion is gorgeous! Blessings, J
ReplyDeleteThanks so much, J!! I love that seat cushion so much,too...I won't let anyone sit on it. Yet. 😉
DeleteI absolutely love your paper. It is so pretty! Definitely my style, too. Thanks for all the tips. We only have one wall and our stair risers papered in our home, and I like that you papered the wall with the window in the middle of it. Great job, Kim!!!
ReplyDeleteThanks Ricki!! I really love this patterned paper, it's very charming and even prettier in real life. We're also considering papering the stair risers with it. I'm just craving more of those bold roses!!
DeleteI've never done wallpaper and you make it look so easy, Kim. If I ever decide to hang wallpaper, I'm calling you! It's so pretty and I can't wait to see the room finished.
ReplyDeleteI had a great helper, Ann, that's why it looks so easy. He's got an engineer's brain and thinks about everything. Although, once it was mapped out, it really didn't involve a whole lot more than spray, stick and cut!
DeleteIt is lovely. Well done! I love the design you picked out.. but it is flowers.. so how could I not. Hee Hee!
ReplyDeleteYes!! Hahaha...and it's probably the only garden I could grow!!
DeleteKim it looks beautiful! I actually in the 90's worked at a wallpaper store. People would bring in their blue prints and we would pick out coordinating wallpaper for their whole house. I am so thrilled to see it making a comeback. I enjoy hanging wallpaper...it's not really very difficult once you get the hang of it. The transformation you made is just stunning.
ReplyDeleteWell that sounds like a super fun job!! I remember a shop like that in our town. I would go with my mom and they would pick out the prettiest papers. Our house was always stunning. I also agree that it's not difficult to hang once you get the flow...and thank you!! We really love it.
DeleteThe only thing I've ever wallpapered was melamine kitchen cupboards in our holiday home and that was scary too. Your tips are going to make a big difference next time, Kim. Thanks so much. Pinned, because I know I'm going to need them.
ReplyDeleteThanks Michelle!! Wallpaper is back and in a big way. If you try it again, you have to let me know.
DeleteKim,
ReplyDeleteIt looks fantastic!! I did all the wall paper borders in our house myself and many years ago, I did wall paper one wall in a few rooms in the house back when wall paper was the thing to do...Glad to see that it is coming back as I think it really brightens up a room and adds a bit of dimension to it!! Doing a whole wall is not an easy thing and I do not think I would ever try doing it myself again.....Your room is looking so beautiful!!! Thanks so much for sharing!!
Hugs,
Deb
It is coming back, Deb!! I'm glad too, I've always loved the look and now I have a little bit of it in my own home. Hugs!
DeleteIt looks beautiful, Kim! You guys have the skills! Amazing! I've never hung wallpaper, nor will I, even with your very detailed tutorial, haha! I'm thinking about trying some peel and stick wallpaper, but even that makes me nervous! I'm so behind in blog reading - trying to catch up!
ReplyDeletePeel and stick is so easy, Amy!!! You can do it. I have faith. Honestly, this wasn't much more difficult, it's just a messy job, with all that water and paste. However, I know that this pattern does come in peel and stick. So there's always an easy way out!!
DeleteSorry I’m late to the party. But Kim: GORGEOUS! I can’t wait to dee the new sofa in the room and of course I’m interested to see what you do with the window treatments and remember if the old floral sofa goes to the curb it will need a proper send off. Be well my girl!
ReplyDeleteThanks Susan!! I have to agree, I'm on team gorgeous, too. I just can't get enough of those flowers. Hopefully the sofa is getting there and in the meantime I've been dreaming about window treatments...and if I could do it safely (or legally!!) that sofa would have a Viking funeral in the front yard. Alas, I think I'm going to have to settle for a fabric ripping party instead. You just know I'll be keeping a bunch of it!! xo
DeleteDid you just do the one wall? I love how pretty this paper is!
ReplyDeleteYes, just that one wall...although of course once it was up, I wanted to keep going. I do have plans to use some of it elsewhere though! It really is too pretty for just that one spot.
Delete