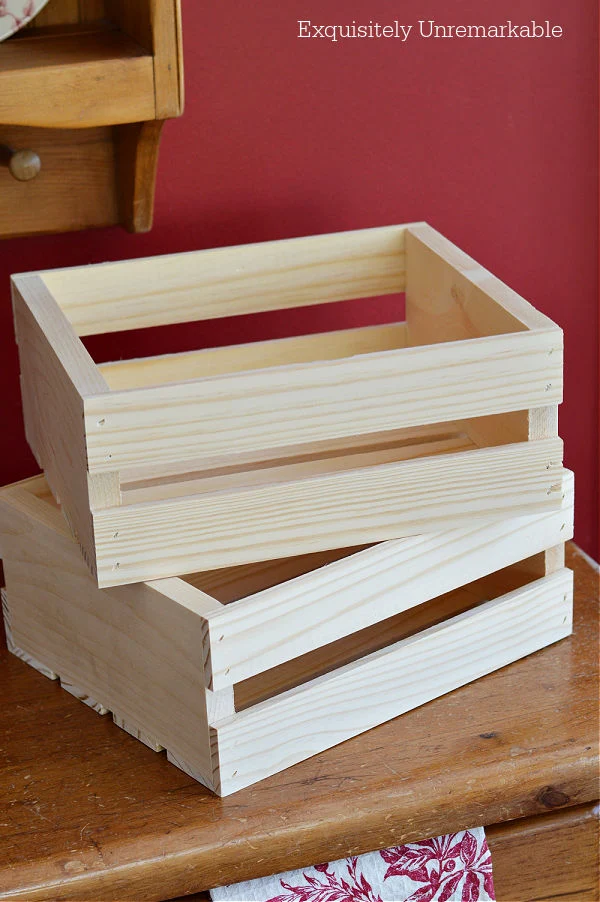
Looking for the easiest way to decorate a small unfinished wooden crate? Why not try a vinyl transfer?
It's the quickest way to get a finished home decor piece and look like a pro. Check out the simple steps.

I absolutely adore living in my tiny cottage home.
It's cozy, full of charm and old world craftsmanship.
It's also very, very small.
Which is fabulous, since I'm not a fan of giant open spaces. I want a house that hugs me.
However, when you're a girl who lives in a tiny home and is also addicted to decor accessories, well, you might have a problem.
As my grandmother used to say, sometimes my eyes are bigger than my stomach.
So how do I balance my love of both?
Very carefully.
I never grab a cart at the store. I think twice about where I'll display and store an item before purchasing it.
 |
| This post is sponsored by Crates And Pallet |
And I choose small decor pieces that are also functional, like these adorable unfinished wooden crates.
They're cottage style cuties, perfect for a creative DIYer, like myself, who enjoys putting their own spin on things.
Which is exactly what I did.
Now, they came in a four pack, and I just couldn't decide on one way to finish them all, so I didn't. I chose a few different techniques.
Years ago, I aged several wooden crates I'd found for free. This time around I was excited to do more.
So over the next two weeks, I'll share them all, like how I decoupaged a wooden crate with napkins and how I used small wooden feet to transform a third.
But today, I want to start with the quickest and easiest way to decorate a small unfinished wooden crate.
And that, my friends, is with paint and a vinyl transfer.
How To Add A Transfer To A Wood Crate
This is the simplest way to take an unfinished wooden crate and turn it into a home decor accessory or organizational tool for your cottagecore or farmhouse style home.Depending on the transfer you use, your crate can also be customized for any holiday or event. I mean how sweet would one of these look as a centerpiece on a rustic wedding or holiday dinner table?
1. Gather Your Supplies
You can use any type of paint you like to cover you crate, but since I don't like a lot of prep, I used chalk paint.Wooden Crates
Chalk Paint
Paint Brushes
Misting Spray Bottle
Plastic Cups
Fine Sanding Block or Paper
Clear Coat in Satin
Farmhouse Transfer
2. Paint The Unfinished Crate
I started by wiping my wood clean to make sure it was free of dust and debris. Then, since I was using chalk paint, I just started painting.No prep necessary.

I did spray a little water on the paint to make it easier to work with, less thick and easier to blend as I went along. First I covered the outside of the crate.
Then I moved on to the inside, making sure I covered every surface and every side of every slat.

The chalk paint covered the wood very well, so I only needed to apply one coat.
3. Cut Out The Transfer
While the crate was drying, I chose my transfer from the sheet and cut out the one I wanted. I made sure to leave a little room around the outside of it, so when I used the rubbing tool, it wouldn't slip off the vinyl and mar the paint.

4. Apply The Transfer To The Wood
Then I peeled away the backing and stuck it onto the painted wooden crate.

I simply used my fingers to press it down to secure it in place.
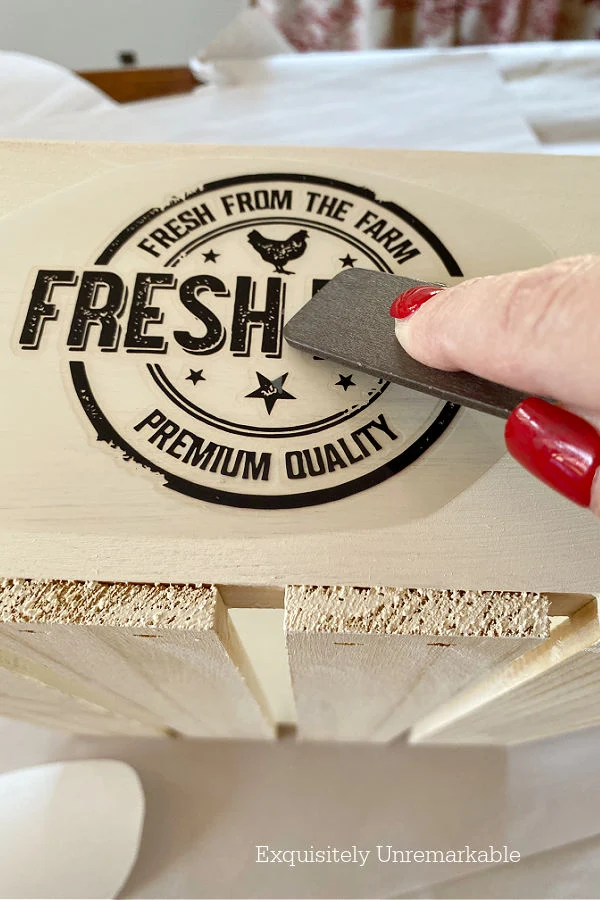
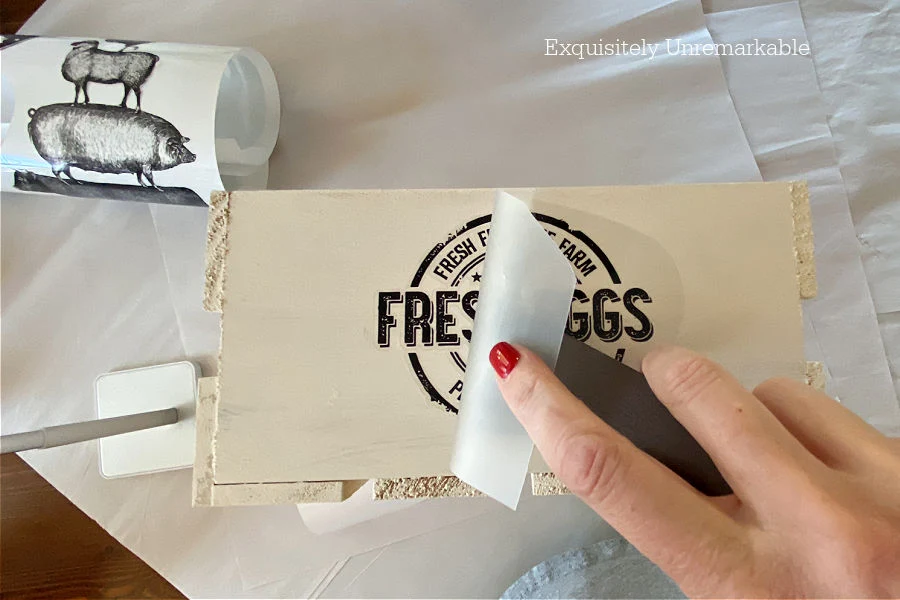
Then I used the enclosed rubbing stick tool to put pressure on the transfer until it released.

Next, I peeled the top vinyl piece away to reveal the transfer pattern.

If there were parts that didn't release immediately, I just put the clear piece back down and rubbed some more until it did.
To blend and remove any of the transfer seams around the edge, I took a small sanding block and rubbed it gently on those spots.

5. Seal The Transfer
When I was done I brushed on a sealer on top of the transfer to lock it it place.
I also gave the entire crate a coat of satin sealer so the finish on the front would match the rest of the piece.
When I was done, about 30 minutes after I started, I had a beautifully decorated crate ready to be displayed in my home to welcome spring.

It was another very simple craft and one that will be generating big smile in this tiny house for a long time.
Day and night.

Whether it's holding real eggs.
Napkin covered faux eggs.
Or the bills.
What would you put inside?


I love this craft, especially for Easter! These would make a great gift "basket" as well or a caddy for an entry table to hold pocket stuffings including phones. It would be easy to feed the charging cords through the slats. So many possibilities!
ReplyDeleteThanks Jeanine!! it was super easy to do and yes, totally multifunctional. Right now it's just sitting pretty, but next week it will be holding the bills...or the phones...or the keys! Like you said, so many possibilities!!
DeleteThis is simple and cute. It would make a great centerpiece or gift basket for Easter goodies.
ReplyDeleteVery creative. Have a great rest of the week and Happy Easter. xoxo Kris
Thanks Kris! I do love simple...and yes! The Easter Bunny has a small stash ready to leave in that little basket crate. Hippity Hoppity!! xxoo
DeleteYou are the queen of transfers! I really like this one!
ReplyDeleteThanks Mari! I'm clearly obsessed!! Haha!!
DeletePretty! I'm always switching baskets and such out around my house and making them work for holding magazines, sewing supplies, organization in the garage, under cabinets, you name it. I'm not really into the whole labeling thing because I move them around as seasons change and as I need them!
ReplyDeleteThank you and I’m the same way, Gina. I’m fickle and move things around, too. I like choices!
DeleteI love your little crate, Kim. I could see it filled with succulents or potted plants. How about filling it with some chocolate and a couple of mini wine bottles for a gift? The possibilities are endless!
ReplyDeleteThanks Ann! I’m excited to use this one for Easter and then repurpose it for storage or fun. Succulents may be the better plant choice for me, since I’m a terrible plant mother. I need ones that are pretty independent! Haha! Happy Easter my friend!
DeleteVery sweet Kim, a lovely gift or centerpiece. Thanks for sharing at Love Your Creativity. Happy Easter.
ReplyDeleteThanks so much, Linda! It would make a sweet gift...I can see it wrapped up with cellophane and a big bow! Happy Easter!
DeleteSo cute and simple Kim. It looks darling with your pretty eggs inside and will make great storage for other little bits when not in use. Happy Easter to you and family..xxoJudy
ReplyDeleteThanks so much, Judy! I'm smitten with this one!
DeleteI oooo'd and ahhhh'd when I saw this cute project on IG! I also think you have the prettiest hands and nails....you would not be my friend if you could see my nails, LOL!
ReplyDeleteYou are too sweet, Ricki! My hands are terrible most of the time...those press on nails do work wonders though!
DeleteIt is lovely. I have a little basket to collect Lolly, Polly, Dolly, Holly and Molly's eggs in, but this crate would be prefect too.
ReplyDeleteI love your eggs.. have you shared a tutorial on those with us?
Oh how sweet their eggs would look all set into this crate!! I did share a tutorial a long time ago. They're pretty but it was honestly kind of a DIY fail!! Haha!!
DeleteI love your wooden crate upcycle, Kim, and how you decorated it for Easter! I especially love how you can have it on display year round and the possibilities for decorating it for each season are endless. Happy Easter!!
ReplyDeleteThanks Marie! I've already got a few plans for this pretty crate for summer!
DeleteYou decorated the cutest crate Kim. You can use this for any occasion and holiday. It would look decorated with items for Memorial Day or the 4th of July. Have fun with your crate Kim.
ReplyDeleteGreat idea, Julie! Here's to summer!!
DeleteKim,
ReplyDeleteThis is just adorable ! Love it!!
Just wanted to stop by to wish you a Happy Easter and thank you for your visit and kind words!!
Hugs,
Deb
Thanks Debbie! I hope you had a fabulous Easter!
DeleteNot sure it would make you smile as much if it were holding the bills, lol! Very cute craft, as usual. Kim. Hope you had a happy Easter!
ReplyDeleteNo...I think you're right, Amy!!
DeleteOoooooo, you just reminded me that I have that exact same transfer somewhere in my craft cupboard somewhere. Thanks for that, Kim. Now I just need to find me or make me a little crate :D
ReplyDeleteOoooo is right, because I know you'll create something even more fabulous than what I made!! Can't wait to see it!
DeleteI love wooden crates' projects, they are great and can be very useful at the same time. Love what you did with yours!
ReplyDeleteAmalia
xo
Thanks Amalia! I agree and feel the same way about crates. It was fun to decorate a few! 🙂
DeleteThis is a really cute idea. I used to do lots of EGGS crafts. lol. Off to see the other crafty crates. xo Diana
ReplyDeleteThank you, Diana! I'm a suburban girl, but I've always dreamed of life on the farm. So far, egg crafts are as close as I've been able to get! xo
Delete