Turn a thrift store clip frame into a home decor treasure to display family photos or place cards on your holiday table.
It's a quick and easy DIY!
 |
| This post is sponsored by Dixie Belle Paint |
Ah spring.
How I love thee...let me count the ways.
Ok, I really don't need to count them, I know the ways.
The warmer weather and the beautiful colors.
There you go one, two.
And frankly, I'm really more about those beautiful pastel colors I see blooming outside my window.
Because, let's face it, in New York, warmer weather is always guaranteed in March or April...or even May.
The colors, however, are. Especially when I take control of the rainbow and add them to my view.
Yesterday's tablescape is a perfect example.

Lots of lovely springtime color there.
Those darling pink dishes, the dainty pink tea cups. The roses.
Oh yes, and my thrift store clip frames.
Don't tell the plates, but I think they're my favorite.
I found those old picture frames for a buck a piece at my local thrift store.

However, I knew that with a fresh coat of paint, and a little embellishment, those thrift store frames would look amazing.
Plus, it would be a fun DIY project to distract me from all the sheetrock dust.
Want to make some of your own? Great, here are the step by step instructions.
Thrift Store Clip Frame Makeover
Now, before we start with the process, you might want to know where can I find these clip frames?
I have to say that lately they seem to be everywhere.
I don't know if they were all the rage a few years ago and the fad has passed or what, but I've seen them at yard sales, my local Goodwill, the Salvation Army store, the Dollar Tree and even in the clearance aisles at the craft store.
Which is great, since if you have a collection of them, you can use repurpose them for a gallery wall, a cohesive photo display or on a table as place card holders or to clasp table numbers at a wedding or similar affair.
Or to make a Christmas button tree.
The possibilities are endless.
Now onto the DIY.
I started by removing the clips from the frames. I wasn't going to paint over them, so they had to come off.
.jpg)
Then I painted it on to each frame, one coat at a time.

First pink, then blue.
When the paint was dry, I gave the frames a second coat.
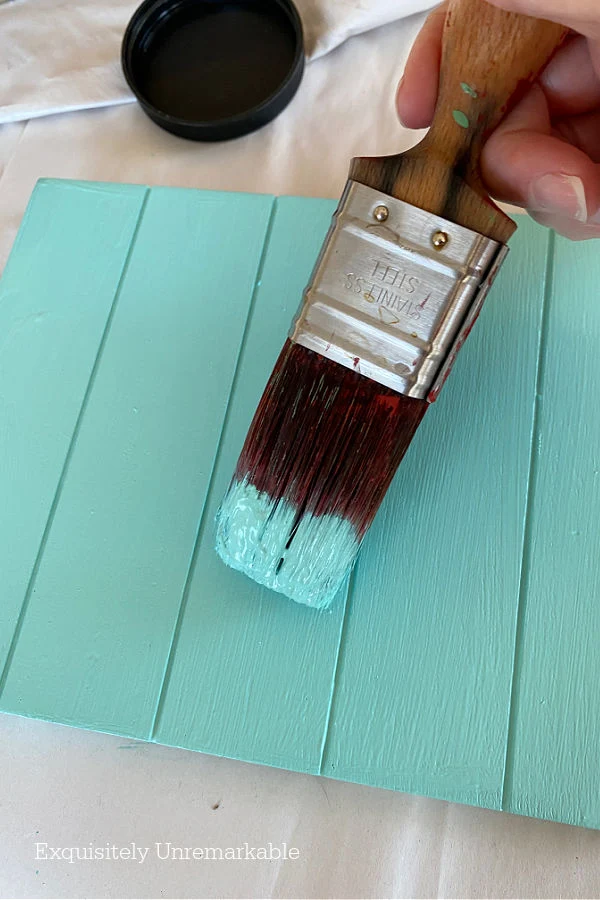
One covered well enough, but the wood was so dry, I decided to go over it again. Just in case.
If I wanted a more rustic look, I could've stuck with the one.
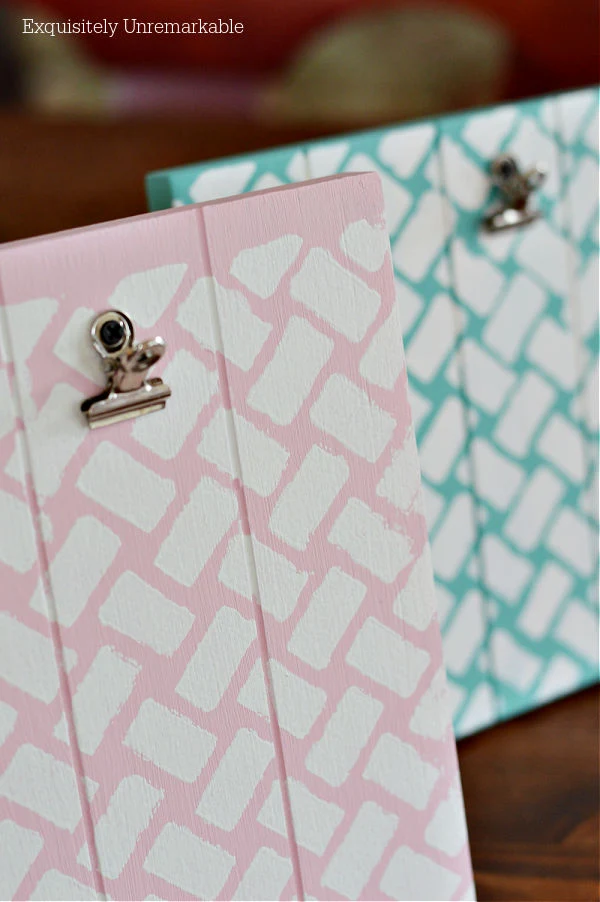
The colors were totally gorgeous and perfect for spring. They looked great on their own, but I thought they'd be a bit more interesting if I added a little something extra.
Like a stencil. Dixie Belle's Basketweave to be exact.
Now, I know I'm always complaining about stencils and I try to avoid them whenever possible, but this one was so cute, I figured it was worth the trouble.
And turns out, it was no trouble at all. I guess sometimes it's all about the supplies.
I just laid the stencil down on the dry chalk paint and positioned it where I wanted it.
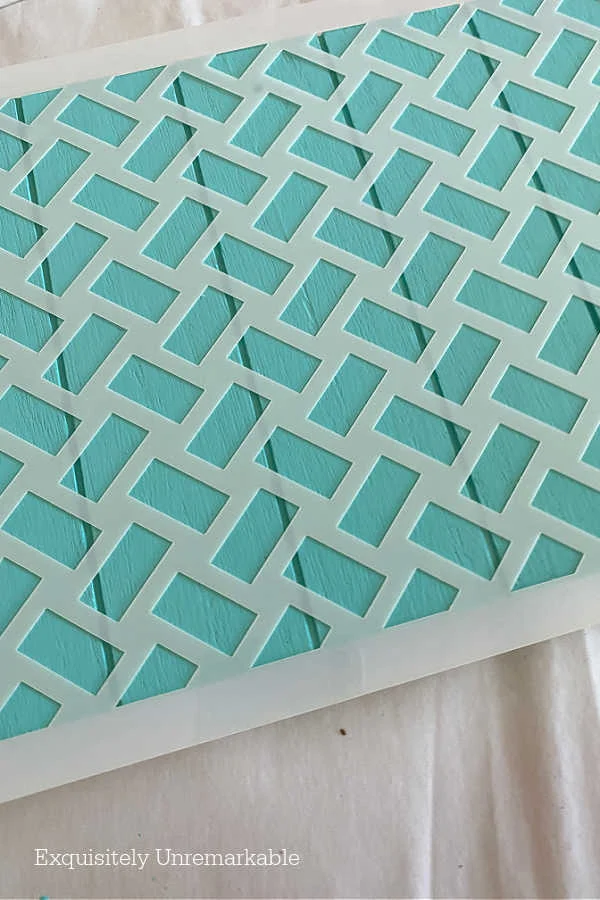
Then I used a small roller kit that I had leftover from testing all our wall paints and was done in a jiffy.
Using a roller to stencil is magic.
The trick is to make sure you have an even amount of paint spread on the roller. You don't want any heavy spots or it will create blobby spots on your project.
It will also bleed underneath the stencil.
Neither of those things is good.
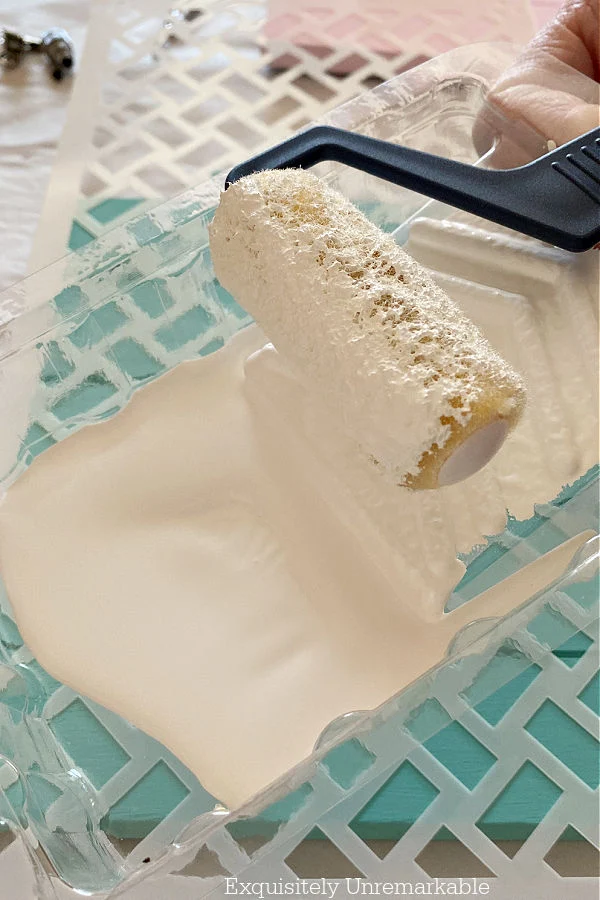
Once I was satisfied with the coverage on my roller, I simply rolled over the stencil until the entire pattern was covered.
Then I carefully lifted the stencil away from the frame and I was done.
Well, with the blue one anyone.
But the pink stenciling went equally as well.
When everything was dry to the touch, I gathered the clips and screws and put them back on the frames.
Ready for me to add photos or name cards or printables to display.
Which I did.
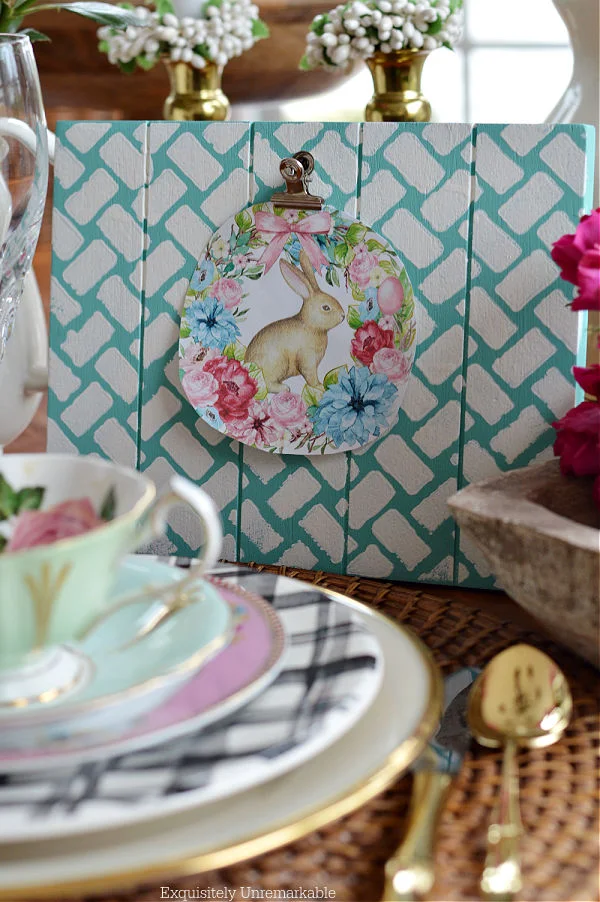
Are you a fan of clip frames?

Hey there friend, before you go, why not pop over and visit my Do It Over Designer gals?
Ann from The Apple Street Cottage hosts a lovely hop every other month and today's the day.
Happy Crafting, Friends!




Those are so cute! I can't believe I'm saying this, but I've never seen a clip frame. Maybe the fad passed us by or I'm living under a rock lol!
ReplyDeleteThanks Sara! Oh gosh, maybe they're just in my area, but I see them all the time. The Dollar Tree has tons of them and tons of styles, too. They're cute for parties!
DeleteWhat a clever makeover! Love the stencil you chose, too! I love a clip frame to hold recipes in the kitchen
ReplyDeleteThanks Patti! Great idea...I'm not a cook, but my daughter has become a huge baker over the last two years. I might have to keep one of these in the kitchen for her.
DeleteI've got a few clip frames in a pile somewhere in the workshop. What a pretty idea for giving them a facelift. I love the colors and the stencil pattern you chose. They definitely would make lovely guest table place cards for a summer wedding!
ReplyDeleteThanks Marie...and I was thinking the same thing. A few more of these peppered around on tables at a spring or summer fling would be very pretty. Thanks for the visit!
DeleteVery creative and quite lovely, Kim! The colors and stencil really sets them apart from the usual styles. I've always called them clip boards, but the ones you found look possibly like a vintage or farmhouse style with the wood slats. Great job in updating them!
ReplyDeleteThanks so much, Gail! I'm not usually a giant fan of stenciling, I don't have the patience, but this one was so easy to use and it really did give them a nice pop!
DeleteThese are just adorable. Love the idea of using a roller to stencil. Super cute Kim. Happy weekend. xoxo Kris
ReplyDeleteThanks Kris! They’re so much more cheerful now. Enjoy the day! xoxo
DeleteYou had me at 'quick and easy' DIY, Kim. I love the colors you chose and that stencil is the best! You've had several suggestions on how to use them, but I think they'd make great gifts.
ReplyDeleteThey would make great gifts, Ann, I think you're right! They could be cute housewarming gifts or a personalized for a baby shower. Oh the possibilities! Thanks for the idea and for hosting another fabulous hop! ❤️
DeleteThose turned out so cute!
ReplyDeleteThanks Penny! They were fun to make.
DeleteCute project Kim, love the chosen colors. Quick and easy is the very best. Happy weekend.
ReplyDeleteThanks Linda! I like the colors, too! They're very bright and a nice distraction from all the renovation tarps! Haha! Happy Weekend!
DeleteLove the colors Kim. Very cute project and for a buck each worth it
ReplyDeleteThanks Cindy, I’m not usually a pastel girl, but this time it just felt right.
DeleteI love this idea! They turned out so cute!
ReplyDeleteThank you so much! It was a quick and easy craft…just the way I like them.
DeleteI love clip frames, and I love what you did with these!
ReplyDeleteThanks Mari!! These were fun to play with for sure.
DeleteThis makeover is just to cute. Thanks for sharing your tips on stenciling with a roller. It is something I have always struggled with.
ReplyDeleteGlad I could inspire, Anita. Stenciling is not always easy for me either, the roller definitely helps!
DeleteWell, isn't that darling? I have never stenciled with a roller -matter of fact, I haven't stenciled anything in ages. I used to do quite a bit of it. Fun post, Kim. Happy Sunday- xo Diana
ReplyDeleteThanks Diana! I used to stencil a lot, too. My first house was covered in vines and roses. I learned about the roller when I stenciled a pillow. It was a great trick and I haven't looked back since. xo
DeleteThese are really cute, Kim. Love the bunny print! xx
ReplyDeleteThanks Nancy!! I borrowed that pretty free print from I Should Be Mopping The Floor. She has such pretty prints. I linked to it in my tea table post, but I should add one here, too. xo
DeleteLOVE it... and as usual you are up to your creative shenanigans. Thank you for sharing your creativity with us... I use many of your ideas. Thank you!! And keep creating and sharing.
ReplyDeletexx oo
Carla
Carla, you always make my day with your sweet, sweet comments. I really wish we lived next door. We could get crafty together!! xo
DeleteKim,
ReplyDeleteWhat a great makeover!! Love it!! So pretty!! Thanks so much for sharing!!
Hugs,
Deb
Hi Debbie!! Thanks so much and thanks for the visit. Now all I need is a pretty Easter tree, like yours, to go with my frames!! Hugs!!
DeleteI like the makeover of that thrift store clip frame and turned it into an Easter decoration. It looks like you have a lot of fun with your crafts and stencils Kim!
ReplyDeleteThank you, Julie, you're so sweet...and yes, I do have a lot of fun with crafts. I find it very relaxing, especially when I don't have to wash out a paint brush. Haha!!
DeleteWhat a pretty makeover. Perfect for your spring decorating. Here in the UK we have a different thing that we call clip frames, I don't know if you have them too? A flat piece of board and a piece of glass with metal clips around the edge to hold them together.
ReplyDeleteI don't have a different name for this kind of frame though, it's a frame with a clip so I guess this is also a clip frame!! Whatever it is called it is lovely :-)
Thanks and that's so funny, because I honestly had to idea what to call these frames! I started with clipboard frames, then I went to clip frames. I'm glad to hear I'm not alone!! Maybe someone else will help us out!
DeleteVery cute makeover, and I love the pretty colors you chose for the project (two of my faves). Perfect for spring!
ReplyDeleteThanks Ricki Jill! I just needed a breath of pastel!!
DeleteCute, as always, Kim. The spring colors are perfect! I like that they can be used for lots of different things, like posting the menu at a dinner party, or displaying a WiFi password for guests. Fun!
ReplyDeleteThanks Amy! I'm ready for spring, this was a good way to fake it since Mother Nature is still sending us some winter vibes. I love your WiFi password idea, genius. I can also picture them in your place with some of your son's fabulous photos displayed without all the fuss.
Delete