Don't toss those old bathroom vanity doors.
Turn them into home decor signs with this quick and easy DIY craft using paint and furniture transfers.
 |
| This post is sponsored by Dixie Belle Paint |
Today I'm taking a little break from our hallway renovation to share my latest craft.
You may remember that earlier this year I made a cottage style sign out of an old cabinet door that I rescued from the trash heap.
Yes, yes, technically I had to remove it from the vanity my neighbors were tossing with my handy dandy screwdriver, but it was so worth it.
It's definitely one of my favorite trash to treasure makeovers.
It was a quick and easy project with such great results, you know I had to try again.
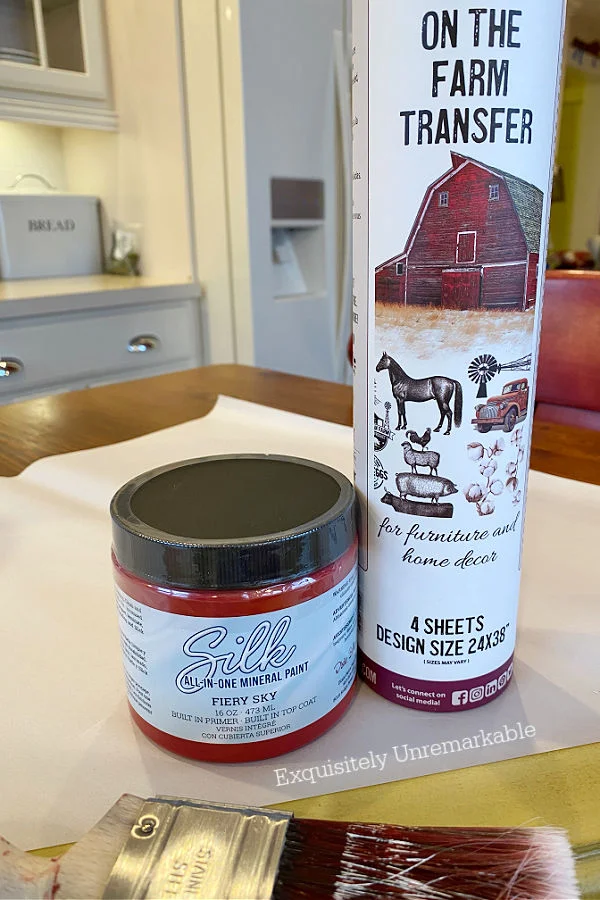
And this time I knew exactly where to start...with Dixie Belle's new Silk All In One Mineral colors. The Desert Colors.
Sounds exotic, doesn't it?
Well, they generously sent me a few of the new rich hues and Fiery Sky caught my attention right away.
I know, I know, no surprise there.

However, instead of another hanging sign, I thought it would be fun to turn this cabinet door into a shelf sitter.
Here's the whole process, if you want to make one for yourself.
How To Make A Shelf Sitting Sign From An Old Cabinet Door
I started by gathering my supplies.
Cabinet door
Wood putty
Sandpaper (or a nail file!)
Dixie Belle Silk Mineral Paint in Fiery Sky
Dixie Belle Transfer On The Farm
Dixie Belle Transfer Vintage Floral
Brushes
Dixie Belle Clear Coat Satin
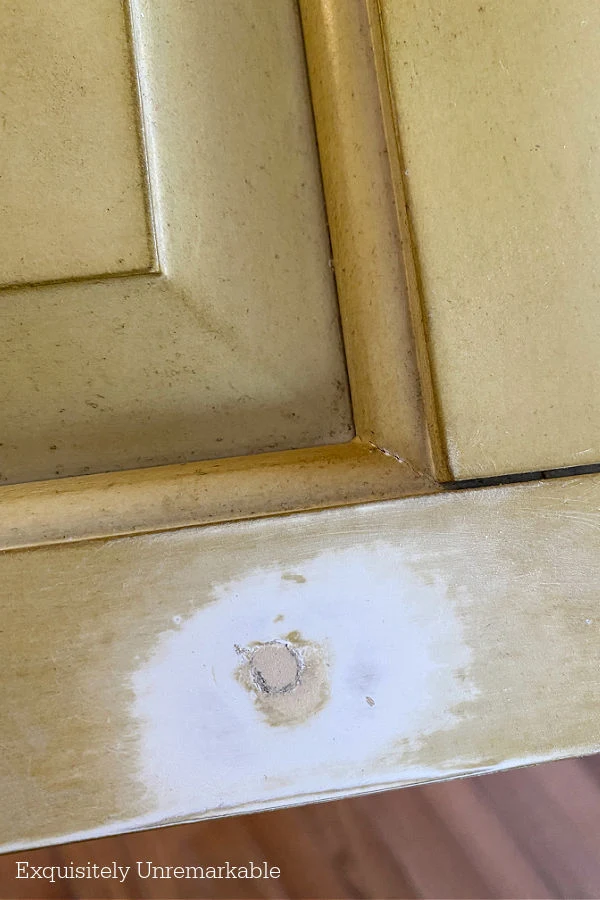
This time around, since I was making a shelf sitter, I needed to get rid of that knob hole.

And when it dried I sanded it until it was smooth.

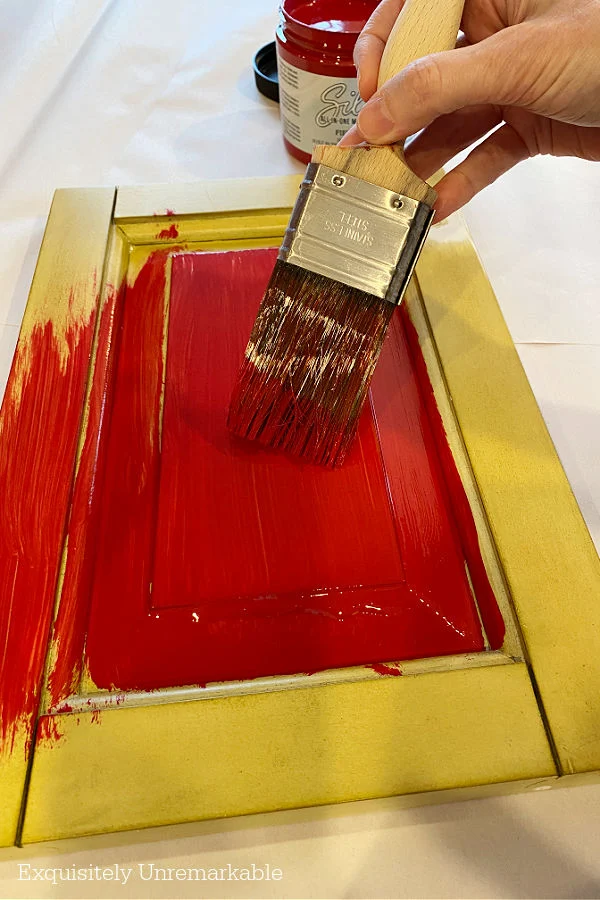
No prep or prime needed with Silk Mineral Paint.

Once it dried, I added a second coat for good measure and a deeper tone.
In between those coats, I stored my brush in a ziploc baggie. No need to wash it out and wait for it to dry before getting back to work.
And I didn't have to mess another brush.

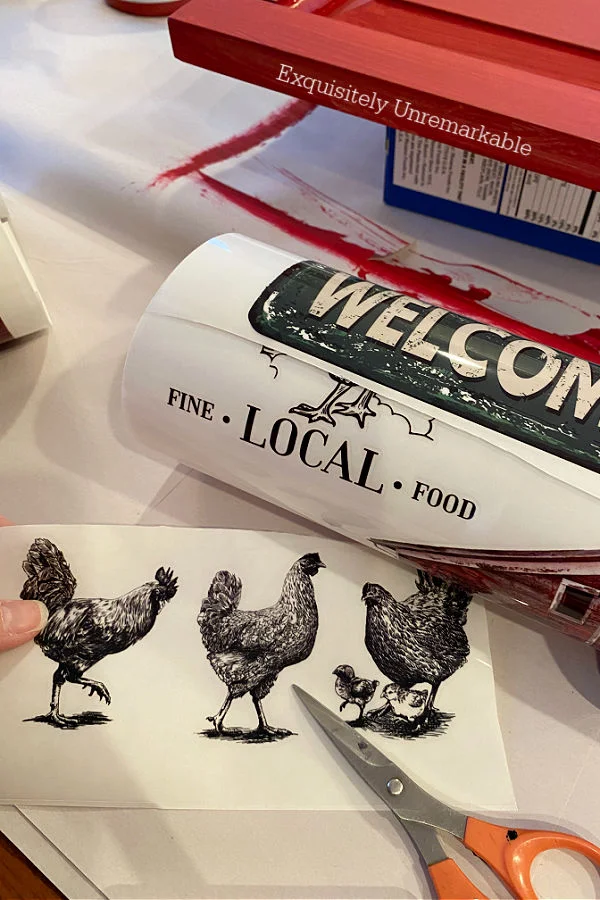
Once that second coat was dry, I whipped out a few chicks from the transfer set and added them to the center block area.

I just cut out those cute little birds, peeled them away from the paper backing, stuck the transfer down on the area I wanted to decorate and rubbed it with the enclosed tool.
Then I simply pulled the top vinyl away as the transfers released. If I noticed they were still sticking a bit, I rubbed a little more until they let go.

The original plan was to stop at hens and chicks, but when I was getting my transfers out of the art cabinet, I spied my Vintage Floral set and decided to layer a bit of foliage and flowers in the corners.
I had a few of them leftover from both my magazine rack makeover and my romantic music page banner.
I just kept picking transfers I thought would add to the "spring on the farm" feel.
When I was satisfied with my design, I grabbed my nail file...don't laugh...and strategically sanded a little bit of paint off that raised center panel for a distressed appearance.
The final step was to coat the entire piece with Clear Coat in Satin.
The Silk paint does not need to be sealed, it's got a built in primer and top coat, but I added it to protect the transfers and lock them in place.

It looks like something I purchased at a cute country shop.
Rather that something I lifted from the curb.

Making me smile.
Of course, now I'm out of doors.
But hopefully not for long.
I do still have that screwdriver.
😉
What do you think about my latest cabinet makeover?


Absolutely love it. Red and chickens, how could you go wrong?
ReplyDeleteThanks Pat! And I totally agree...red and chickens are a winning combo around here!
DeleteLove it Kim The chick's are great with their muted black look.
ReplyDeleteI finished our dining room. table base. Then got sick.
I can't wait to share it. I'm hooked on Dixie Belle products niw.
I can’t wait to see that table, Cindy. I bet it’s gorgeous and please take care and feel better soon.
DeleteI am loving how fast paint dries. ;-) Ha ha!
ReplyDeleteRed + Chickens = Perfect Cottage Charm
Thanks Carla...I totally agree!! Of course it would be nice to have some of the real deal around here!
DeleteKim, the most darling craft project since your last one! Of course, red and chickens are at the top of the page in my book and the old cupboard door makes the perfect backdrop..I love it..Happy Weekend..xxoJudy
ReplyDeleteThank you, Judy! I'm rather smitten with this one myself.
DeleteVery cute, Kim. I'm picturing you taking the doors off your neighbor's vanity and happily carrying them home. So funny. Hey, if you need more cabinet doors and have a Habitat for Humanity near you, be sure to look there. I've purchased doors at their Restore for $2 each. Not quite free, but pretty close. :) Hugs.
ReplyDeleteOh Nancy, it was a sight I'm sure. I don't think we have a Habitat store anywhere around here, but now I'm curious and need to check. Thanks for the tip! Hugs!!
DeleteSo cute! I saved some cabinets doors with a project in mind--you've inspired me to pull them out!
ReplyDeleteI hope you'll share your projects with us and thanks!!
DeleteThis turned out beautifully! And it DOES look like something you would have to BUY at a craft fair or shop! I"m going to circle back and read your older post you link in this one !! Thank you for the inspiration!!
ReplyDeleteThanks so much! I had fun making this one!!
DeleteRed.......mmmmmmmmmmm.........
ReplyDeleteOur Habitat Restore, always has tons of doors......
Beautiful!!
Blessings,
J
J, you're the second person to suggest this.I really must investigate.Thanks!!
DeleteIt turned out so cute! I love the chicks in black.
ReplyDeletePS - I do that trick of putting a paint brush in a zip lock too. And if it's going to be a day or two - you can put a brush or roller in a zip lock in the freezer. Saves cleaning or having to use a new one!
I love this freezer trick, Mari!! You guys are all so smart, I'm definitely going to do that from now on...at least with the red painted covered ones!!
DeleteI love it, Kim! They should name one of their red paints after you! I'm trying to imagine you on the side of the road with a screwdriver, taking off those doors, lol! Is the paint a matte finish, or does the clear coat give it a sheen? Believe it or not, non-DIYer that am, I have actually painted some furniture, and want to do a chair next. but I want it to have a little bit of gloss to it. I'll take a look at the Dixie Belle line.
ReplyDeleteYou are super sweet, Amy...and yes, I would love a paint named after me. Although, Kim would be a boring paint name. It's a boring person name. Maybe Exquisitely Crimson...or I could change my name to Scarlett. It's always been a favorite.
DeleteYour screwdriver comment made me chuckle, Kim. I can just picture you strolling around the neighborhood, tool in hand, waiting for the next cupboard to drop :D Oh and your baggie trick is brilliant. I'm going to have to stock up on those zip lock bags. Love how your farmhouse sign turned out too BTW. It does look like you found it at a crafty stall somewhere.
ReplyDeleteThanks Michelle! In my younger years I tended to wait for the cover of darkness before venturing out to remove doors. My old age has made me brazen!!
DeleteOnce again you've created and made such a pretty sign. I think you should open up an etsy shop Kim!
ReplyDeleteThanks Julie...and I just might have to with all these painted treasures around!!
DeleteLove that red, Kim! I would have never thought to do that...
ReplyDeleteThank you Dalila! It's just the way my crazy brain works...and I've been inspired by others over the years. Lots of talent in this blogging world of ours.
DeleteIt's adorable, Kim. xo Laura
ReplyDeleteThanks Laura!!
DeleteAnother fabulous project. I love your vision for this. I might have to look for some junk around our cottage to transform. 🥰
ReplyDeleteThanks so much, Dena...transforming junk is my superpower! Haha!!
DeleteThree of my favorite things! Red, chickens, and flowers!
ReplyDeleteThanks Deanna! Mine too!
DeleteKim,
ReplyDeleteI absolutely love it!! You know me with red and hens and chickens!!! And if you put that paint brush in the baggie in the freezer, you can use it weeks later!!! I do that all the time....Just let it thaw out and it is ready to go!! Thanks so much for stopping by!!
Hugs,
Debbie
Wow...Debbie, I didn't know about the freezer trick!! I need to try that one. Amazing, thank you!
Delete