Want to make a custom wooden sign without a fancy machine? No problem, you can design your own clear wall decal online with StickerYou in minutes.
Then just peel, press and seal your way to fabulous.
 |
| This post is sponsored by StickerYou. |
Wooden signs are one of my all time favorite decor accessories.
And over the years, I've made a lot of them. I absolutely adore the old world charm they bring to any room.
However, they can be pricey to buy and I don't always love making them.
That's why, whenever possible, I cheat my way to the pretty, by using a vinyl wall decal.
It's literally the easiest way to make a wooden sign.
Unfortunately, I don't have a fancy cutting machine, so my sign designs are always based on what's available in stores.
Which isn't always ideal.
As a matter of fact, sometimes it stinks.
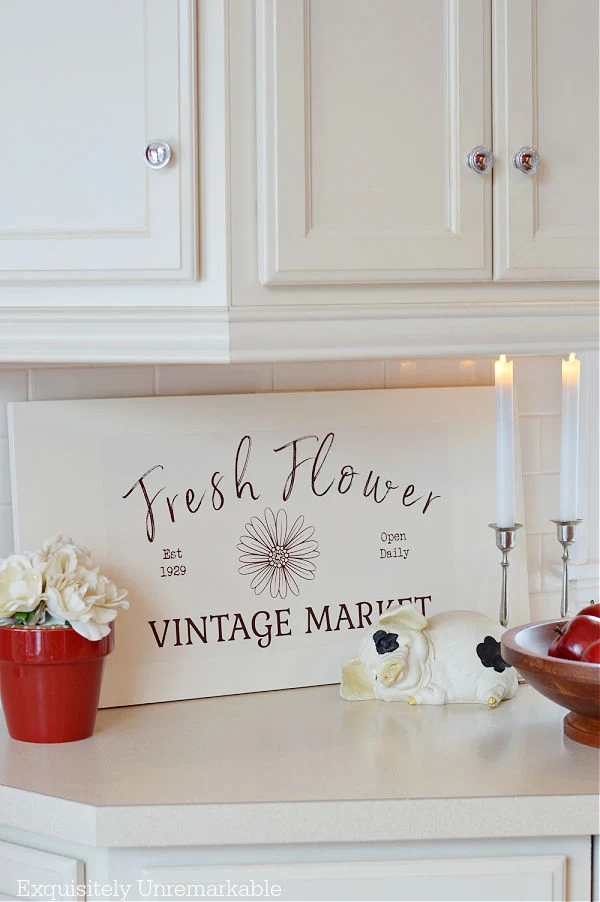
For example, for a really long time I've wanted a Flower Market sign. I had a design in my head that included a simple bloom and the date our home was built.

It wasn't something I was ever going to find pre-made...and estimates to have one made for me were ridiculously expensive.
Besides the fact that I enjoy crafting. So it's a project that's lived only in my mind for years.
Until.
Until I found out that I could design my own clear wall decals at StickerYou.
No fancy machine, no ridiculous price tags and no stenciling or painting. Just peel and press.
Fabulous.
I couldn't wait to get started.
How To Make A Custom Wooden Sign With A Clear Wall Decal
Of course, every sign begins with a vision.
As I said, I've had this design on hand for a long time, so I didn't need to create anything.
However, if you need artwork for your own sign, you can either make it on a site like Canva or PicMonkey or you can go directly to the StickerYou site and design it there.
You can choose from their art and/ or numbers and letters, in a variety of fonts and colors to put together something lovely.
Or if you want to make my exact Fresh Flower Vintage Market Sign you can use my PNG.
With my design nailed down, I was ready to dig into the DIY.
Supplies:
Custom Clear Wall Decal
Wooden Board
Chalk Paint
Satin Sealer
Paint Brushes
Measuring Tape
Step 1: Order Decal
Placing my order was a very simple process. The prompts are easy to follow and if you do need help, there's a chat box that puts you in touch with a live agent.
I just uploaded my file, chose the size I needed, which was based on the board I was going to use. Then I chose the type of decal I wanted - I chose removable, that's important.
Next, I was given the choice of several shapes, including a die cut version, that hugs your design.
I went with a rectangle. It's much easier to center and I like the faint border it provides. Then, I hit checkout and I was done.
Step 2: Paint Your Board
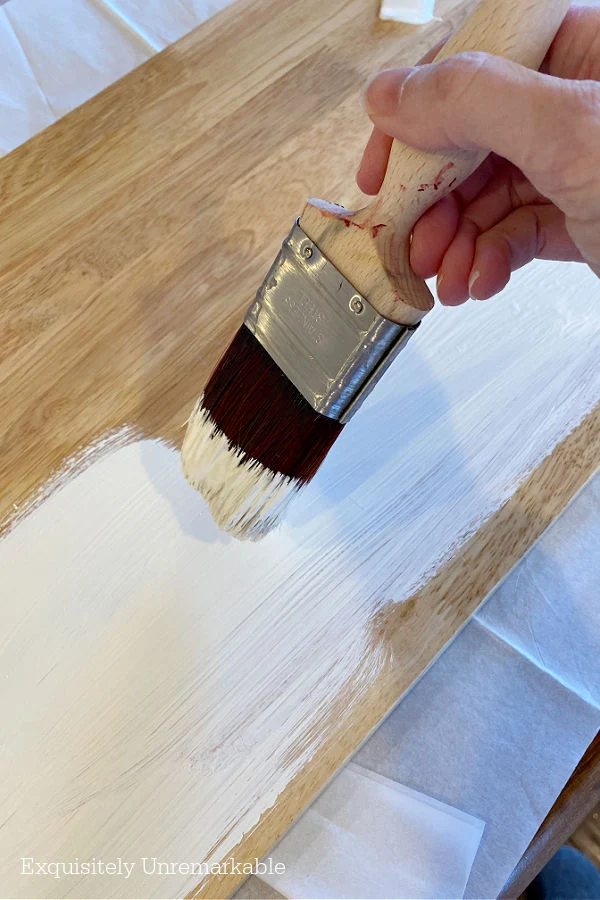
While I waited the few days for my decal to arrive, I decided to paint my board.
You may remember this one, it's from a toolbox. My husband didn't need it, but it was too nice to toss.

I didn't need to prime it, since I used chalk paint for the project. Two coats and it was ready.

Now, right away, I know some of you will say, hey, but it's shiny. And it is. That's ok.

Plus, the shine can be toned down with a matter sealer. But more on that later.
Step 3: Measure
For this part of the project, I measured my clear decal and my wooden sign to determine placement. I drew the faintest pencil lines on the board and then stuck a piece of blue painter's tape on the decal to mark the center.

Step 4: Peel and Press
Then I peeled the decal away from its backing.

I'd like to tell you that I got it right on the first try...but then I'd be lying. Even with all that careful planning, I was off by a smidge.
That's ok, that's where the beauty of a removable wall decal comes in.

You can't do that with a stencil or hand painting or even furniture transfers. It's much, much harder to fix a error with any of those techniques.
That's why making signs with these decals are my go to. Like I said, it's literally peel, press and done.
And I was. I could've stopped right there. I was over the moon with how it turned out.

Way, way better than it looked in my head.
But I wanted it to stay that way. Forever.
Step 5: Seal
So I had to seal it.
It's not really necessary to do that, I would say that about 50% of the time, I don't. Especially if I know I'll want to swap sentiments out for the season.
Another perk of being removable.

If you want less shine, you can use a matte sealer, but I always go with satin. It just has more personality than matte, plus it's easier to dust.

The big dilemma now is where to put my new show-stopping sign.
It's been making the rounds in the kitchen.

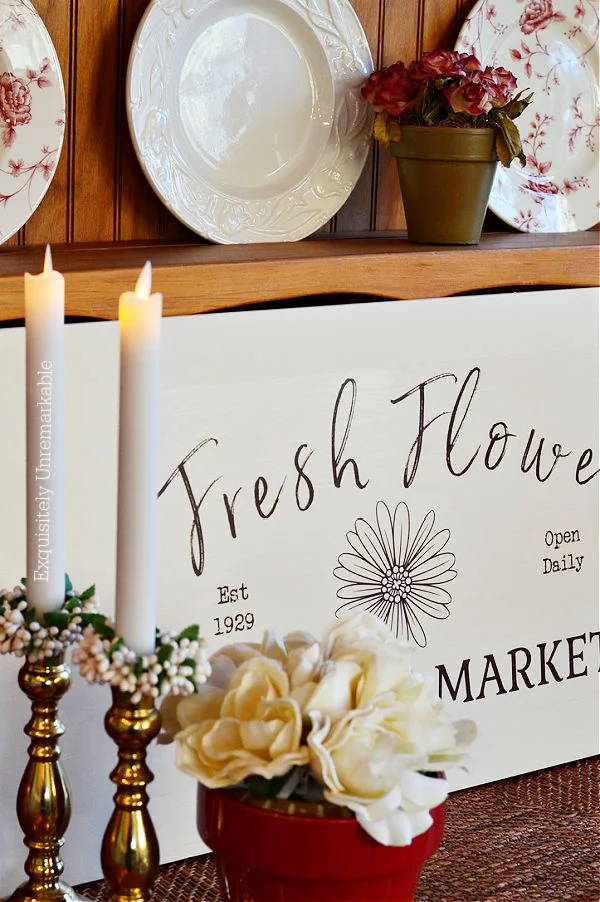
Right now, it's parked on my pine server.
That means I can see those icky outlets on the countertop again, though.
And I can feel the pull to place it in the living room...or my bedroom...or on my covered porch.
Hmmm...I think that means I need another sign.
Or two.
What do you think?


It's so pretty, and like you said, a great way to hide those ugly outlets!
ReplyDeleteThanks so much, Sara! I'm definitely going to need another sign! Haha!
DeleteBeautiful and love the simplicity
ReplyDeleteThanks so much, Cindy! I love this one, too.
DeleteThat looks so good, Kim. I love how fresh it looks. Signs are a great way to get pretty art for not a lot of money (when you do them yourself)..Love it..Happy Valentines Day..xxoJudy
ReplyDeleteThank you, Judy! I agree. I enjoy the process and I love the ability to make my own sentiment. Happy Valentine's Day!! xo
DeleteI love this sign you made Kim. You always come up with the coolest crafts. This sign would look great anywhere in your house. I like the sign on your hutch. :)
ReplyDeleteThank you very much, Julie! I love it on that server, too. There's something about the contrast of the dark wood and that light sign that catches my eye.
DeleteLOVE IT!!! Of course I love the Fresh Flower Vintage Market sign.. I need one. I am excited to see what other signs you create. One for the pool area?
ReplyDeleteThanks Carla!! I can make the flower market sign, I just can't grow the flowers! 😂 I totally think you need one for your Little Garden That Could...and I am thinking about a pool sign. You smart girl, how did you know!!
DeleteVery nice, Kim! I love the design you created. Looks professionally done. Very pretty against the white background.
ReplyDeleteThanks so much, Kim! It was easy to look like a pro with that decal. Simple, simple, simple!
DeleteI love this. So cute. That sweet little pig by the sign is pretty cute too. Have a great evening and wonderful Friday and weekend. xoxo
ReplyDeleteThanks Kris! And I love that pig...Marshalls, years ago. When the kids were little and would get rowdy, I would tell them, shhh, you'll wake the pig. 😉 Worked like a charm. Happy weekend!! xoxo
DeleteLove it
ReplyDeleteThanks for sharing
I want a large sign you know ( you will forever be my always) to fit behind my bed so thankyou again, and again!!!
Debbie, I'm so happy I could inspire you and help you get that dream sign! I wanted this one (and so many others...) for far too long, but didn't want to buy a machine. This way is much simpler and cheaper! Good luck!!
DeleteGreat project Kim, love your sign. It looks right at home in your cozy home.
ReplyDeleteThank you so much, Linda! This one really warms up my kitchen.
DeleteYou can never have too many signs, Kim. Great project - and so easy to make!
ReplyDeleteThanks Ann! I agree, never too many signs, especially when they're this easy to make.
DeleteI think its very fresh and simple and sweet. Also, I think I love those candles!
ReplyDeleteThank you, Gina! You just made my day, that's just what I was going for...and I love those candles, too. Automatic on and off. So easy.
DeleteWow! I absolutely love your sign. It's really timeless beauty! I have bookmarked that site. Looks like there is so much you can do from it!
ReplyDeleteKim I really like this project, thinking about making a "fresh eggs" sign on a pine board to hang in my kitchen. Beth
ReplyDeleteOh Beth, that sounds amazing!! Super charming. I hope you'll share if you make it!
DeleteJust like scatter cushions, a woman can never have too many signs so you're going to have to make more and I'm going to have to check out StickerYou link you shared. I soooo hope they ship to deepest darkest Africa.
ReplyDeleteTotally agree, you can never have too many of either! And deepest darkest Africa sounds very exotic...lucky you!!
DeleteI love what you created, Kim. It's great that it hides an outlet.
ReplyDeleteThanks so much, Paula! It was such an easy project.
DeleteLove the simplicity! What a great idea to hide things we don't like on the counter.
ReplyDeleteThank you so much! I really love the fact that it covers the outlets. That was a lucky coincidence!
DeleteSimple and elegant. Just the right tone and what you really wanted. Nothing better than hitting all the right buttons.
ReplyDeleteI believe I see more signs in your future. FYI I popped over to check out your new bedding...Love It!
Happy Valentine's Day!
Happy Renovating!
(my favorite pastime)
Have a wonderful weekend!
Thank you so very much!! It really worked out well and yes, I'll definitely be making more signs with these decals. It's very easy to get exactly what you want! And thanks for the lovely Valentine wishes, I wish you the same! 🥰
DeleteKim,
ReplyDeleteI LOVE it!! And of course, I love the sweet red pot to the side of where you have it displayed!! I have a sign that Joe bought 2 of on Clearance last year after Easter in Big Lot's for 90% off...It has such good bones to it and I want to paint out the middle where the Easter lettering and graphics are as I have another sign just like it....This gave me an idea....Now I have to decide do I want it for a Holiday, a Season or something like you did....Decisions, decisions....Thanks for sharing!!!
Hugs,
Deb
Thanks Deb! I got that pot at Ocean State Job Lot for like $2 and I dropped some old faux flowers inside. Your Big Lot's score sounds great. I can't wait to see what you make from it! I'm sure I'll see it pop up one of these holidays in your fabulous home!! Hugs!!
DeleteKim, I have never heard of sticker you! My mind is going a mile of minute thinking of the ways I can use this. Your sign turned out beautifully, and I would love it if you would share this post at my Friday with Friends link party: https://myhubbardhome.com/friday-with-friends-58-sweet-valentine-ideas/
ReplyDeleteMany thanks :)
Rachelle
Thanks for the invite, Rachelle! I certainly will...and yes, so many, many ideas!
DeleteIt came out great, Kim! I think you do need to make some more.
ReplyDeleteHere I am, Ms. Crafty (NOT!) heading over to check out Sticker You. You're determined to make me into a DIYer, aren't you?
I think you have to heart of a creative, Amy...I've seen your photos!! Hope Florida is treating you well!!
DeleteWhat a wonderful project, Kim! It is simply beautiful! Pinned!
ReplyDeletePlease consider sharing at the Tuesday Turn About link party.
Thanks so much for the invitation! I will surely take a peek!
DeleteI've never heard of this but sounds like the perfect way to make a custom sign. I have a stash of cabinet doors so now maybe I need a sign.
ReplyDeleteIt was so easy, Rosemary and so much fun to make my own graphic. I highly recommend it!
DeleteCongratulations, Kim, I'm featuring you at the next Friday with Friends link party!
ReplyDeleteThank you for adding to the fun :)
Rachelle
Thank you so much Rachelle! It was lovely to see my feature in your post.
DeleteHi Kim! Love your decal design and pretty sign and I'll be featuring it tomorrow on my blog for Feature Friday! Blessings, Cecilia @My Thrift Store Addiction
ReplyDeleteThanks so much, Cecilia! I'm so excited!!
DeletePeel and stick decals?? That's brilliant! You definately need to make more! Thanks for sharing this on Tuesday Turn About!
ReplyDeleteThanks for coming to take a peek, Cindy!
DeleteWhat a lovely sign you created, Kim! Thank you for sharing this Fresh Flowers Wooden Sign tutorial at Tuesday Turn About. I'm delighted to be featuring you at tomorrow's party! Hope to see you each week! Pinned!
ReplyDeleteOh my goodness, thank you so much Julie! I'm honored!!
Delete