Looking for a curtain rod without a center support? Hate that ugly bracket it the middle of your long curtain rods?
Well, I have a quick and easy way to hide that center support so all you see is your pretty decor instead.

They always say that when it comes to decorating, the devil, or I prefer the word magic, is in the details.
A sentiment I agree with 100%.
And one that became glaringly obvious when I replaced the curtains in my kitchen.
The long metal curtain rods became much more exposed.
Right along with the dark center support brackets mounted on the window frame.
Yes, I understand that they're necessary to support the weight of the fabric on a large window.
However, they interrupt the eye and take away from the view.
So while I adored the new panels and the more formal look in the nook, I hated the fact that those metal supports were taking center stage.
Definitely devil.

You see for years, I had valances on those windows.
The brackets were hidden from view by ring clipped roosters, delicate linen pleats.
Or, by my most recent cottage style obsession, pom poms.
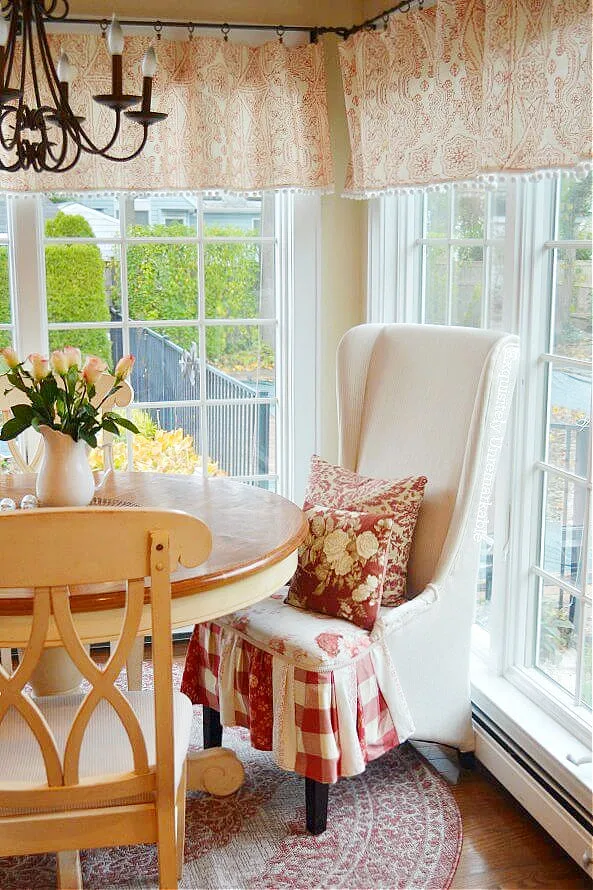
However, when I decided to go for a big girl change last fall and replace the valances with panels, those center brackets had nowhere to hide.
And suddenly, that's all I could see.
I would sit at my kitchen desk and stare at them thinking, Well that's no good.
Should I replace the rods with white ones? Or spray paint them to match the mouldings?
And if I did decide to swap them out, what kind of ring clips would I get? White, to match the new rods? Mmmm...no.
I already had that look in the living room and while I loved it in there, it just didn't seem to fit in here.
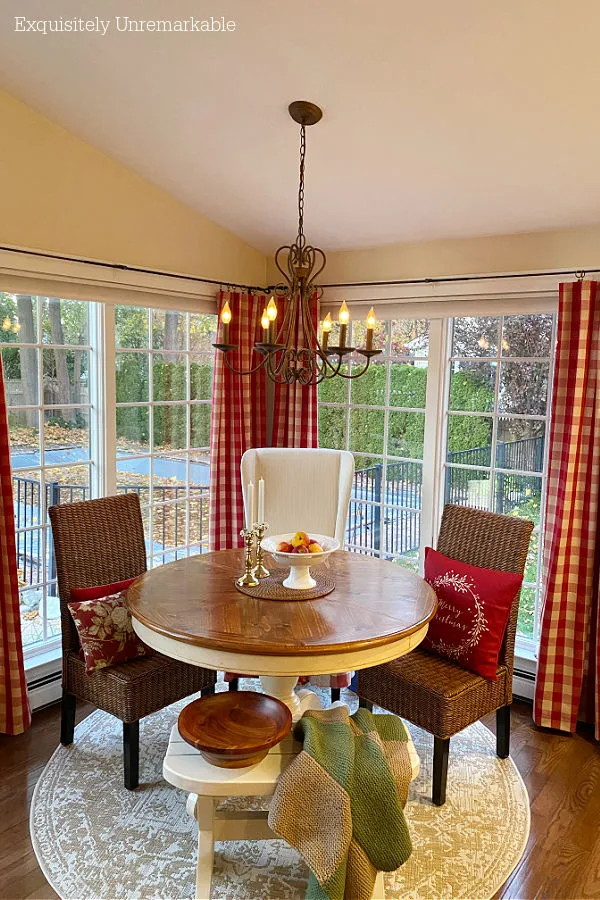
That corner is the transition area that balances the bright red floor to ceiling wall across from it and the light cabinets next to it.
Those dark tones were essential. Besides, they matched the dark metal chandelier so well.
And I really didn't want to spend any money on new hardware when I actually liked what I had.
But those center brackets bugged me to no end.
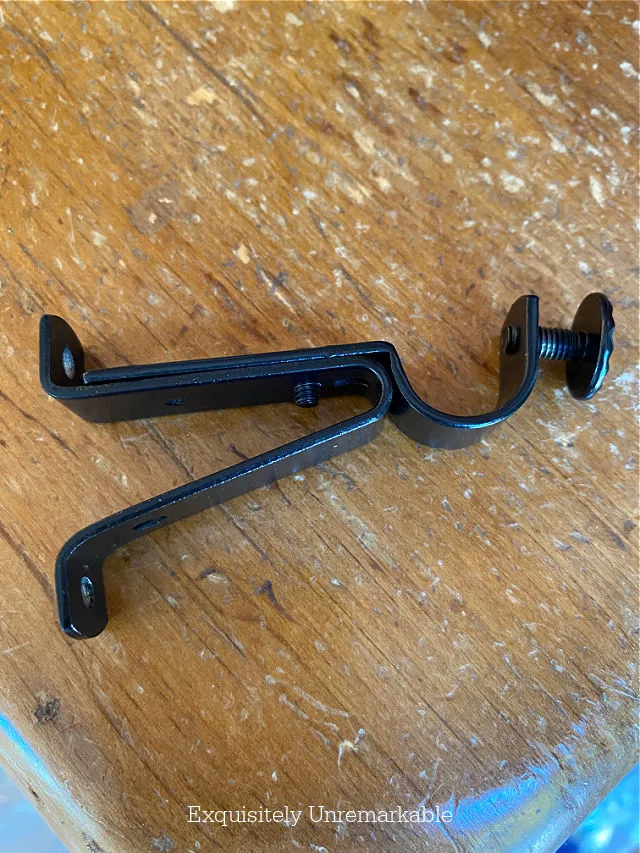
So I decided that my only option was to remove them and paint them.
Of course, once I really thought about it, I realized that wasn't going to work either.
I mean that hook on the end of the bracket supports the rod and if it were white, it would look terrible cradling that bronze pole. It would interrupt the eye worse than the brown metal screwed into the wood.
Nope. Not gonna work.
Finally, it dawned on me that I only needed to paint the part of the support that bothered me. The part that rested on the white wooden moulding.
So, I got to work.
How Do You Hide The Center Bracket On A Curtain Rod?
This was one of my quickest and easiest DIYs to date. It literally took two steps to solve my problem.The rod was still strong, but now I had a very long curtain rod with an invisible center support bracket. Here's my two step solution.
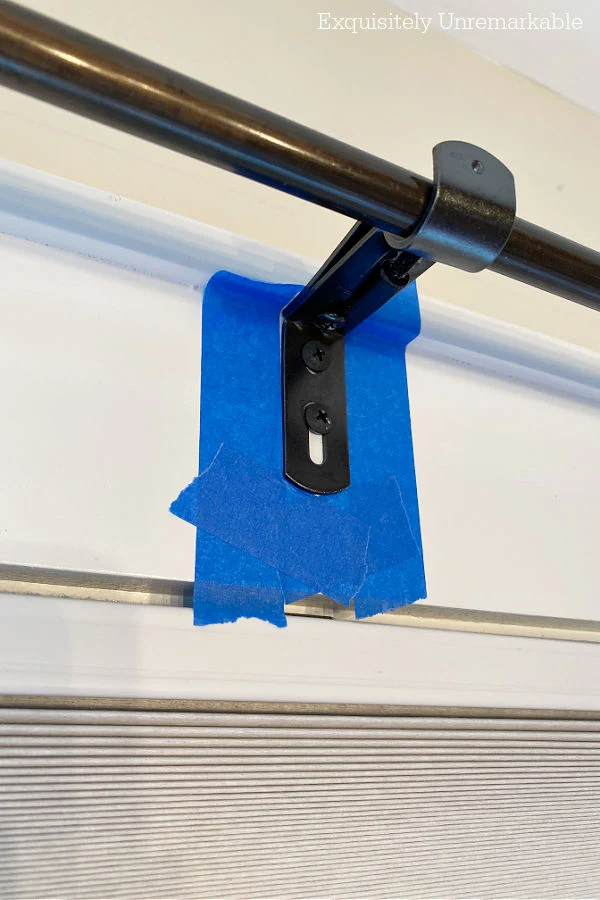
1. First, I taped off the area I needed to paint.
White paints are not all the same, and I didn't want to get any of my new paint on the old and create a bigger painting job. No thank you. |
| SEE THE TAPE HERE |
Taping is much easier.
I just used plain old blue painter's tape for the job.
2. Next up, I opened my paint and started applying it with a flat brush.
Ok, so here's the real trick to this super quick DIY. It's all about the kind of paint I used.When it comes to covering metal, spray paint is best. I used it to change the color of the curtain brackets on my DIY bay window rod.
However, I wasn't removing these brackets and I certainly wasn't going to spray anything in my house.
I also knew that craft paint wasn't going to cover or hold up well.
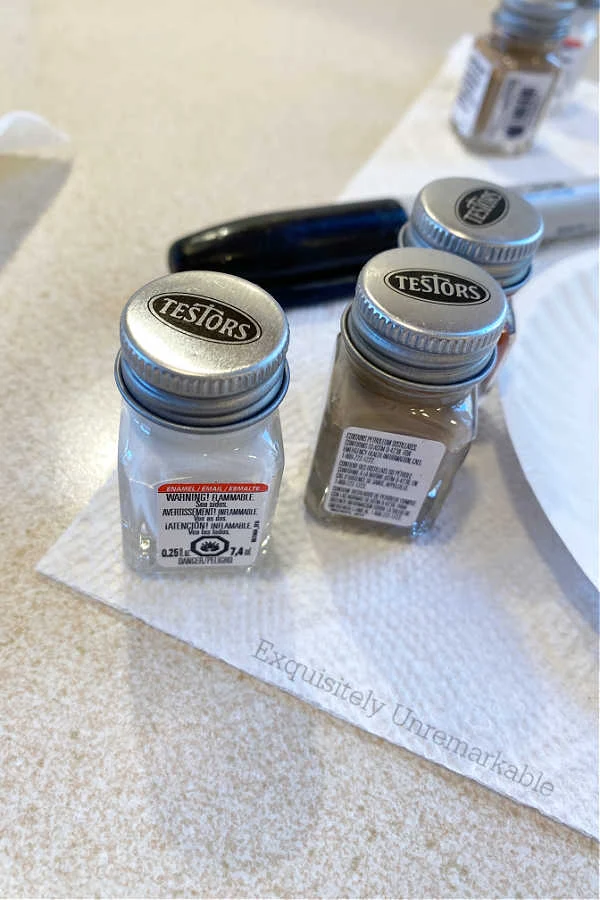
Instead, I reached for my favorite crafty enamel paint.
The one I used to repair my laminate countertop and to cover the screws on my metal shelves.
 |
| SEE THE ENAMEL PAINT HERE |
Which, by the way, both still look fabulous.
That paint is made for model painting, metal and plastic, so I was confident that it would work well.
And it did.
Two coats later and my new, new curtains, fuller ones I made to replace the red check panels I moved into the living room, were all I could see.

My view improved dramatically, for free.
(psst...and now it's been improved again with the addition of red pom poms!)
I guess sometimes the magic is in the details.
Even the ones that are no longer there.
Wouldn't you say?

🪄
Before you go I wanted to share some exciting news.
It's been a big January for this little blog. I've been added to a list of the Top 100 DIY Home Decor Blogs. So exciting!
I was also named a Top Blogger by All Free Holiday Crafts on their Top 50 Crafts Of 2022 list. Again, super exciting news!
Lastly, I was able to share some exciting news with Jenny Y. and Tracey A. - they each won a pillow cover in the winter giveaway!
Thanks to all who entered and keep your eyes peeled for the next giveaway coming up soon!
And if you'd like to continue your tour of the kitchen you can peek here...
Happy Painting, Friends!


You so very much deserve to be on every top list..love your realistic ideas and love everytime I see pics of your home.
ReplyDeleteYou have just made my day!! Thank you so very much for those super kind words.
DeleteYour draperies look amazing! Congratulations on your being named top blogger. That’s awesome.
ReplyDeleteThank you so much!
DeleteKim you certainly deserve that top honor with how crafty you are. This is a super idea to hide those brackets. Congrats to the pillow cover winners. Happy Tuesday. xoxo
ReplyDeleteThank you, Kris! I'm much happier with my view now!
DeleteYou're so awesomely creative, Kim, you totally deserve to be on those lists!! Great idea, love how it turned out! You made me have to go see if my center supports were bugging me but they are above the window a few inches so it's all good!
ReplyDeleteThanks SO much, Debbie. The curtain brackets were a really quick fix...which is good, because they had to go!! Haha!
DeleteCongrats on your blogger award Kim! I love the way you hid the brackets with white paint. The kitchen looks amazing with all of your pretty curtains!
ReplyDeleteThank you so much, Julie. I'm glad all I can see is curtains now, too!
DeleteThat little bit of paint made such a difference in the look of your curtains and rod. Congrats on the honors, Kim - well-deserved!
ReplyDeleteThanks much, Ann! A little bit of paint really is magic!
DeleteWell, that turned out wonderful! Congrats on your awards.
ReplyDeleteThank you, Penny!!
DeleteWoohoo! Congratulations - I'm so happy for you. This is one of my favorite decorating blogs. I love your ideas and the feel of your blog. You are like a neighbor and friend and not some snooty designer!
ReplyDeleteYour paint job makes a huge difference!
Thank you so much, Mari! You just made my day with your sweet, sweet comment. 🥰
DeleteCONGRATS on your exciting news. I know you have worked hard to earn it. I love pompoms!!!! That and fringe just rock my boat:) Thought of you recently. I was cleaning out a room in our church that used to house sewing supplies for a program some of our older ladies had. There was a bolt with some left over red gingham upholstery/curtain type material. I grabbed it!!! Don't know what I will ever do with it but just in case:) I do love gingham, especially red!!!
ReplyDeleteThank you so much, Cheri! Oh and what a find...I know you'll do something really fantastic with it. I hope when you do, you'll share!!
DeleteCONGRATULATIONS !!! You are full of fantastic "down to earth" ideas! That is what I love about you.. and your honesty.
ReplyDeleteAnd this is another fantastic idea.
Thank you so much, Carla!! Your comment is making me blush...☺️
DeleteCongratulations! You are a clever and down to earth DIYer! This is an example of your cleverness. Simple, easy but it makes a huge difference!
ReplyDeleteThank you so much, Deanna! That's very sweet of you to say. I love easy and quick and try to share things that I feel will help others.
DeleteCongratulations! You deserve to be on a top written blog list too my friend. What a clever idea - poof - disappeared!
ReplyDeletePoof!! I love when things work out that way.
DeleteWell! First off congratulations for the two honors. I can't say I am surprised. You are one of the most creative people I know and I always love your crafts and the way you share your home with all of us.
ReplyDeleteAND- what a clever idea to 'paint out' the part of the bracket that is on the trim. Perfect fix.
Have a wonderful night, Kim. xo Diana
Thank you, Diana. You just made my day! I'm glad you think I'm creative. Sometimes I just think I'm crazy...Haha!! xo
DeleteWhat a clever idea! Our old curtain rod in the living room had one of those center supports, but our "newer" one does not.
ReplyDeleteCongrats on your awards!
Thanks Melanie! I haven't seen a longer rod without a center bracket. Good to know! Thanks so much for sharing!
DeleteWell deserved recognition, Kim! That's something to be proud of!
ReplyDeleteI totally understand that when something bugs you, it's all you can focus on. But you did work your magic, and solve the problem! Looks great!
Thanks so much, Amy! I'm so glad they're gone from my view now.
DeleteThis is so genius! I absolutely love how you solved such a simple but super annoying problem!! Plus, I love all of your curtain options that you've used throughout the years! So pretty!
ReplyDeleteThanks so much, Stephanie!! I'm kind of a fabric junkie!!
DeleteCongratualtions Kim!! That is amazing news and I am sure it thrilled you to pieces x2!! BTW, the center support fix is brilliant!! Pinning 😊
ReplyDeleteThank you so much, Cindy!! What a sweet comment!! 🥰
DeleteKim, it is amazing how such a little object can mess with the total look but it is true. I didn't notice it too much at first as all my attention was taken by those beautiful curtains, but then I couldn't stop seeing it. Such a simple fix and it made all the difference. I just love all that you have done in your beautiful and cozy kitchen..Happy February, my friend..xxoJudy
ReplyDeleteP.S. I forgot to mention how proud I am of you for the prestigious awards. You are so deserving!!! xxoJudy
ReplyDeleteThanks so much, Judy!! I'm so glad those brackets are "gone" now. They were really distracting. I know that it's a silly issue, but it's one I could fix, when I feel like so many things lately cannot. And thank you for your sweet words, you just made my day. xxoo
DeleteAren’t you clever??!! Now you’re not bugged any more! Great job, Kim!
ReplyDeleteThank you, Kitty! It was a silly thing to obsess over, but sitting at my desk each day, staring at it was becoming an issue. Haha! I'm glad they're gone.
DeleteKim,
ReplyDeleteAmazing!! How a simple application of paint cold change so much!! Genius!! And Congrats to you!! Accolades that you truly deserve, my friend!!! I truly enjoyed this post and got a kick out of your commentary!!
Stay safe, healthy and happy!!
Hugs,
Debbie
Thanks so much, Debbie!! You made my day saying you got a kick out of my commentary. Making people giggle is my main goal! Hugs!
DeleteBravo Kim! I love how you fixed your eye sore! And congratulations on your big month in January! How exciting and I am very happy for you!
ReplyDeleteThank you so much! I'm so happy that tiny metal piece is gone...makes all the difference.
DeleteFirst thing on my to do list today! Great to know others have the same OCD. This has bugged me since I put mine up in my new home. Thanks!!!!
ReplyDeleteMy pleasure! That middle bracket irked me, too. You are definitely not alone!
DeleteQuick question. Did you paint the u desire of the bracket that sticks out. Or just the part attached to the wall? Thanks!
ReplyDeleteHi Karen, I just painted the part that attached to wall so it blended in with the white paint. I left the rest unpainted. I hope that helps!
DeleteHi Karen, What an awesome fix in covering up the center black bracket. I am looking to do some updating with our living room bay window which is large. Still looking for ideas. Thanks for sharing yours!
ReplyDeleteSo glad you found this DIY quick fix helpful! I hope you find some other great ideas for your bay window. I have one in our family room and I'm always looking for inspiration, too!
DeleteThis is GENIUS! Thank You!
ReplyDeleteThank you! I'm all about simple fixes. Hope it helps!
DeleteI'm getting out the paint immediately. How clever!
ReplyDeleteThank you! I hope it works out well.
DeleteYou should never mount your rods in the trim. They should have gone 6 inches above. But like the bracket cover up
ReplyDeleteI’m glad you like the rod fix. I hope it works for you! Ordinarily I would agree with you, curtain rods, generally look better hung above the window trim- although I would never say never when it comes to decorating since I do not believe in decorating rules. We mounted these rods to the trim since our home is over 100 years old and the walls crumble like Swiss cheese when drilled into so we opted to put the rods in the trim where they would be stable.
Delete